Summary

Learn to set up your Site Gateway as a Camera Server. This article is a supplement to the Site Gateway Install Guide: Site Gateway Install Guide

Hardware Setup

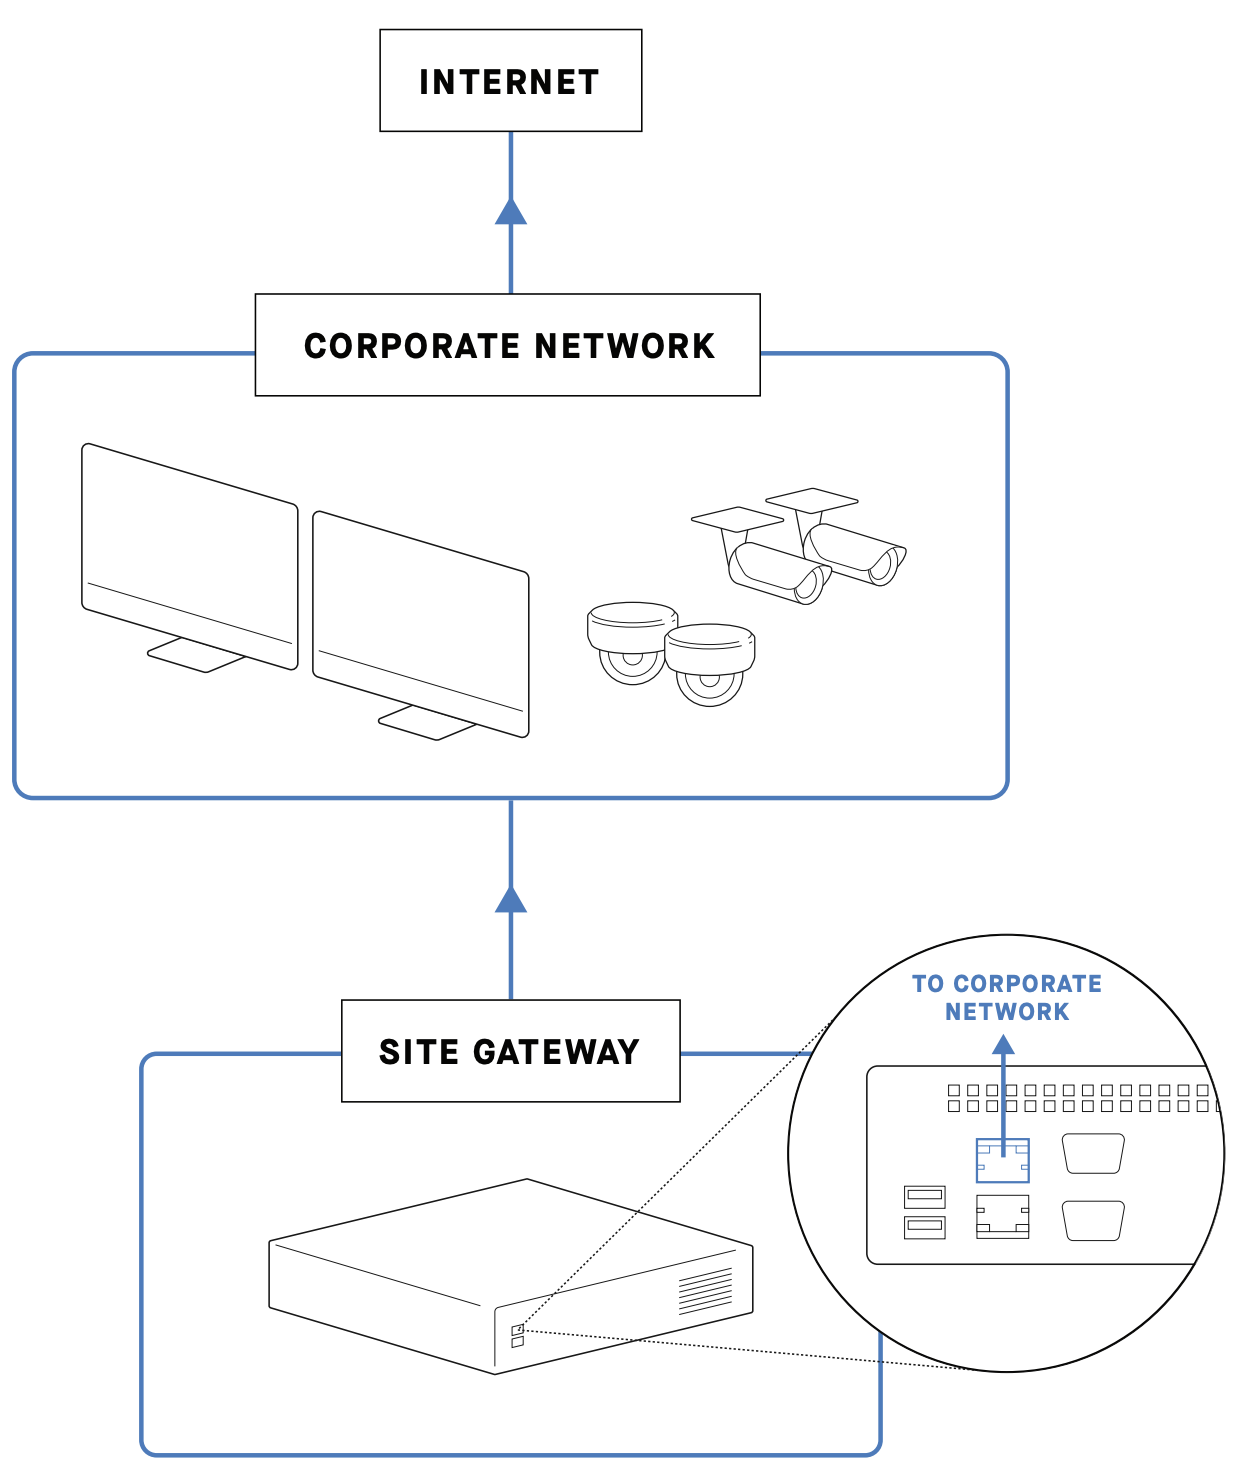
  1. Using the provided Ethernet cable, plug the Site Gateway Top Port in to your network switch. 
    For Cloud access you must configure outbound traffic to use port 443 (TLS).

  2. Power the Site Gateway by flipping the Power Switch to on.

Cloud Setup

  1. If you are a new user, create an account: Login and Access the Samsara Cloud

  2. Now, set up your Organization's Dashboard: Set up Account Settings of the Cloud Organization

  3. Your Site Gateway may already be activated on your dashboard. If not, Activate it: Activate your Samsara Site Devices

Configure Site Gateway Settings

Now, go to Configure Site Gateway Settings:

Cloud_Setup_1.gif
  1. Navigate to Settings > Gateways.

  2. Search for your Site Gateway and select Settings in the right menu.

  3. Rename your Site Gateway (for more information, see Activate your Samsara Site Devices).

  4. Configure the standalone port IP address type. The default is DHCP but you can set up Static IP address (see Configure Site Gateway to Static IP).

  5. Set the Bottom Port to Operate as Camera Server.

  6. Hit Save.

  7. You can now add cameras in the Dashboard. To learn how how to do this, go to

    1. Adding Samsara IP Camera: Add Samsara IP Camera to the Dashboard

    2. Adding 3rd Party IP Camera: Add 3rd Party IP Camera to the Dashboard