Configure Site Gateway to Static IP
Summary
By default, our Site Gateway comes configured to auto-discover on your network using DHCP. If you don’t have a DHCP Server, you need to configure Site Gateway to Static IP.
You can configure the Site Gateway to be Static on the Internet network as well as any local network where cameras are located.
To start, refer to our Site Gateway Install Guide: Site Gateway Install Guide
From your Cloud Dashboard, navigate to Settings > Gateways.
Search for your Site Gateway. You can quickly filter in the search using SG1.
Select the gateway setting by clicking the 3 dots on the right and choosing Settings.
Connect to Internet Network with Static IP
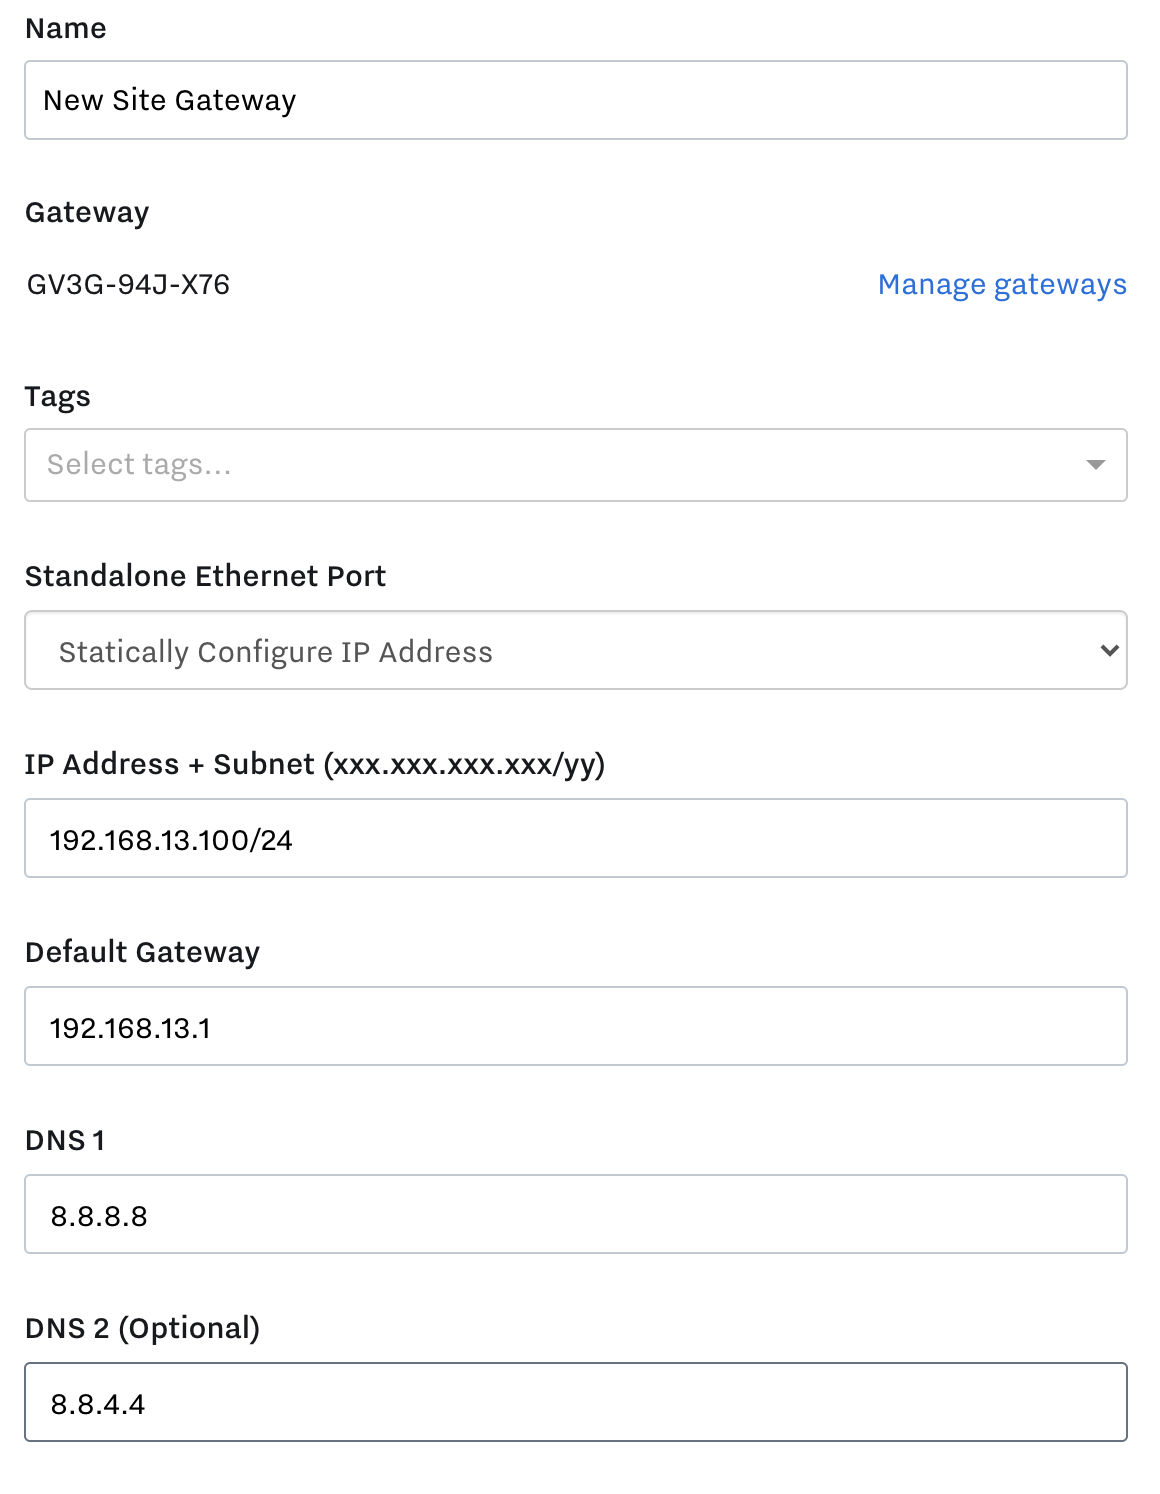
Under the Standalone Ethernet Port drop-down, choose Statically Configure IP Address. We require the Classless Inter-Domain Routing (CIDR) notation for the Subnet shown above as /yy.
The most common configuration for this is a Subnet of 255.255.255.0 = /24
To guarantee Internet access please make sure outbound port 443 (TLS) traffic is open:
IP Address + Subnet - Required
Default Gateway - Required
DNS 1 - Required
DNS 2 - Optional
Connect to local camera network with Static IP
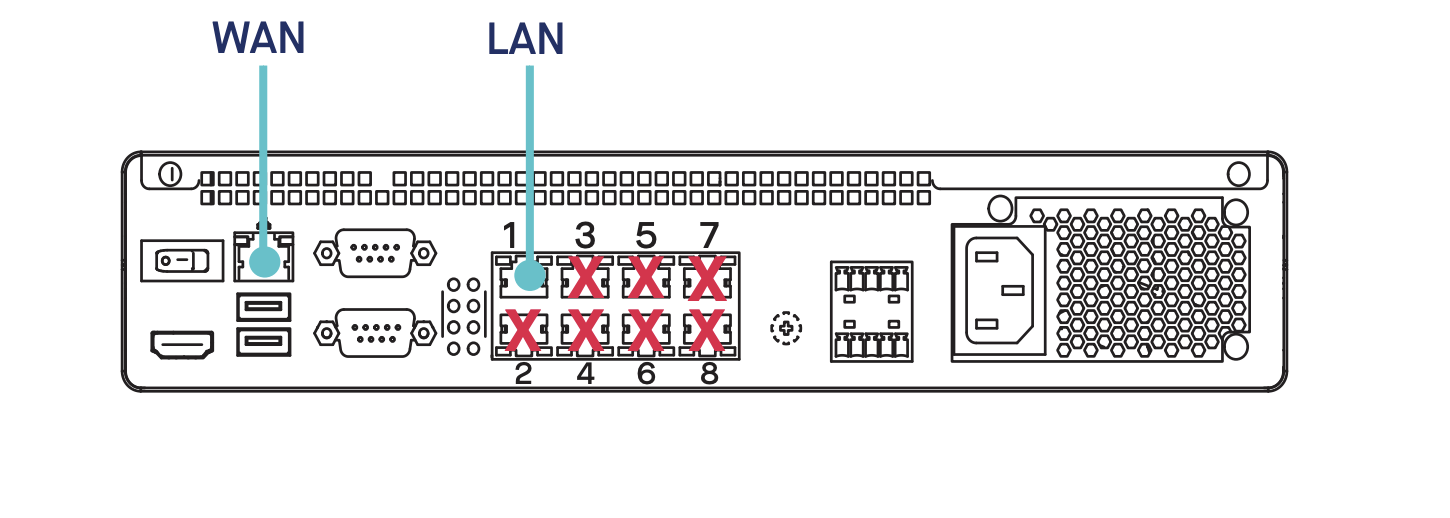
Verify the Site Gateway is plugged into your local camera network under the LAN port.
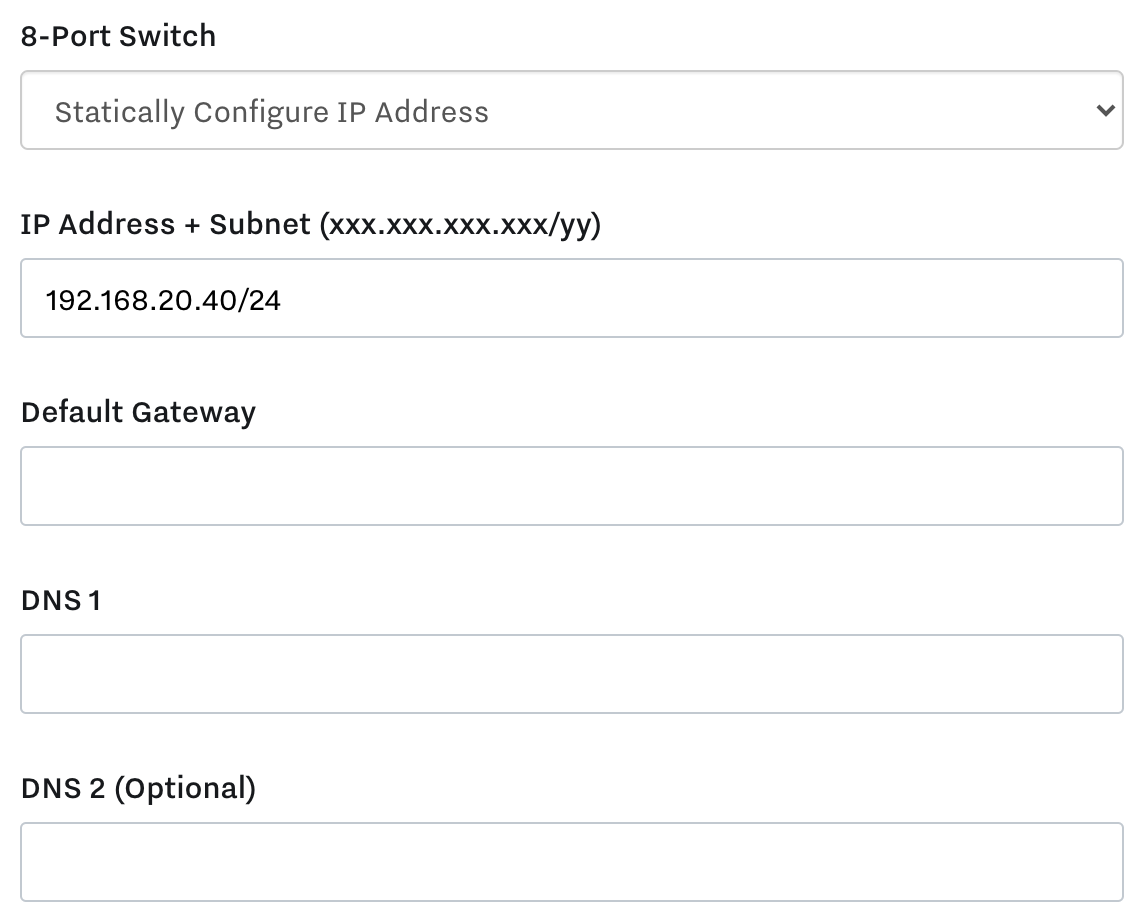
Under the 8-Port Switch drop down, choose Statically Configure IP Address. We require the Classless Inter-Domain Routing (CIDR) notation for the Subnet shown above as /yy.
The most common configuration for this is a Subnet of 255.255.255.0 = /24
Local camera networks usually do not require the Default Gateway and DNS, however if you know your network has them available you may use them in the configuration:
IP Address + Subnet - Required
Default Gateway - Optional
DNS 1 - Optional
DNS 2 - Optional