Set up Assets with the Asset Tree and Asset Labels
Summary
In this article, we will go through how to set up Assets, Asset-Based navigation, the Asset Tree, and Asset Labels.
Introduction to Assets
Assets are at the heart of the Samsara Industrial Dashboard. Depending on your organization and how you plan to use the Samsara platform, this may mean that you choose to group by asset type, by region, or by customer. Whatever the case, the structure you set up will serve as the primary way that you navigate between assets.
To learn about the value of Assets and setting up Asset-Based Navigation, read our overview: |
Create Assets in the Configuration Page
To set up Assets and the Asset Tree hierarchy in the Home Page: you need to create them first in the Asset Configuration page.
To get to Configuration Page, go to Settings (bottom left gear icon) → Assets on the left sidebar. Read our article here:
Set up Assets in the Configuration Page
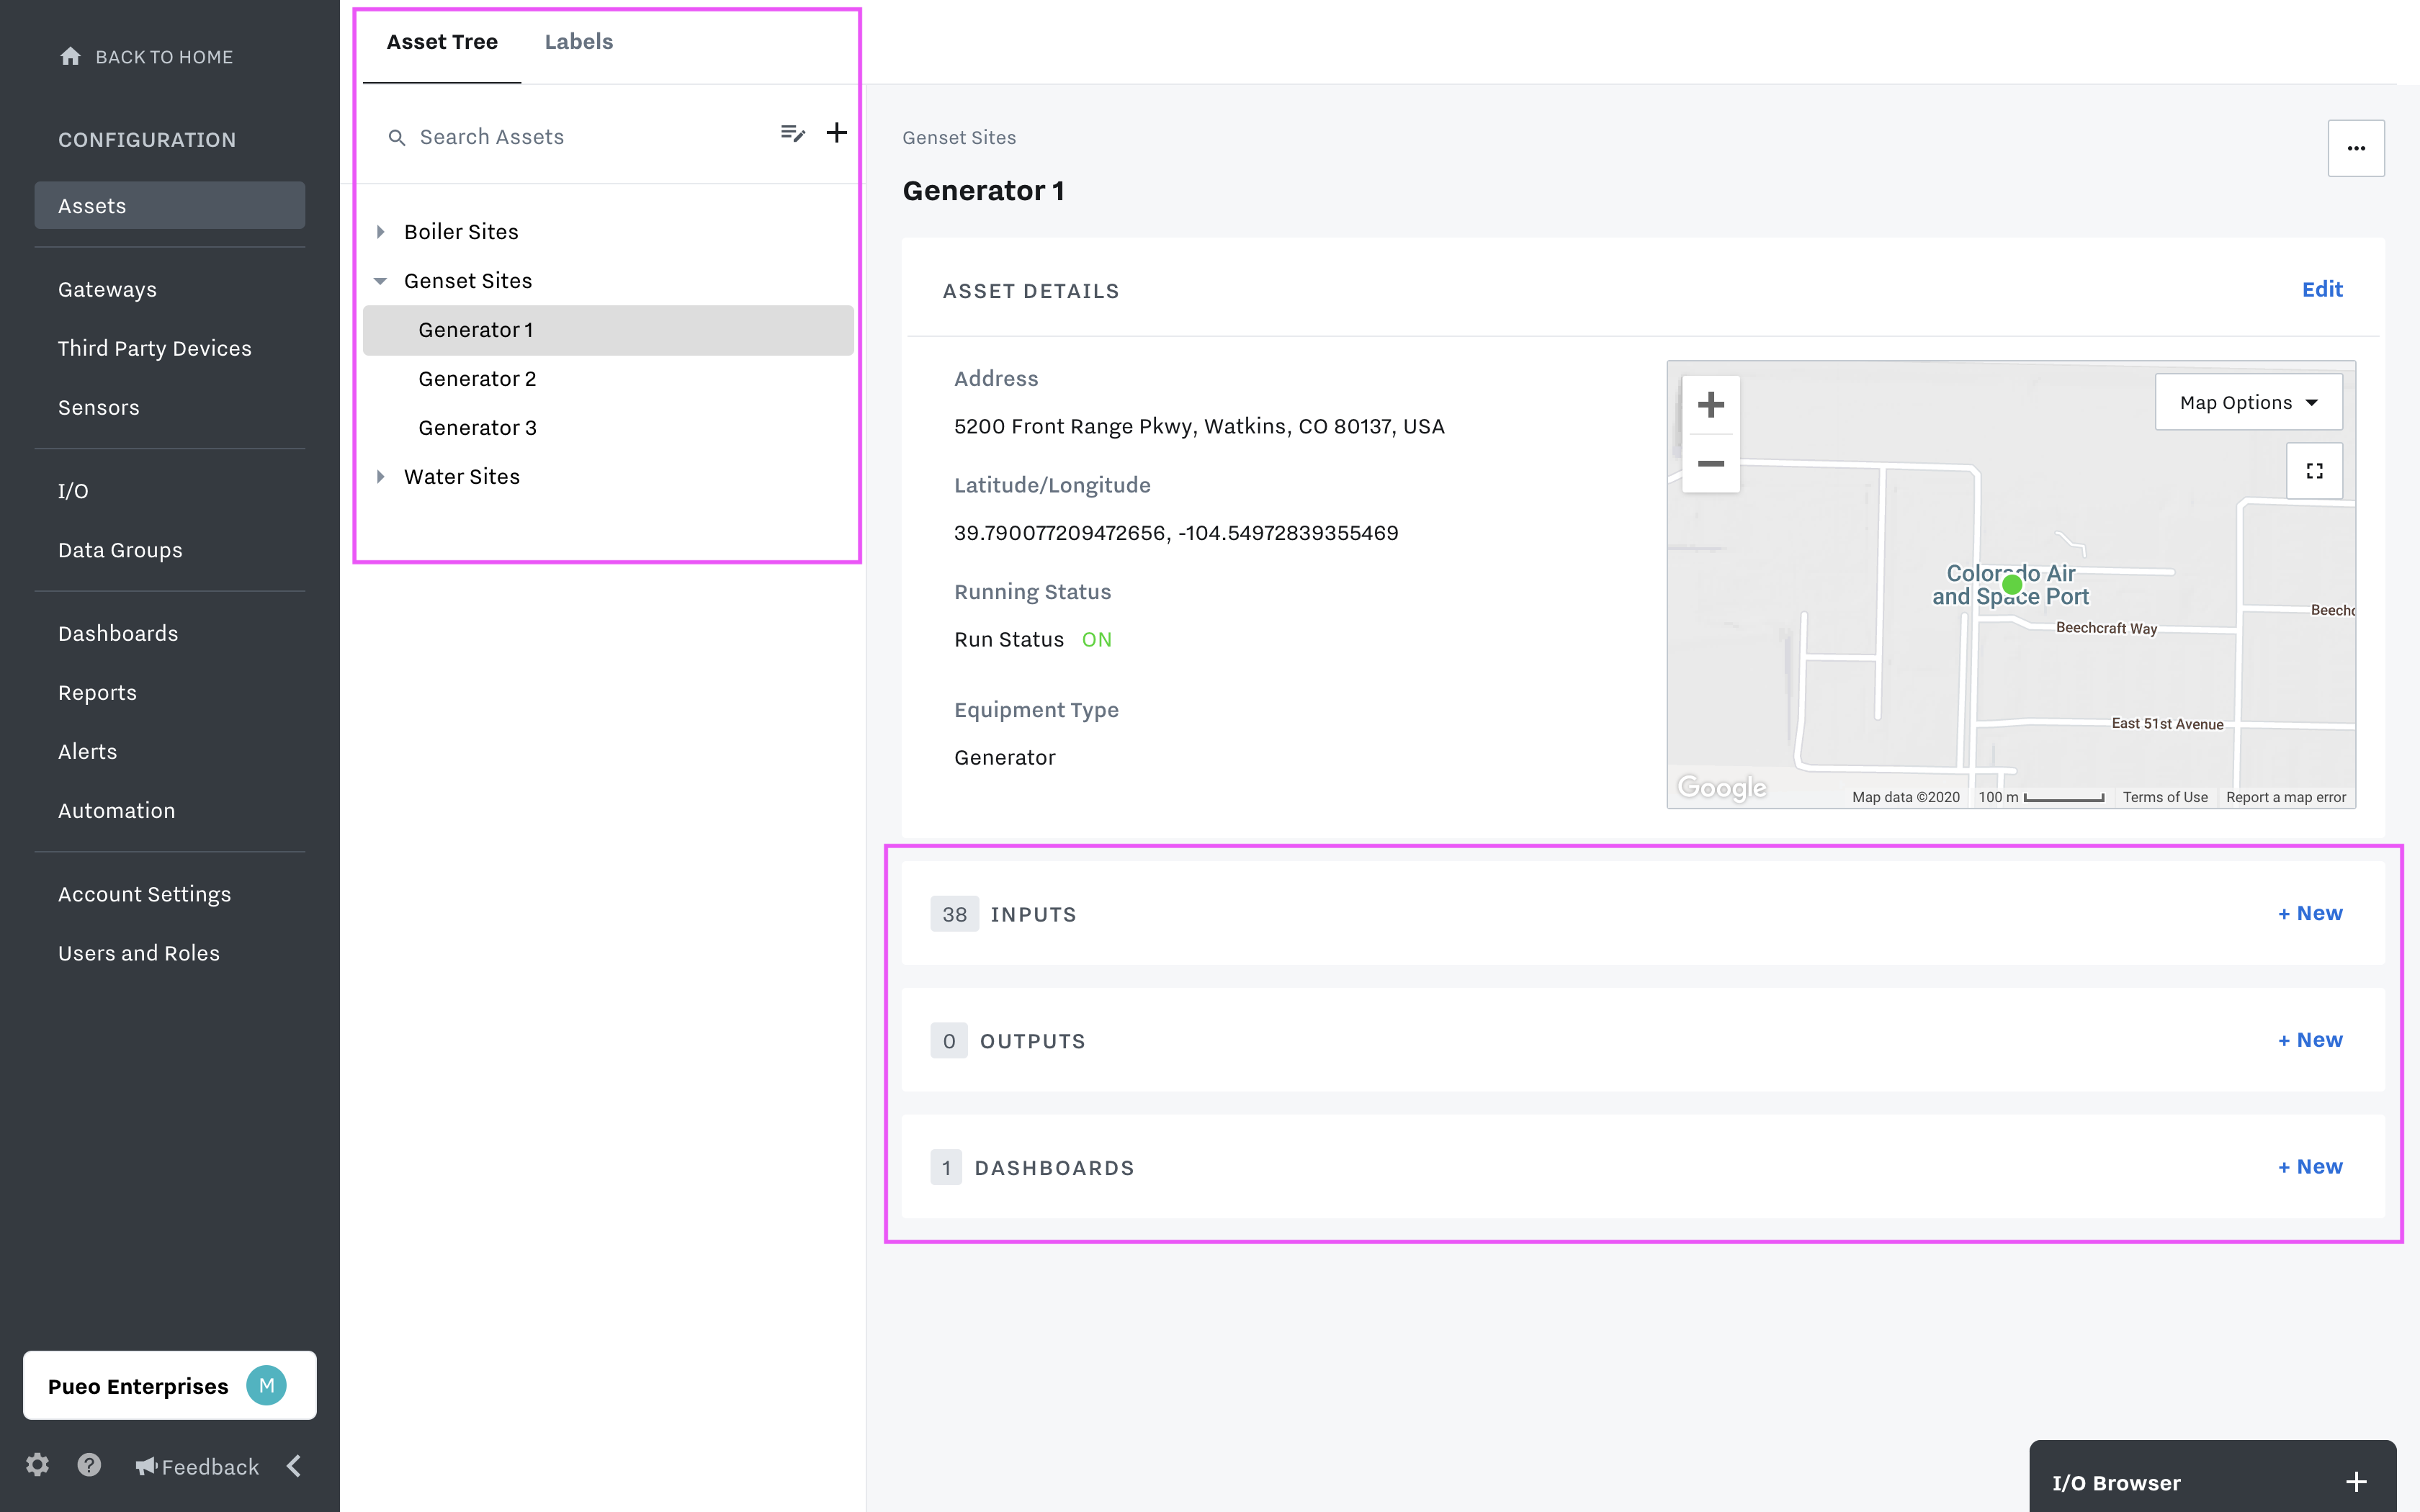
The Assets section of the Configuration Page is made up of the left sidebar, which contains both the Asset Tree and your Asset Labels, and the main asset view, where you can see and edit all of the information associated with your asset.
Asset Tree Introduction
Assets are at the heart of the Samsara Industrial Dashboard, and the Asset Tree is where you will organize your assets to mirror your physical operations. Depending on your organization and how you plan to use the Samsara platform, this may mean that you choose to group by asset type, by region, or by customer. Whatever the case, the structure you set up here will carry over to the home screen and serve as the primary way that you navigate between assets.
The Asset Tree is comparable to a nested folder structure on your computer–you can create multiple layers of organization by nesting assets in parent-child relationships (e.g. parent: region, child: customer, grandchild: asset).
Definition
Asset Tree - How Assets are organized on the left sidebar on the Home Page.
It is critical to create and organize your assets in line with the structure of your operations and users. See below for examples of how companies organize their assets:
Example: Asset Tree for Water and Wastewater 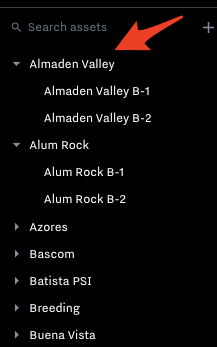 A Water customer uses Samsara technology to gain real-time visibility into pumps and equipment at different locations in California to ensure efficient operational management, higher reliability, informed capital planning, and better customer service. As such, they organize their assets in Samsara by site location then the individual pumps / equipment under each location. |
Example: Asset Tree for Equipment as a Service Generator rental companies uses Samsara to prevent breakdowns, maintain uptime for customers, provide technicians with key generator data, and manage their generator rental operations. As such, they can organize their equipment in Samsara based on their operations: Example 1 - Region → Site → Generator Name
Example 2 - Customer Name → Customer Region Location → Customer Site Location → Generator ID
|
Set up the Asset Tree
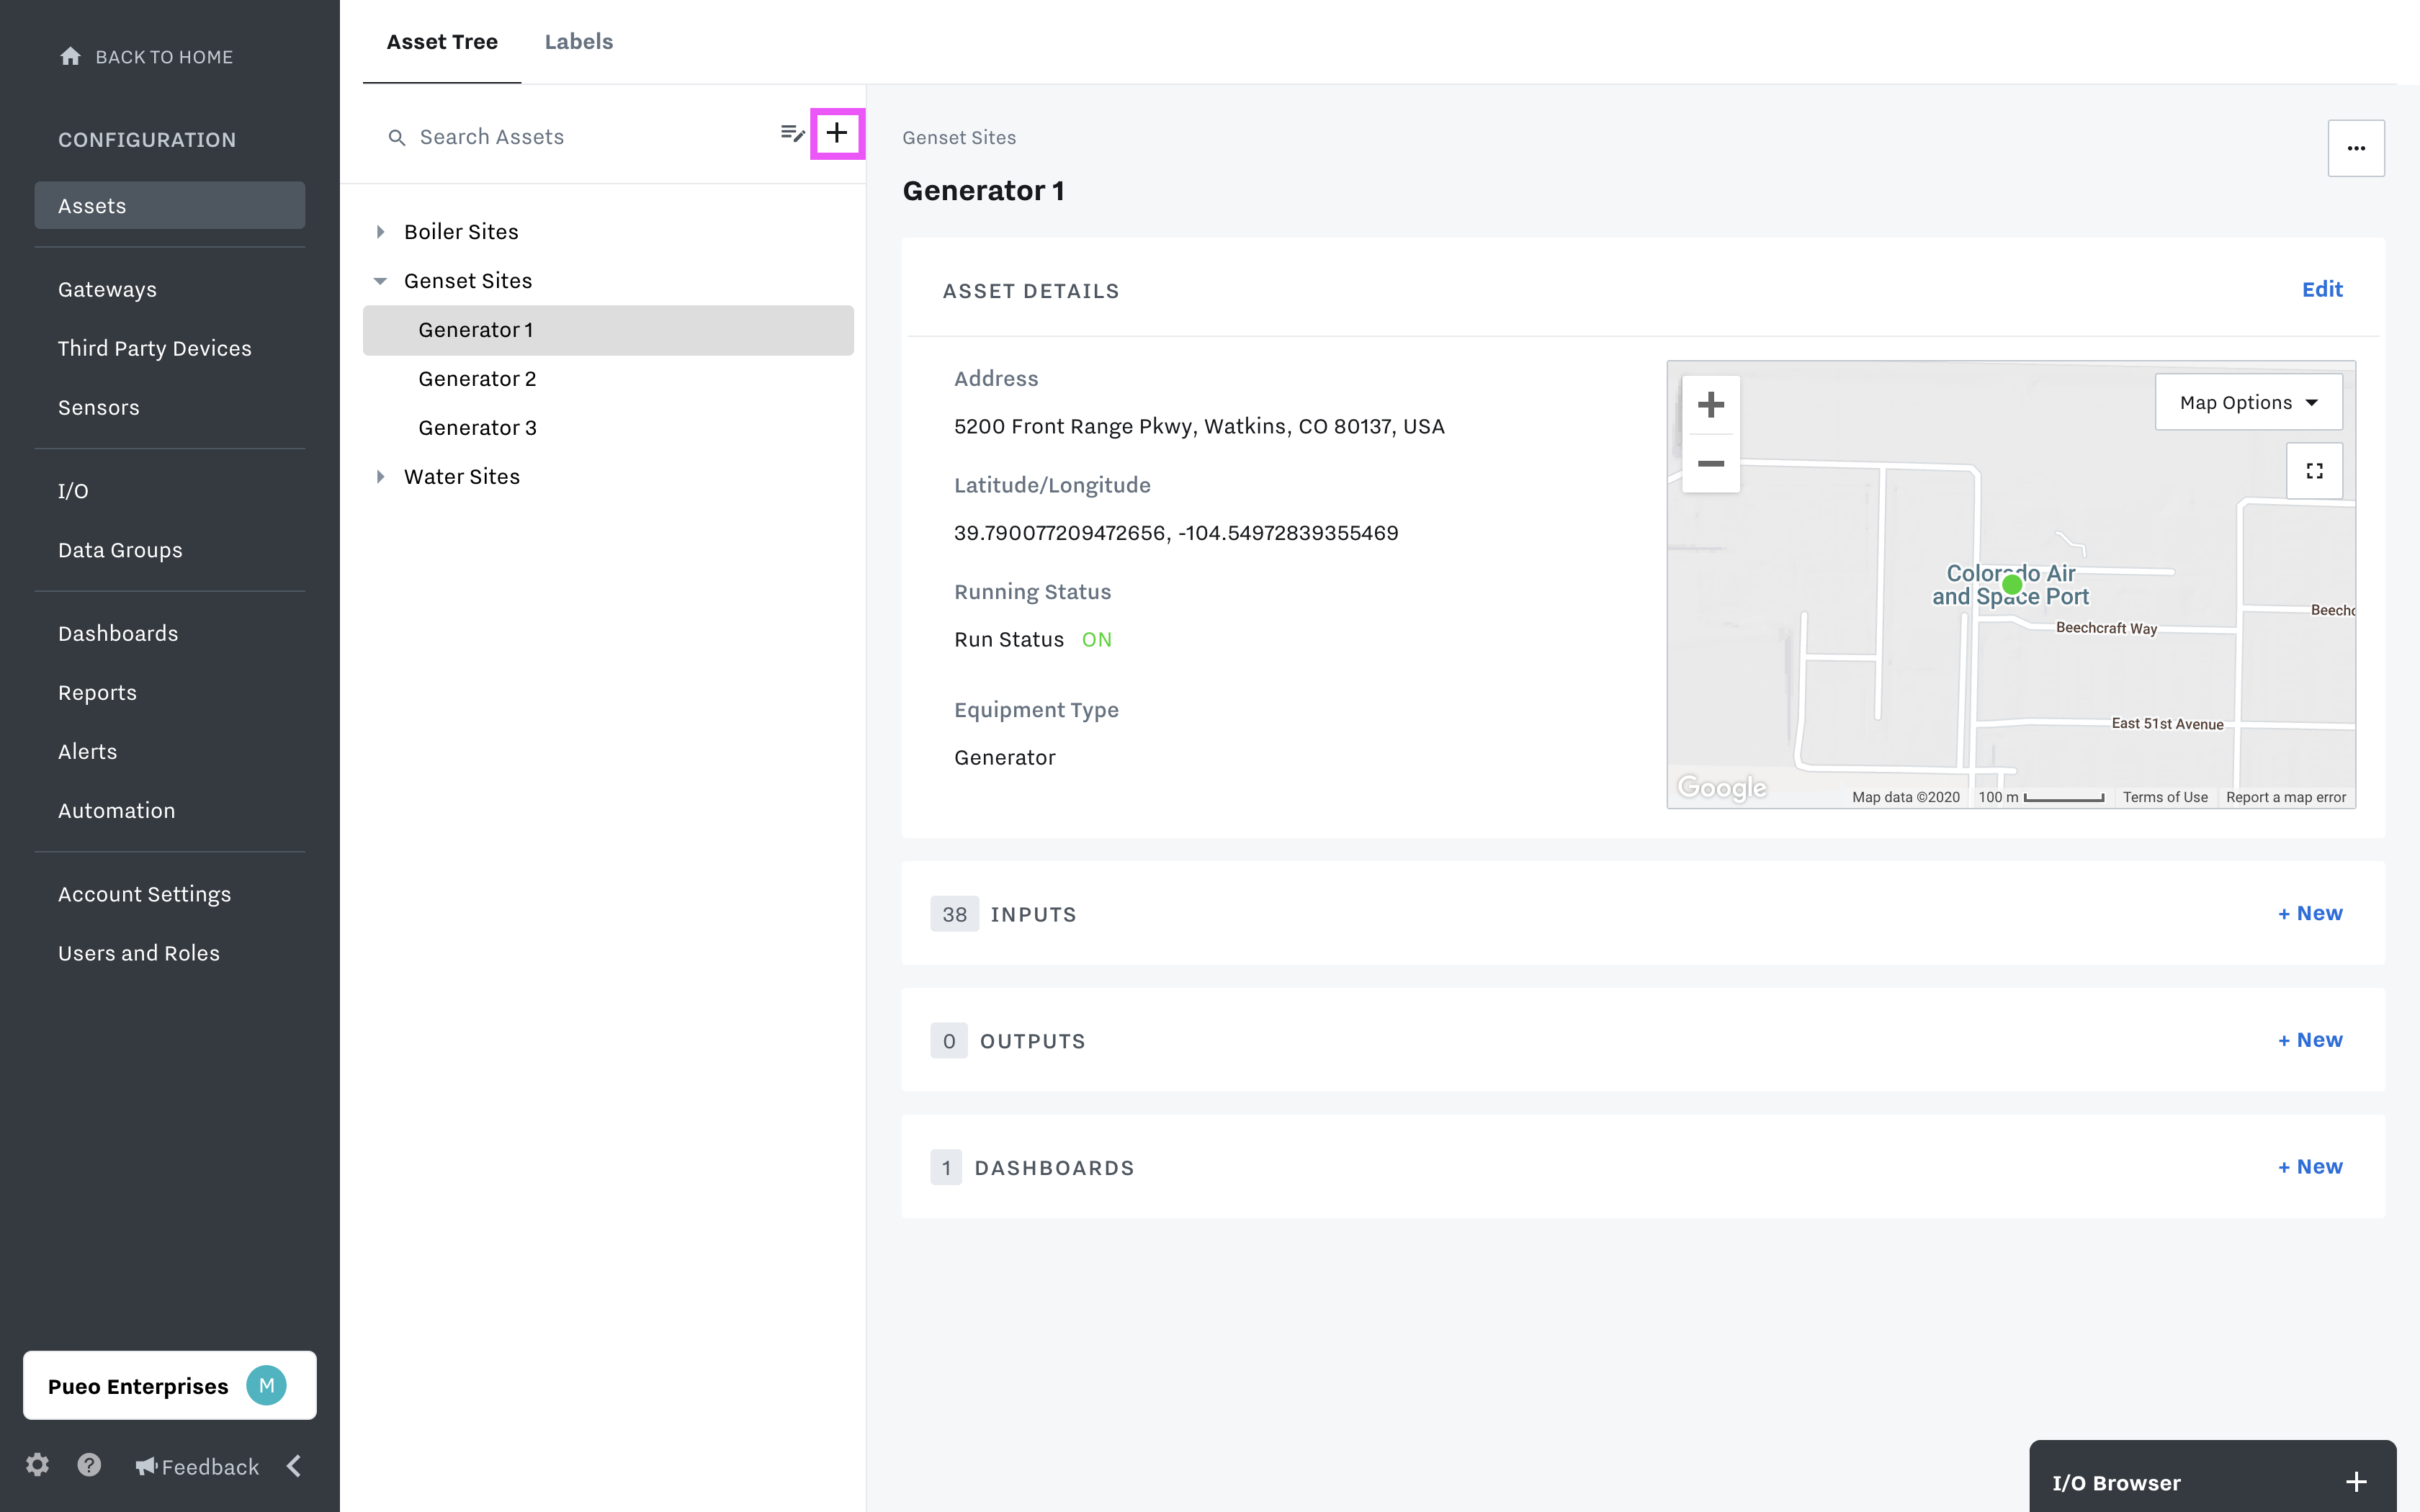
To begin creating your Asset Tree, click on the “+” icon in the left hand sidebar. From the pop up window, you can add to your tree in two ways:
Option 1: Manually create assets, one at a time – Manual asset creation should generally be reserved for small additions to existing asset trees or for pilot projects only.
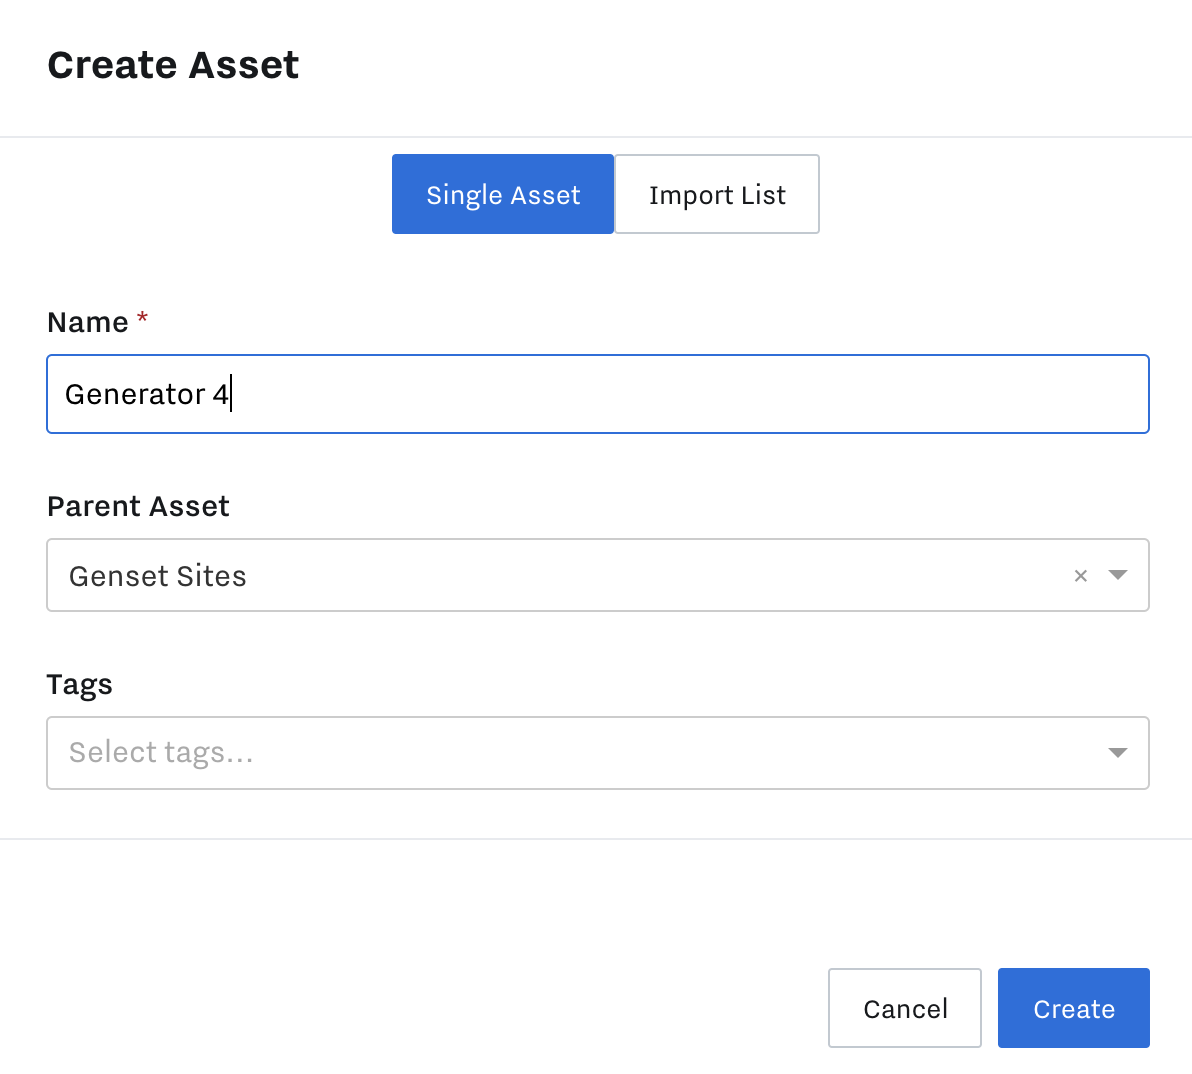
Option 2: Create assets in bulk, by importing a list - for the fastest configuration, we recommend uploading a CSV file with your assets listed in the following format: parent asset, child asset, grandchild asset (e.g. region 1, customer 2, asset type 3). Note that nesting assets is completely optional.

Add Asset Details
Once you’ve created your Asset Tree, you can start editing your asset details. Location is included by default, but you can add additional custom details. You can also edit asset details in bulk, we recommend editing in bulk as widely as possible to save time.
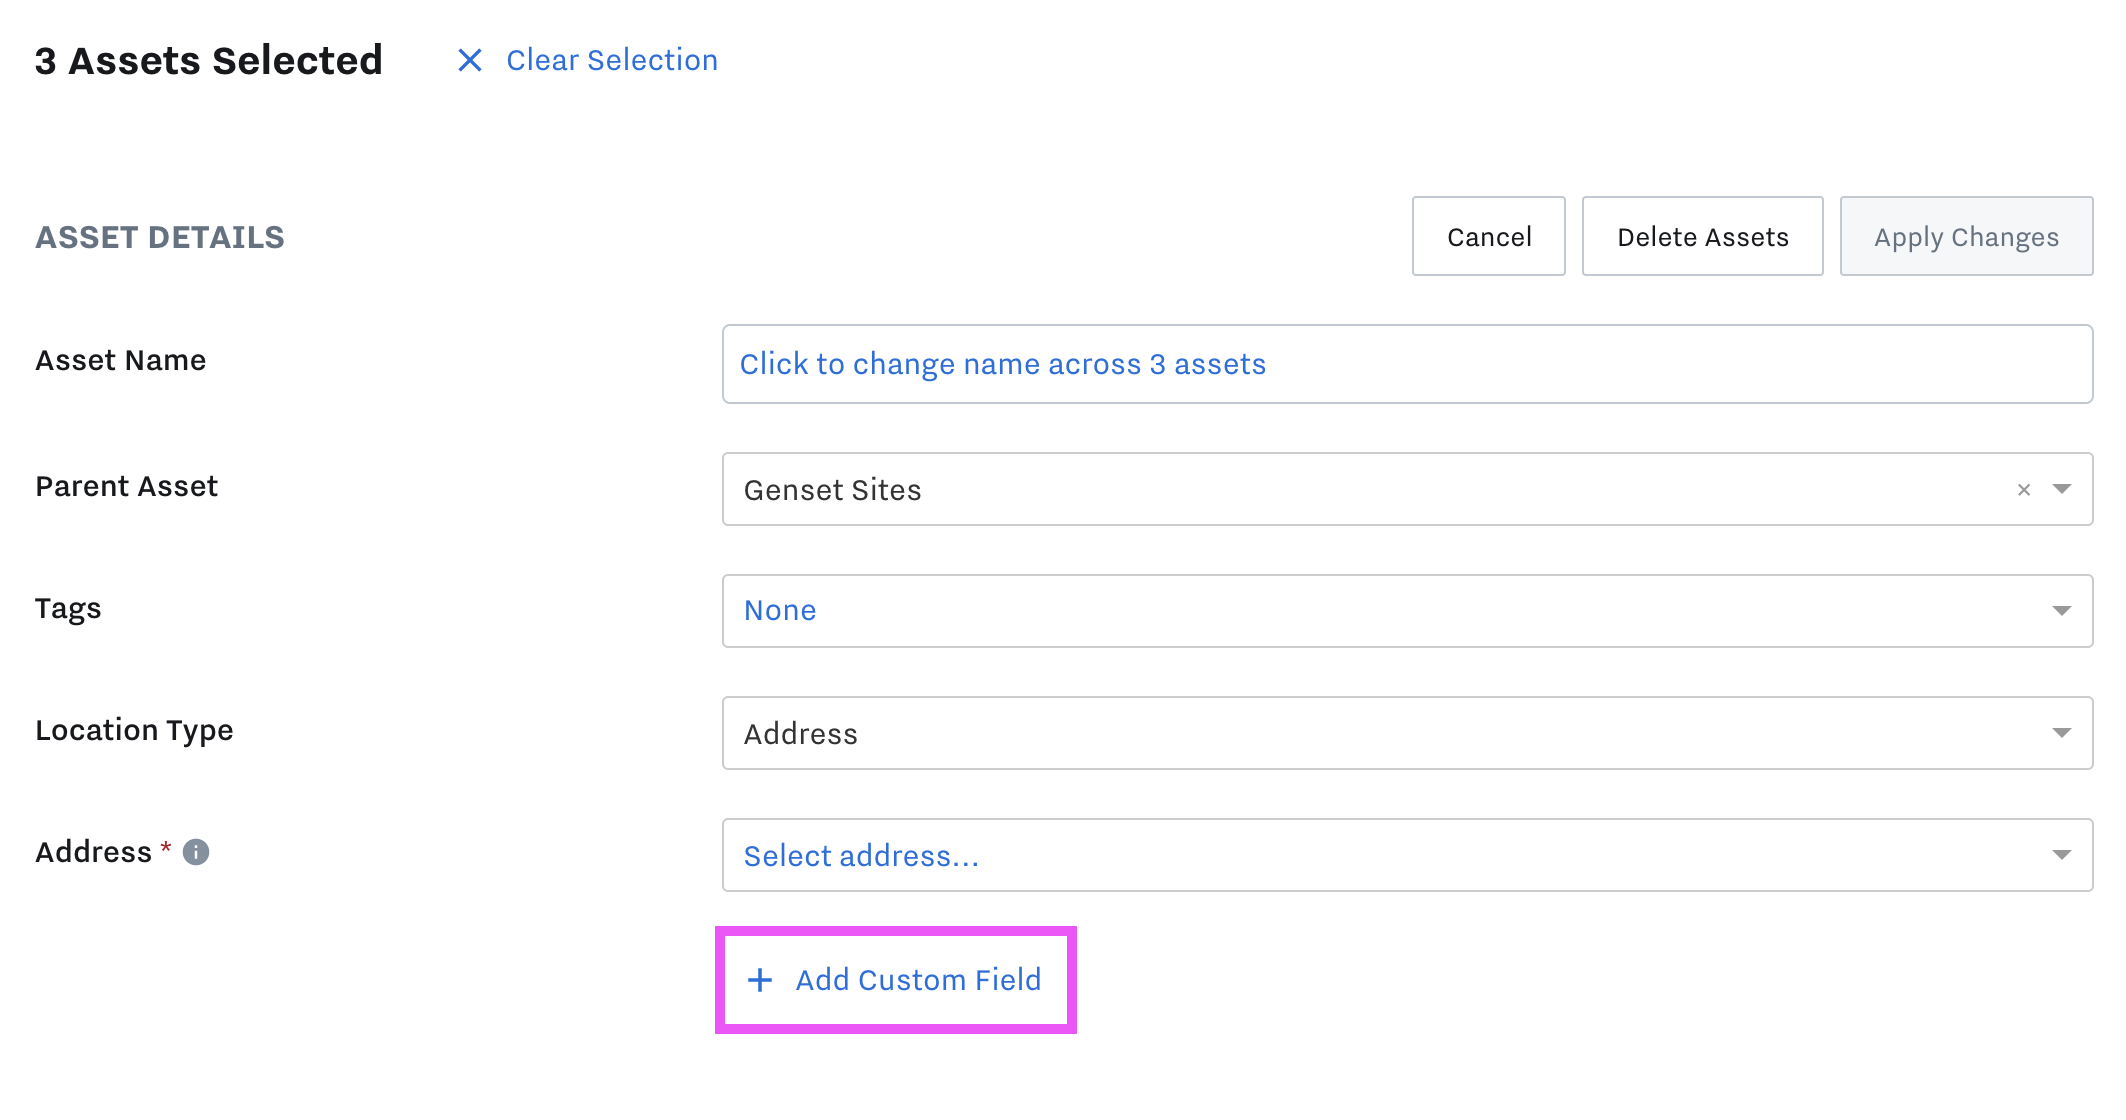
To edit details in bulk, select the “Toggle Bulk Selection” button at the top of the left sidebar.With this button selected, you will be able to select multiple assets in your tree for bulk editing.

On the right hand of the screen, select “Edit”.

Fill in your asset details and create additional custom fields.
You can easily add custom details that describe and define your asset like asset make and model, serial number, and even links to maintenance manuals.
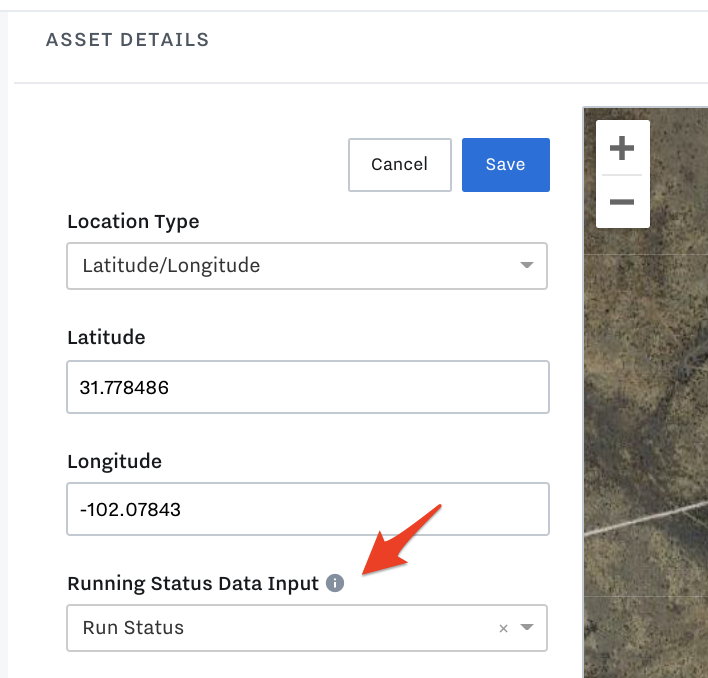
Asset Details - Run Status
Add your "Running Status Data Input" to each asset. The asset running status will be indicated as "On" when the selected data input's value is equal to 1. Running Status Data Inputs must be added to each asset individually. Run Status Data Input
Asset Details - Location
Add the Lat/Long or address of assets to visualize them on the Map View: Location Data Inputs

Set up Asset Labels
Alongside the Asset Tree in the left sidebar, you’ll find a tab for Asset Labels. Asset Labels allow you to group assets based on a common attribute and are the main way that templates are applied in the Industrial platform. Each label is made up of a name and distinct values.
Asset Label Example: If you were managing a fleet of generators, you might want different dashboards for each unit depending on its power rating. To make this work, you would create a “Power Rating” asset label, with specific power ratings (i.e. 250 kW, 300 kW, 500 kW) as its values. Each of these values could then be associated with the right generators and dashboard templates (i.e. the 250 kW label is attached to both your collection of 250 kW generators and your 250 kW dashboard template)
To create an Asset Label, select the Label tab in the left sidebar and then click the“+” icon.
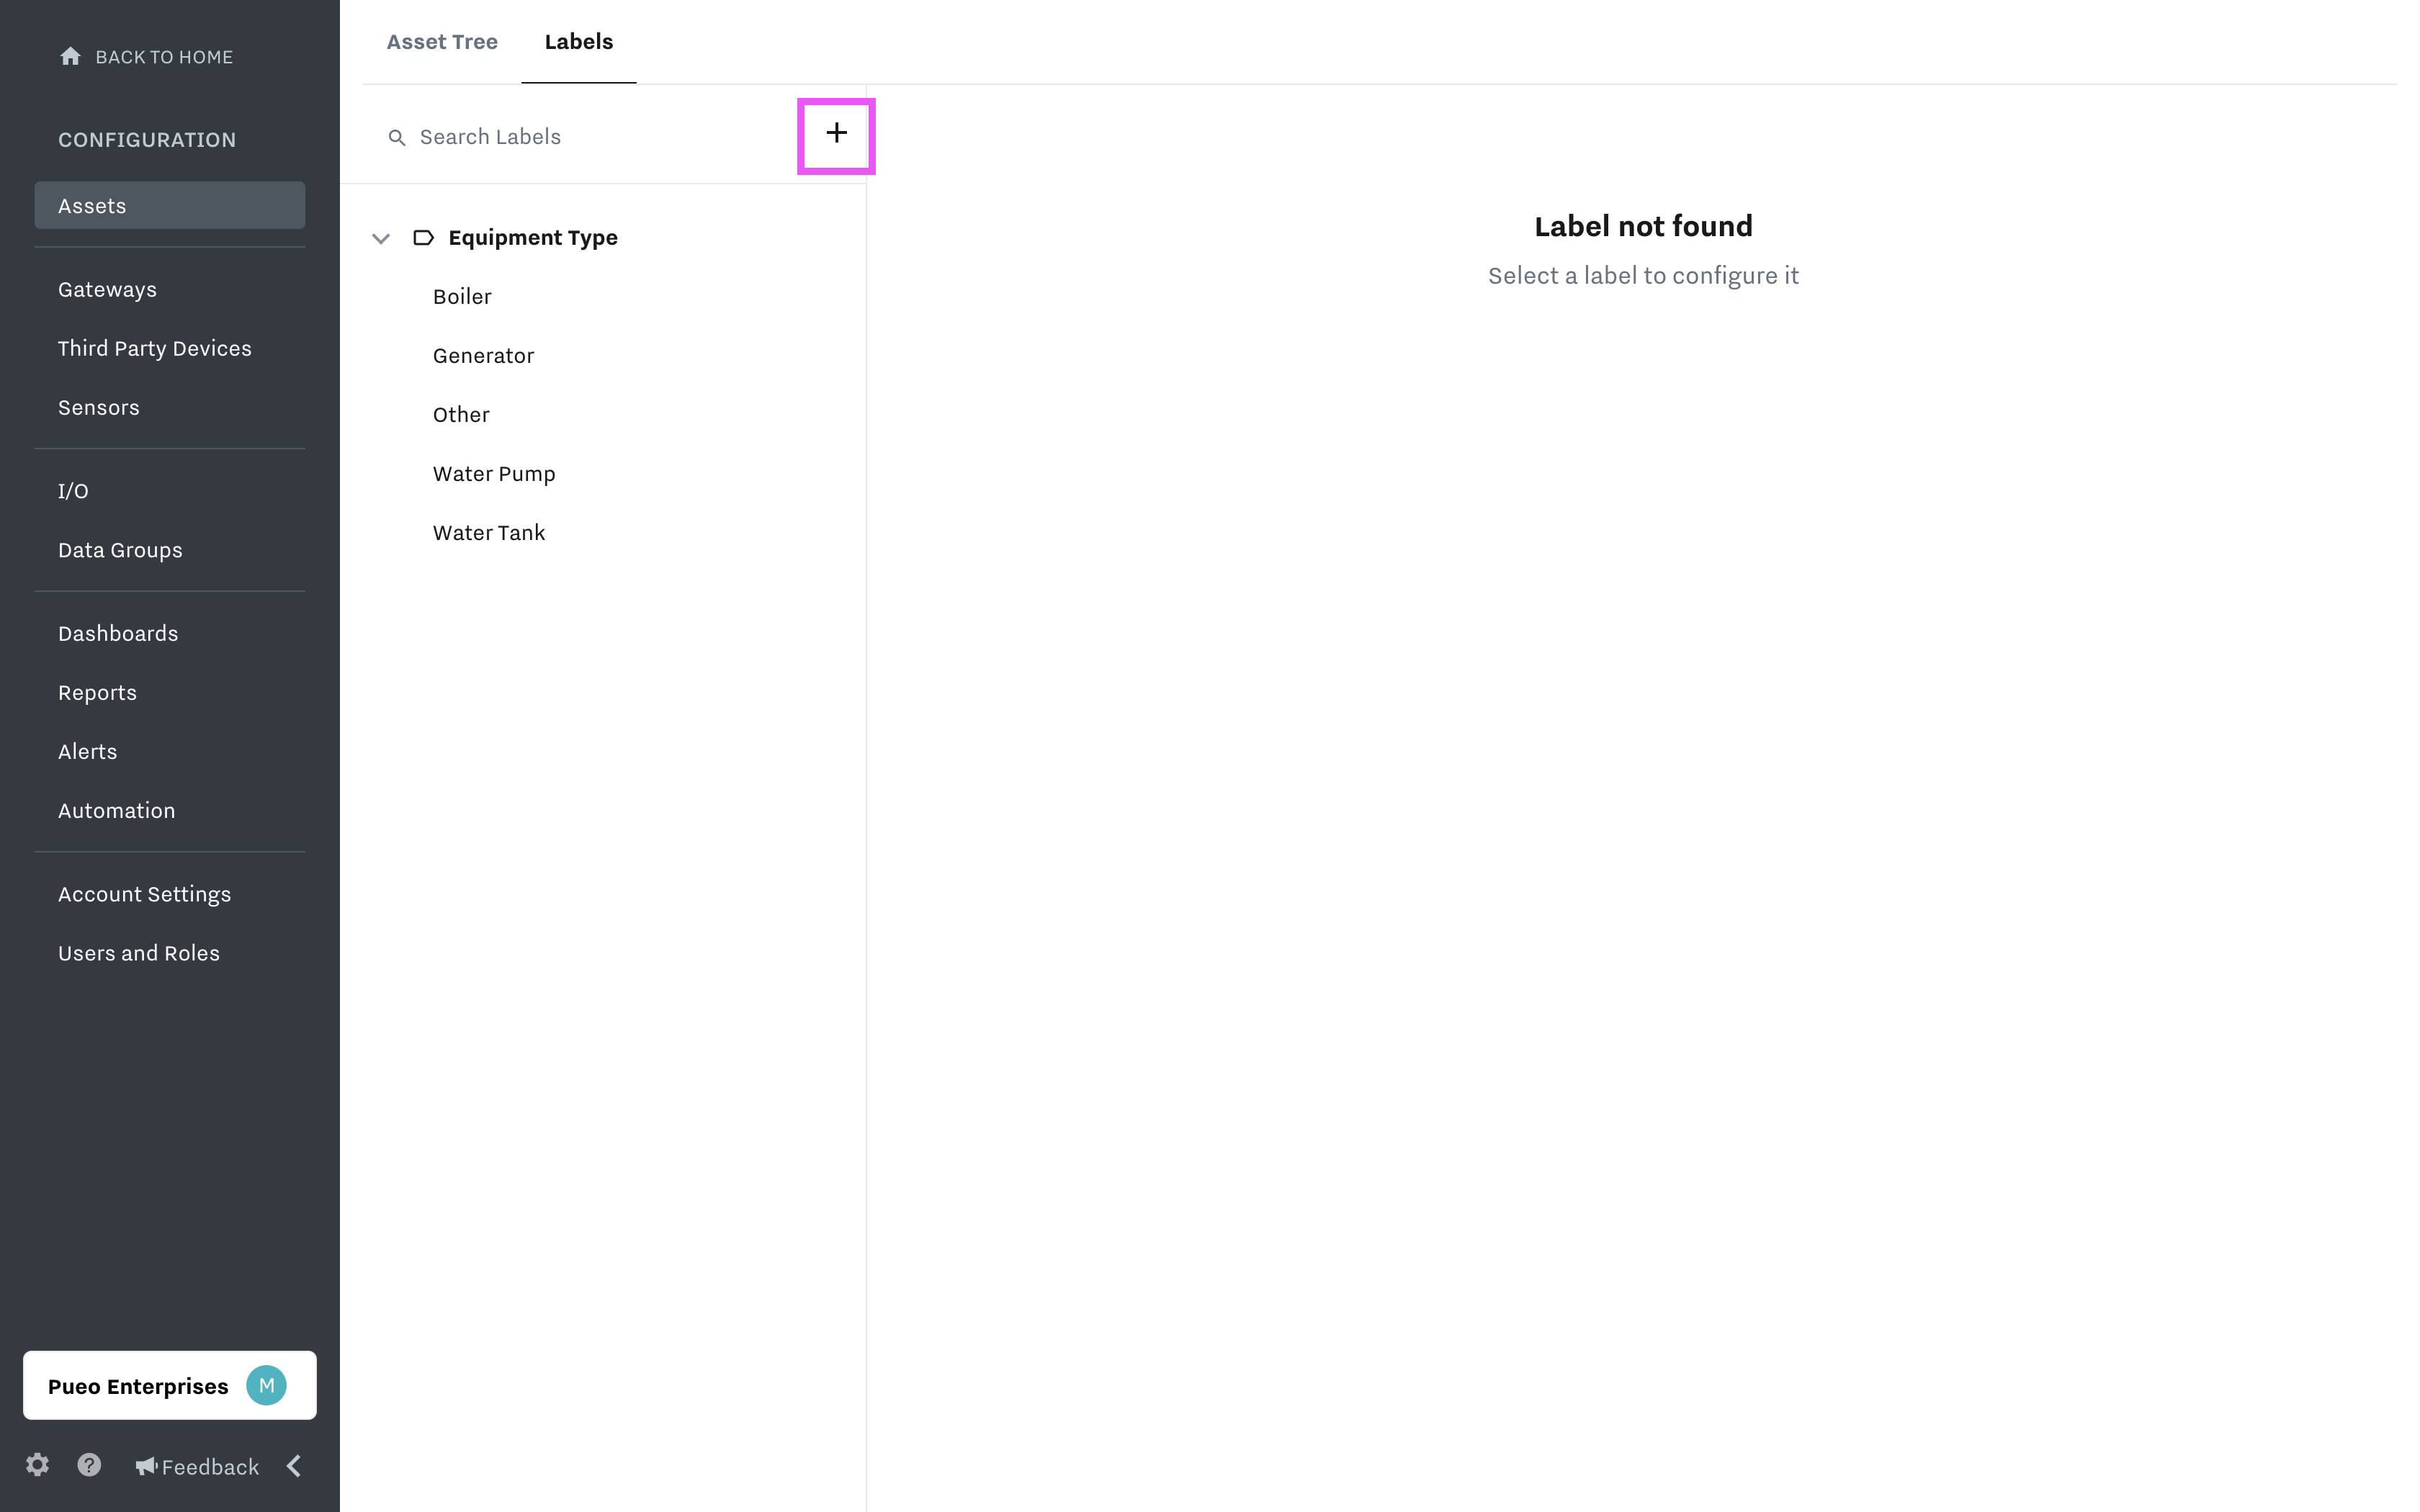
Fill in your Label name, add your unique values, and hit save.
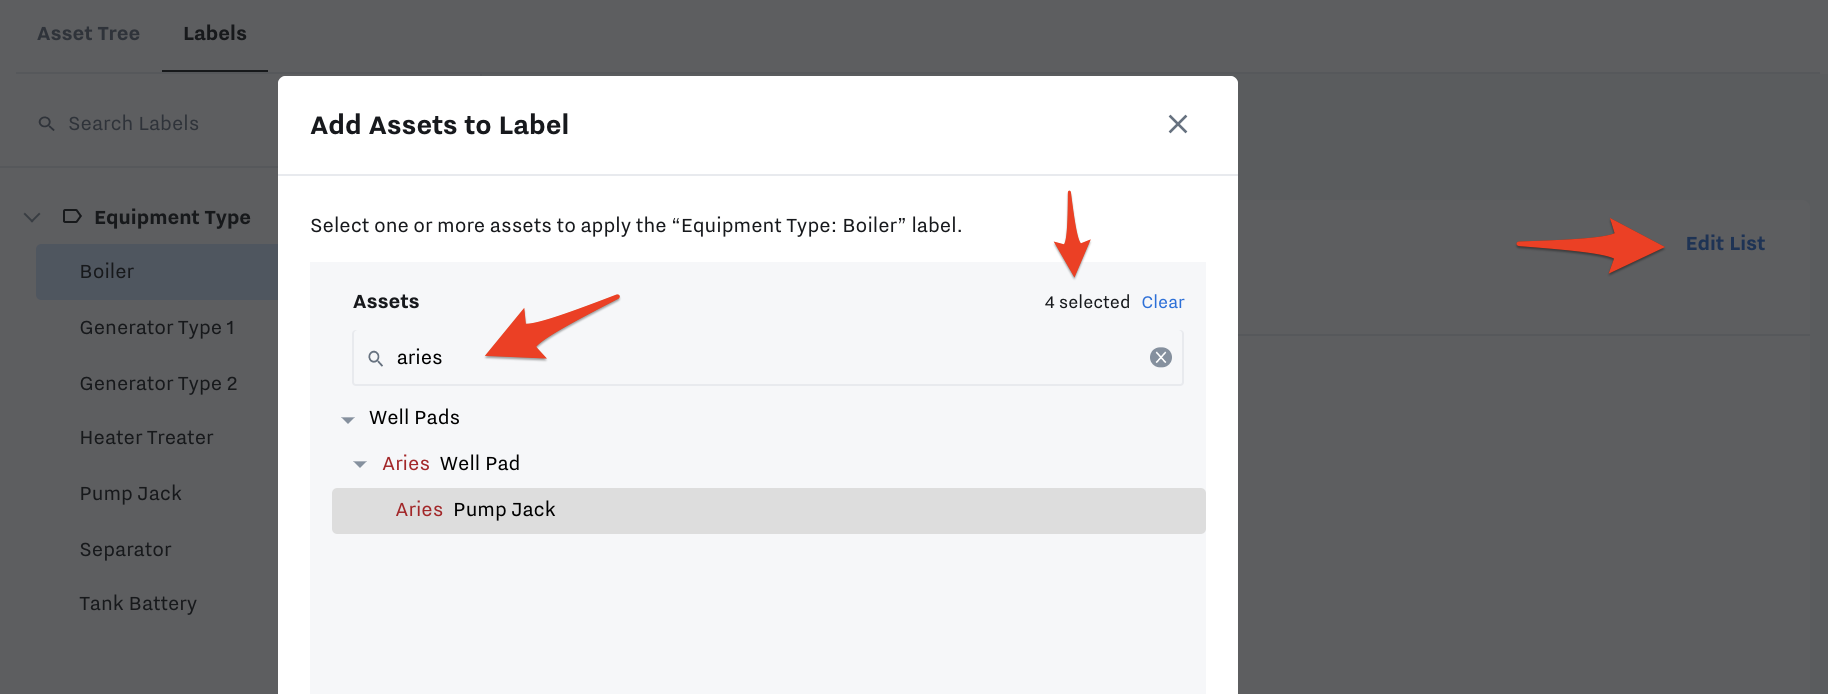
Select a label and click the edit button to apply your labels to specific assets.
Clicking the edit button will open a window where you can select assets from your Asset Tree to which you’d like to assign the newly created Label.
Additional Asset Label Considerations
When assigning Asset Labels, only a single value per Label name can be assigned to an asset.
Selecting a parent asset in the “Add Assets to Label” window will only assign the label to the parent asset; it will not automatically assign a label to all of its child assets.
Asset Labels vs. Asset Tree: While Labels may seem similar to the primary Asset Tree, there are a few key differences between the two.
The first is key difference is that, again, Labels are used to assign templates to a group of assets
The second key difference is that the Asset Tree is used to visually organize assets on the home page and it is also used to assign permissions (if a user has access to a parent asset, they will have access to all of its nested child assets).
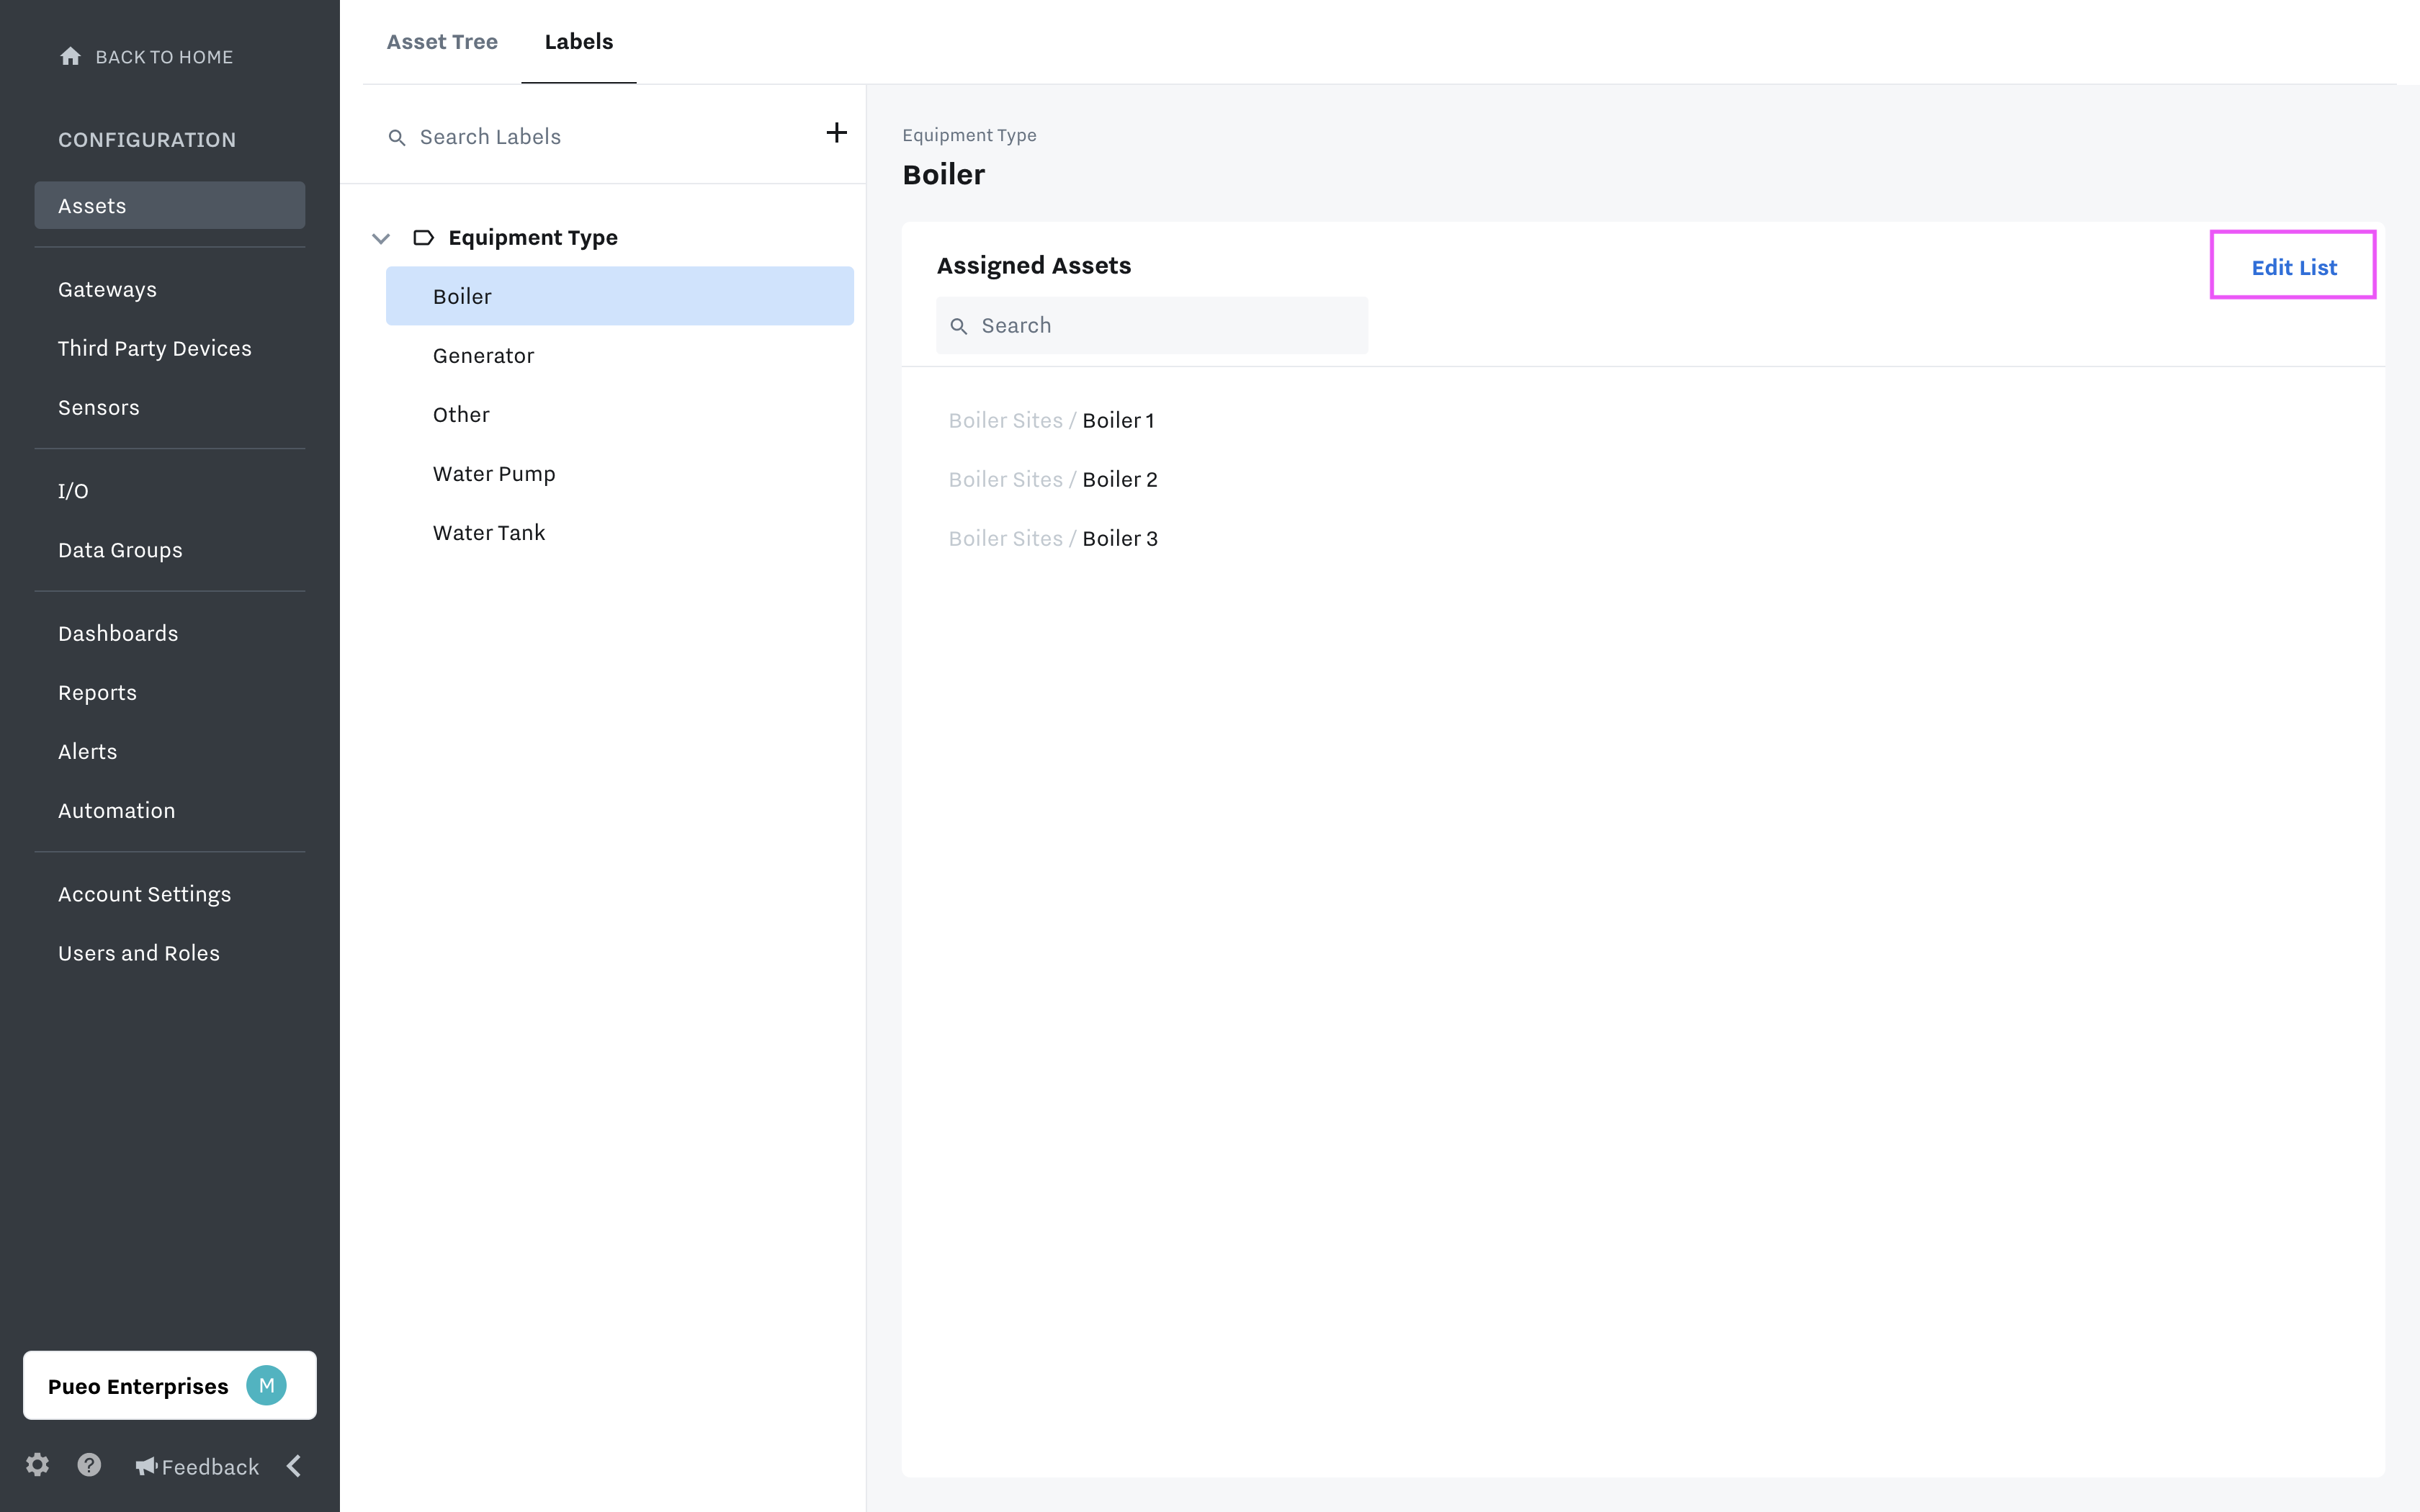
Apply Asset Labels to Assets
Once you’ve created your Labels, you can apply them to your assets. See below for the steps to do this:
Select an individual asset label and “Edit List” modal on the right hand side of the screen.
This will open a window where you can select the assets from your Asset Tree to which you’d like to assign the Label.
Search for assets
Select or de-select assets that belong to the asset label
Note : When assigning Asset Labels to Assets, remember that only a single value per Label name can be assigned to an asset. In addition, selecting a parent asset in the “Add Assets to Label” window will only assign the label to the parent asset; it will not automatically assign a label to all of its child assets.
Assign I/O to Assets
Once you have your Assets set up, you can create I/O and assign them to Assets. To learn how to create IO, go to our section Set up Data Inputs + Outputs .
How to assign IO to assets:
Go to I/O tab in Home Page
Go to Asset Details and Assign Existing IO
Go to IO in Configuration Page (recommended)
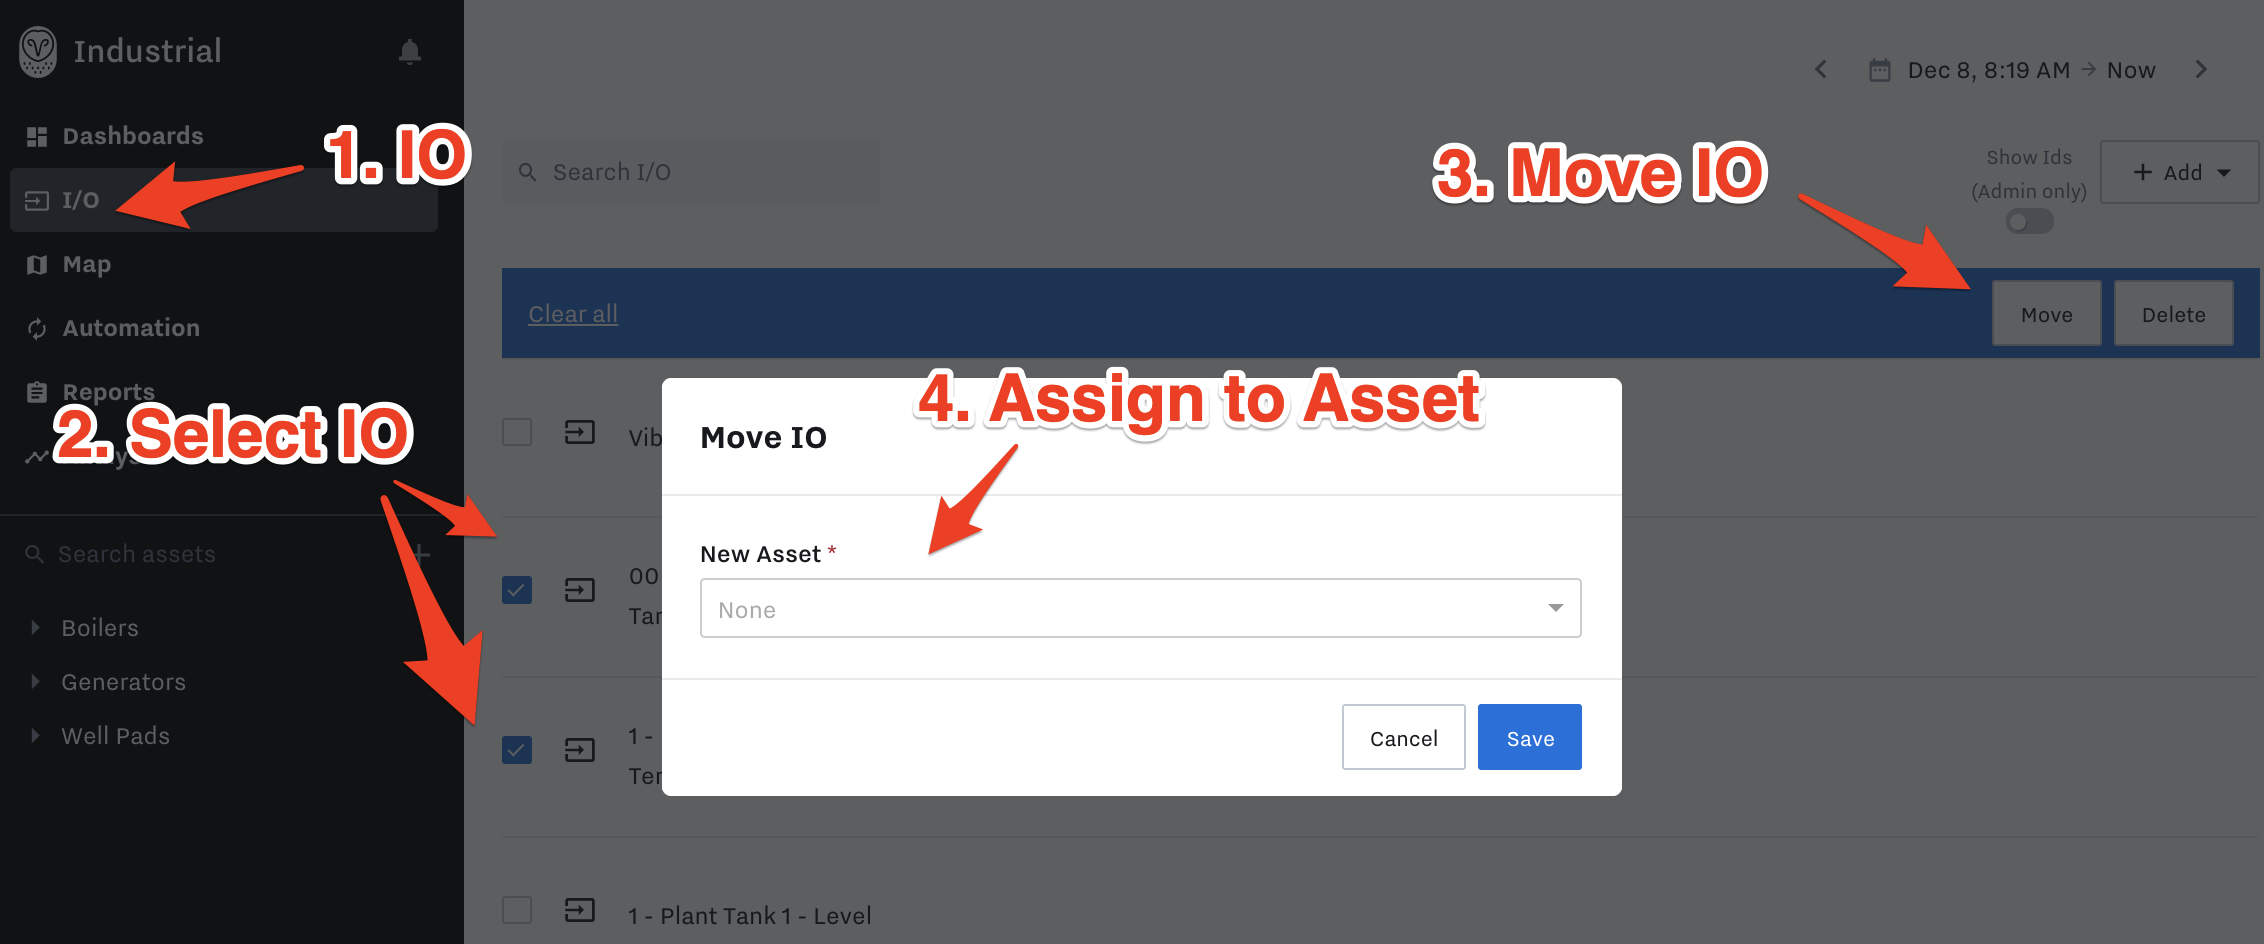

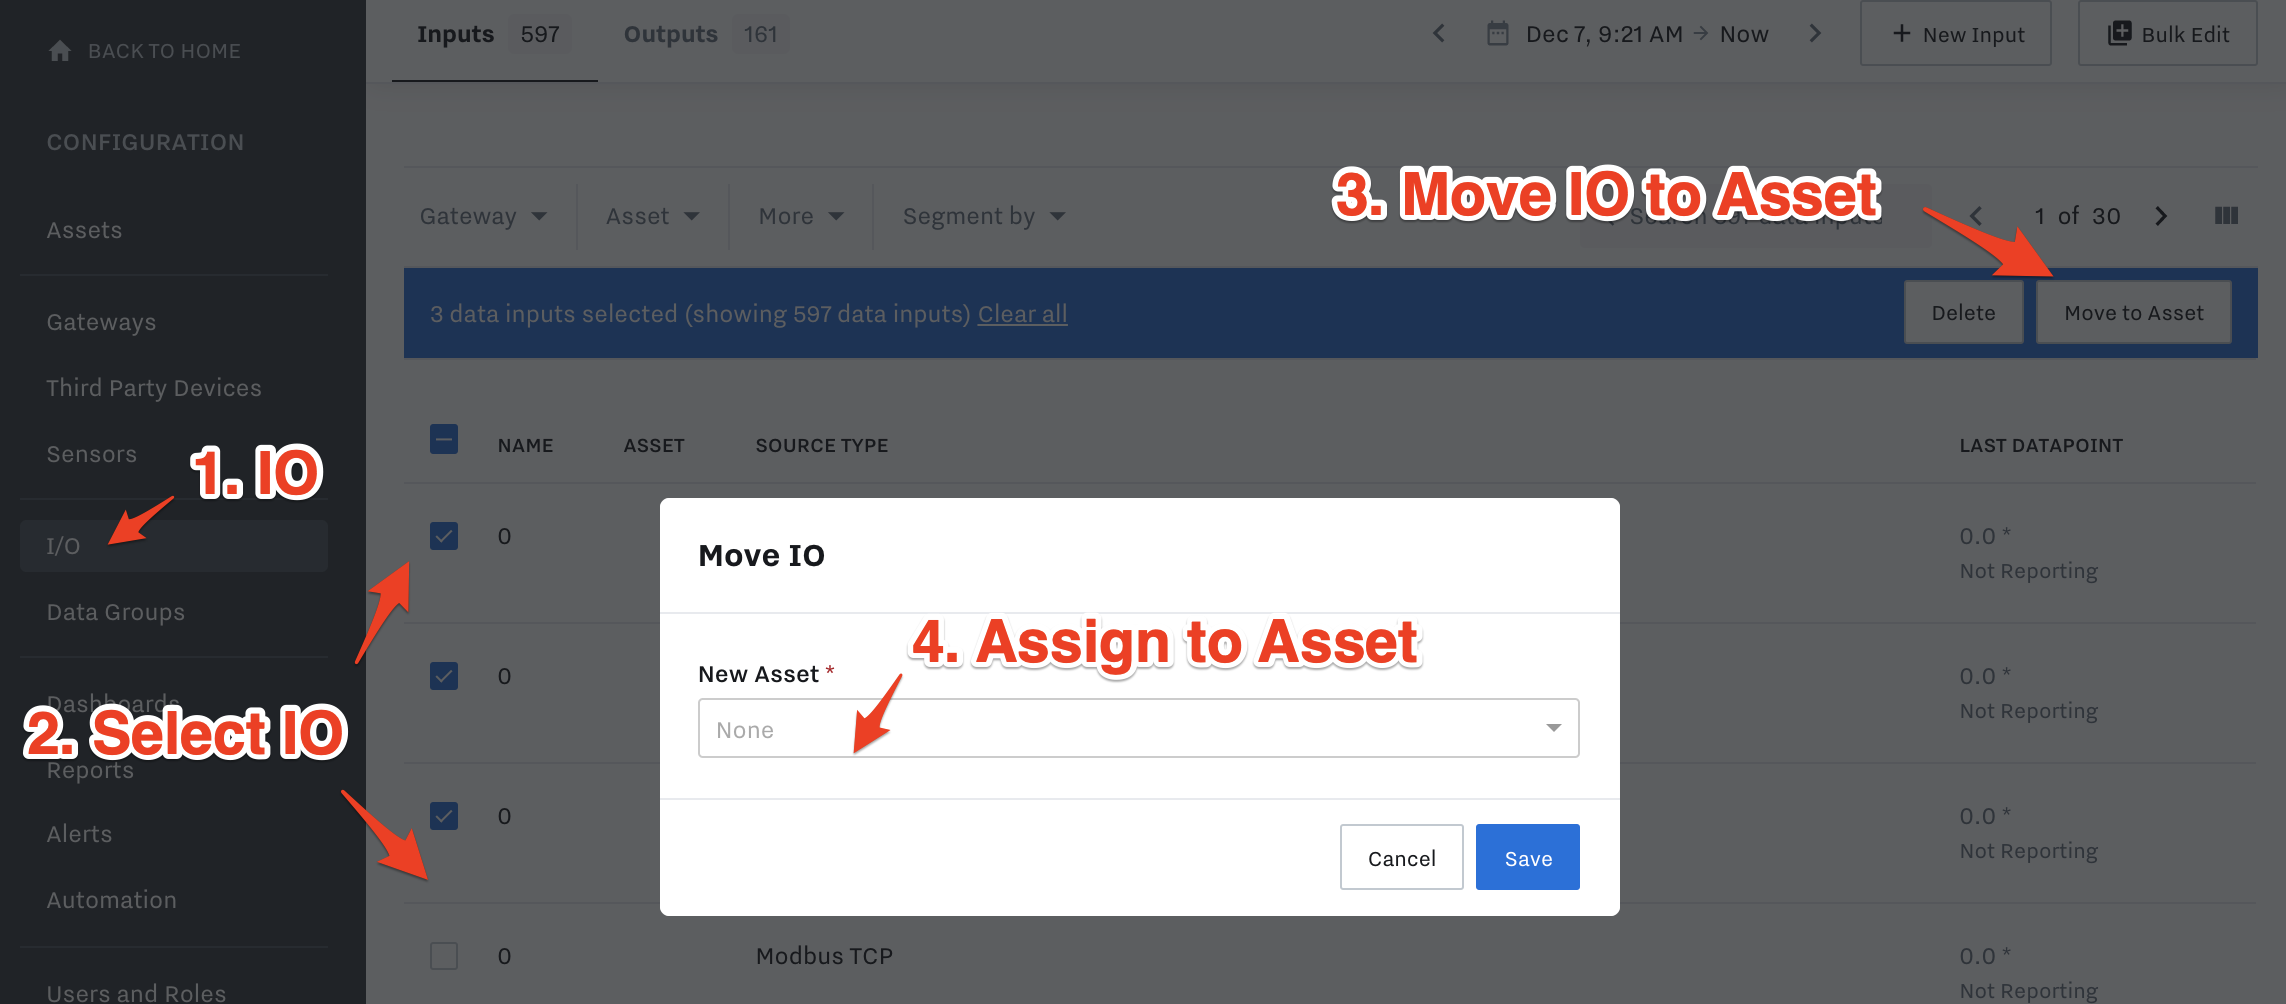
To learn how to assign I/O to assets, watch our video below:
Set up Asset-Based User Access
Once you have Assets created, you can restrict users to only access specific Assets or sub-Assets by updating their Access permissions: Set up Users with Roles and Tags
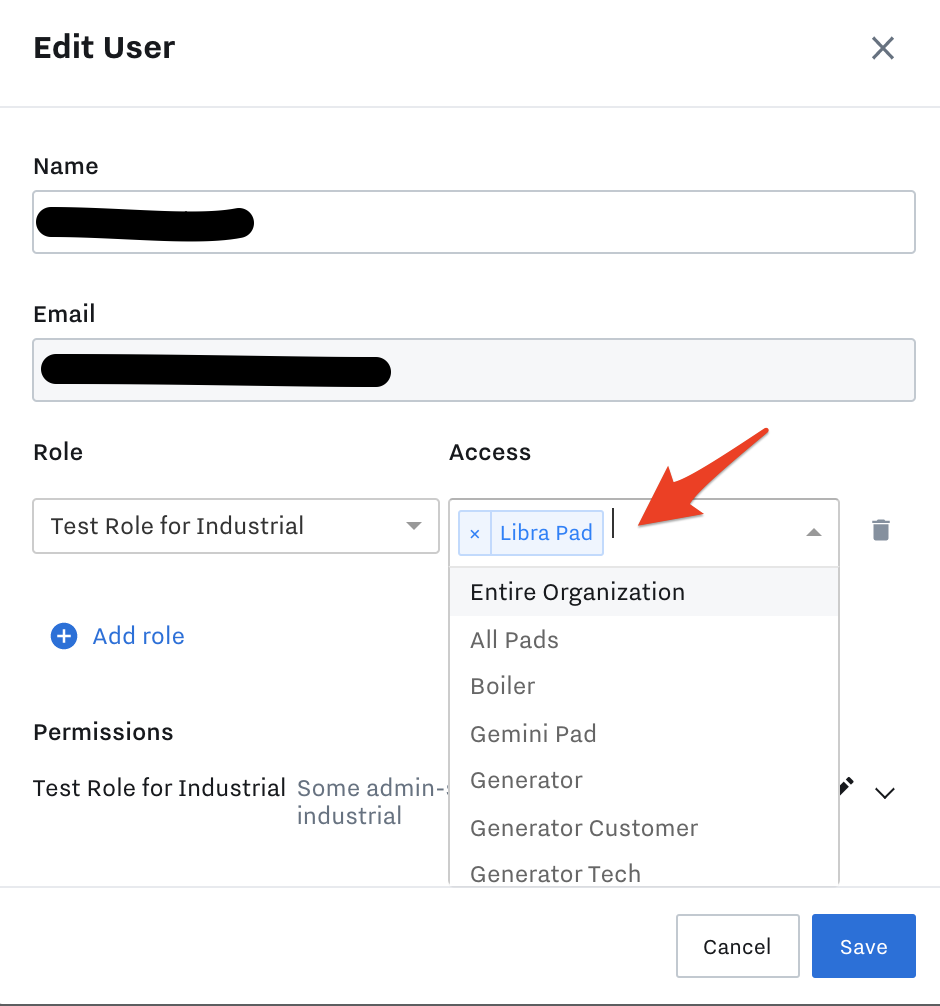
Example below: User restricted to specific Assets
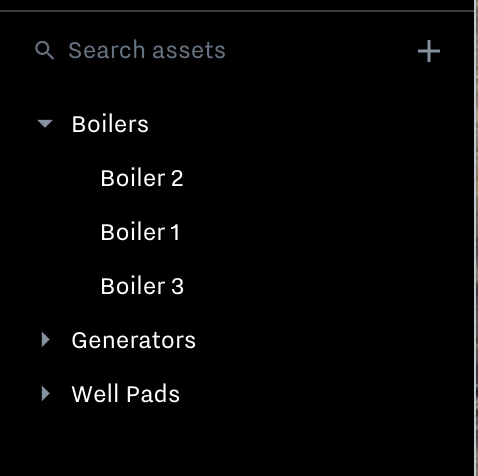
When you restrict a user’s Access to a specific Asset or group of Assets (children assets under a parent asset, for example), they will only be able to view those Assets. See example below:
Full Org Access | Libra Well Pad Access Only |
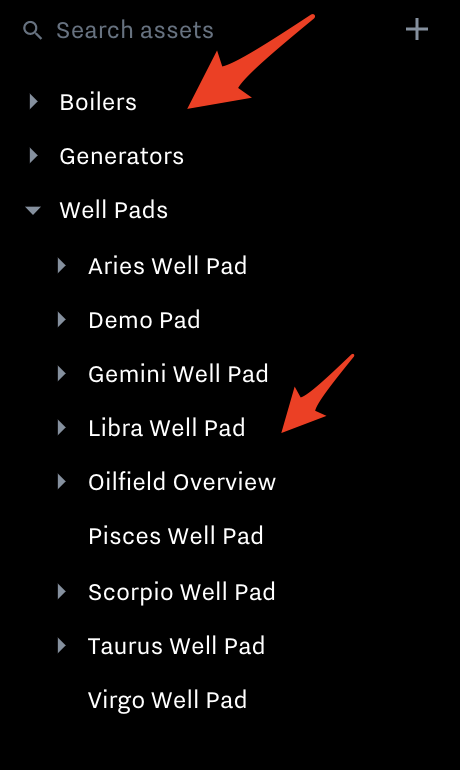 | 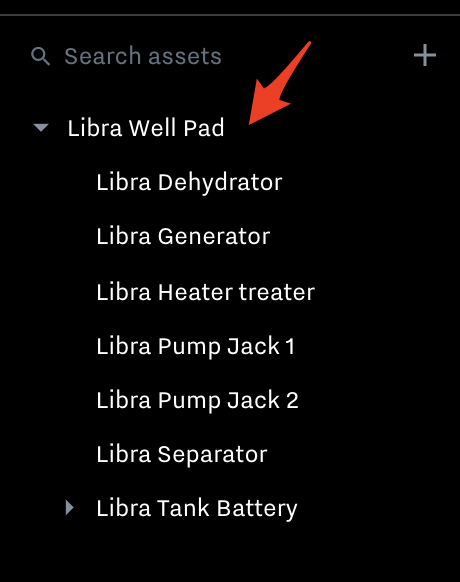 |