IG15 Expansion IO Module Cloud Setup
Summary
We will go through how to set up your IG15 Expansion IO module in the Cloud after it has been installed.
Activate Module
The IG15 Expansion IO Module does not need to be activated in the cloud, there is no serial number on the device to activate it with. However, the IG15 that the Expansion IO Module is connected to should already have been installed and activated in the cloud by using the serial number as shown in the IG15 Install Guide:IG15 Install Guide
Module Settings
There are no module specific settings that need to be configured to use the IG15 Expansion IO Module, it is plug and play. The digital and analog inputs have set functions, they can not be changed between sinking/sourcing or voltage/current inputs. Once installed, move directly to creating data inputs.
Create Module IO
To visualize the data streaming from the device, follow the steps and screenshots below:
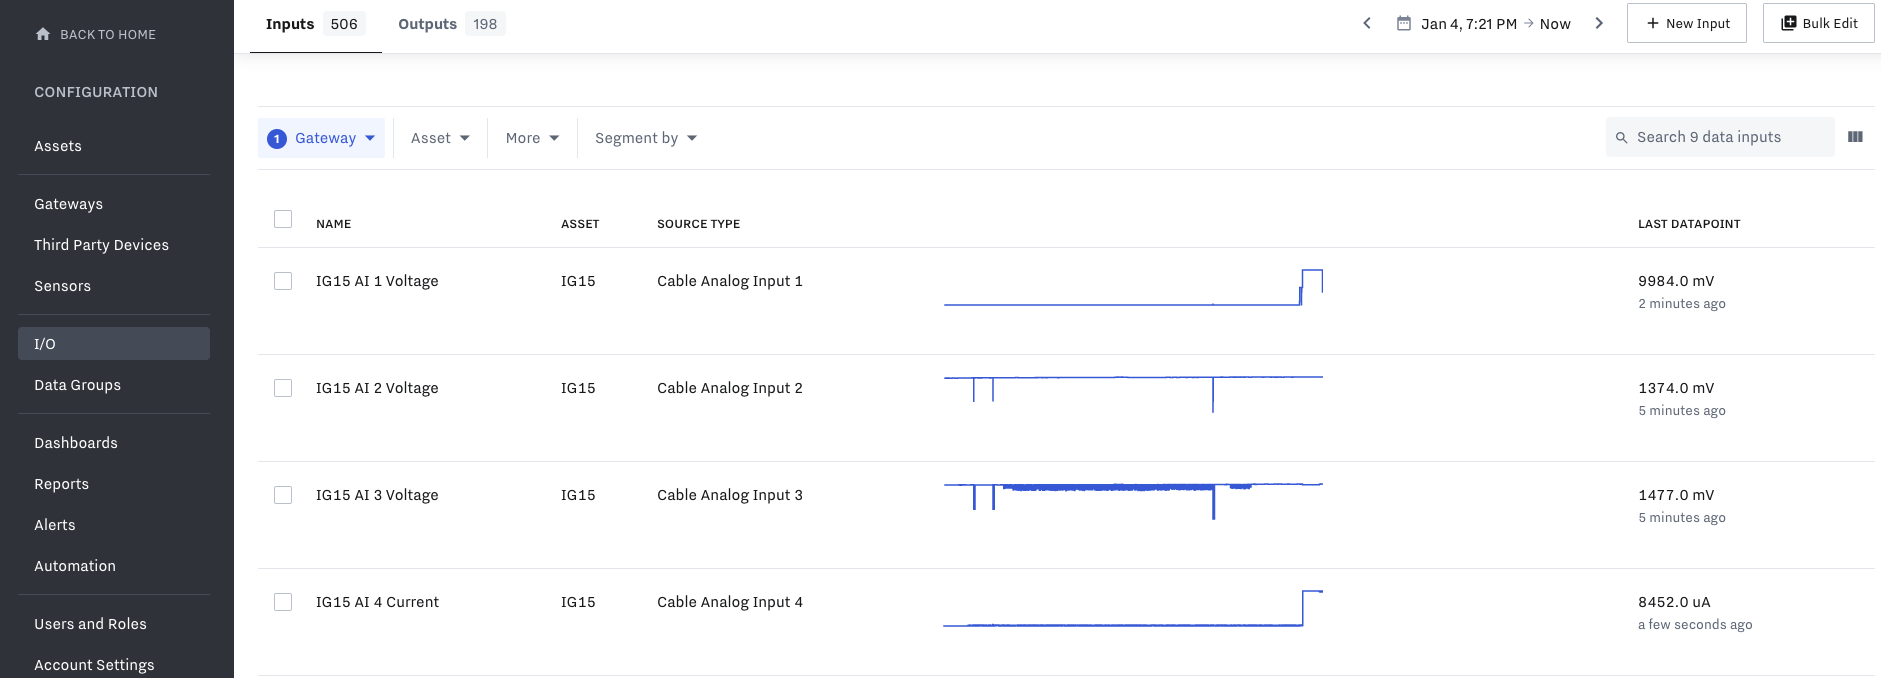
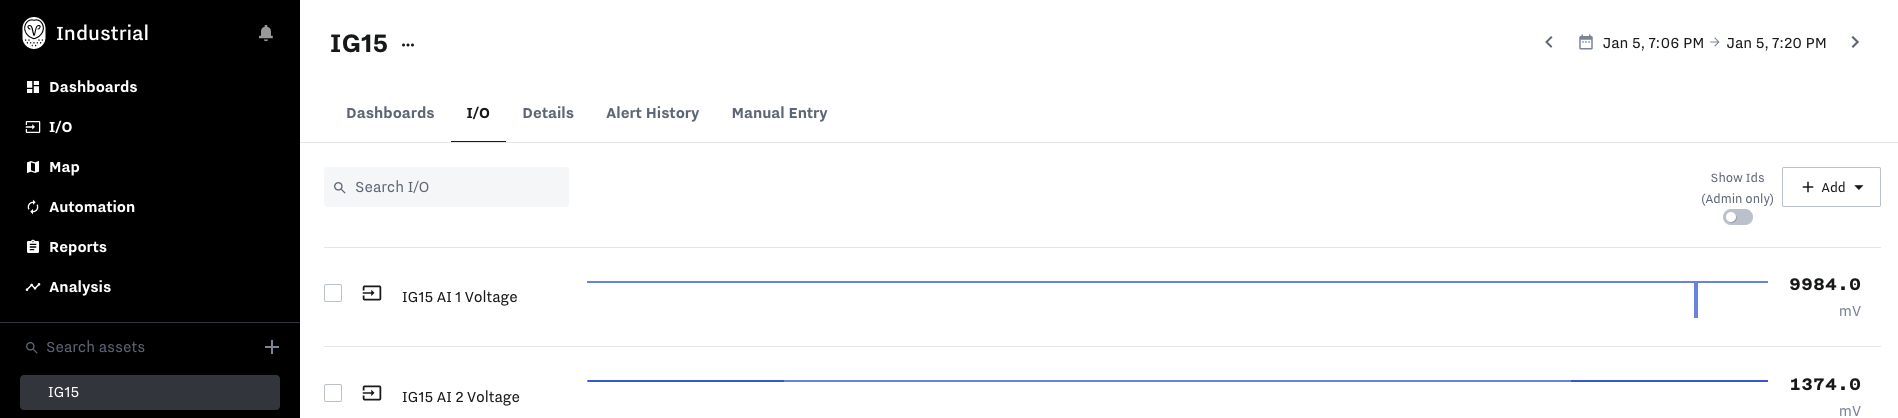
1. Navigate to the page where data inputs can be created then viewed. Create in the IO tab in the Configuration Page, then you can also view in the Asset IO page that the IO is assigned to.
IO Tab in the Configuration Page
Asset IO Page
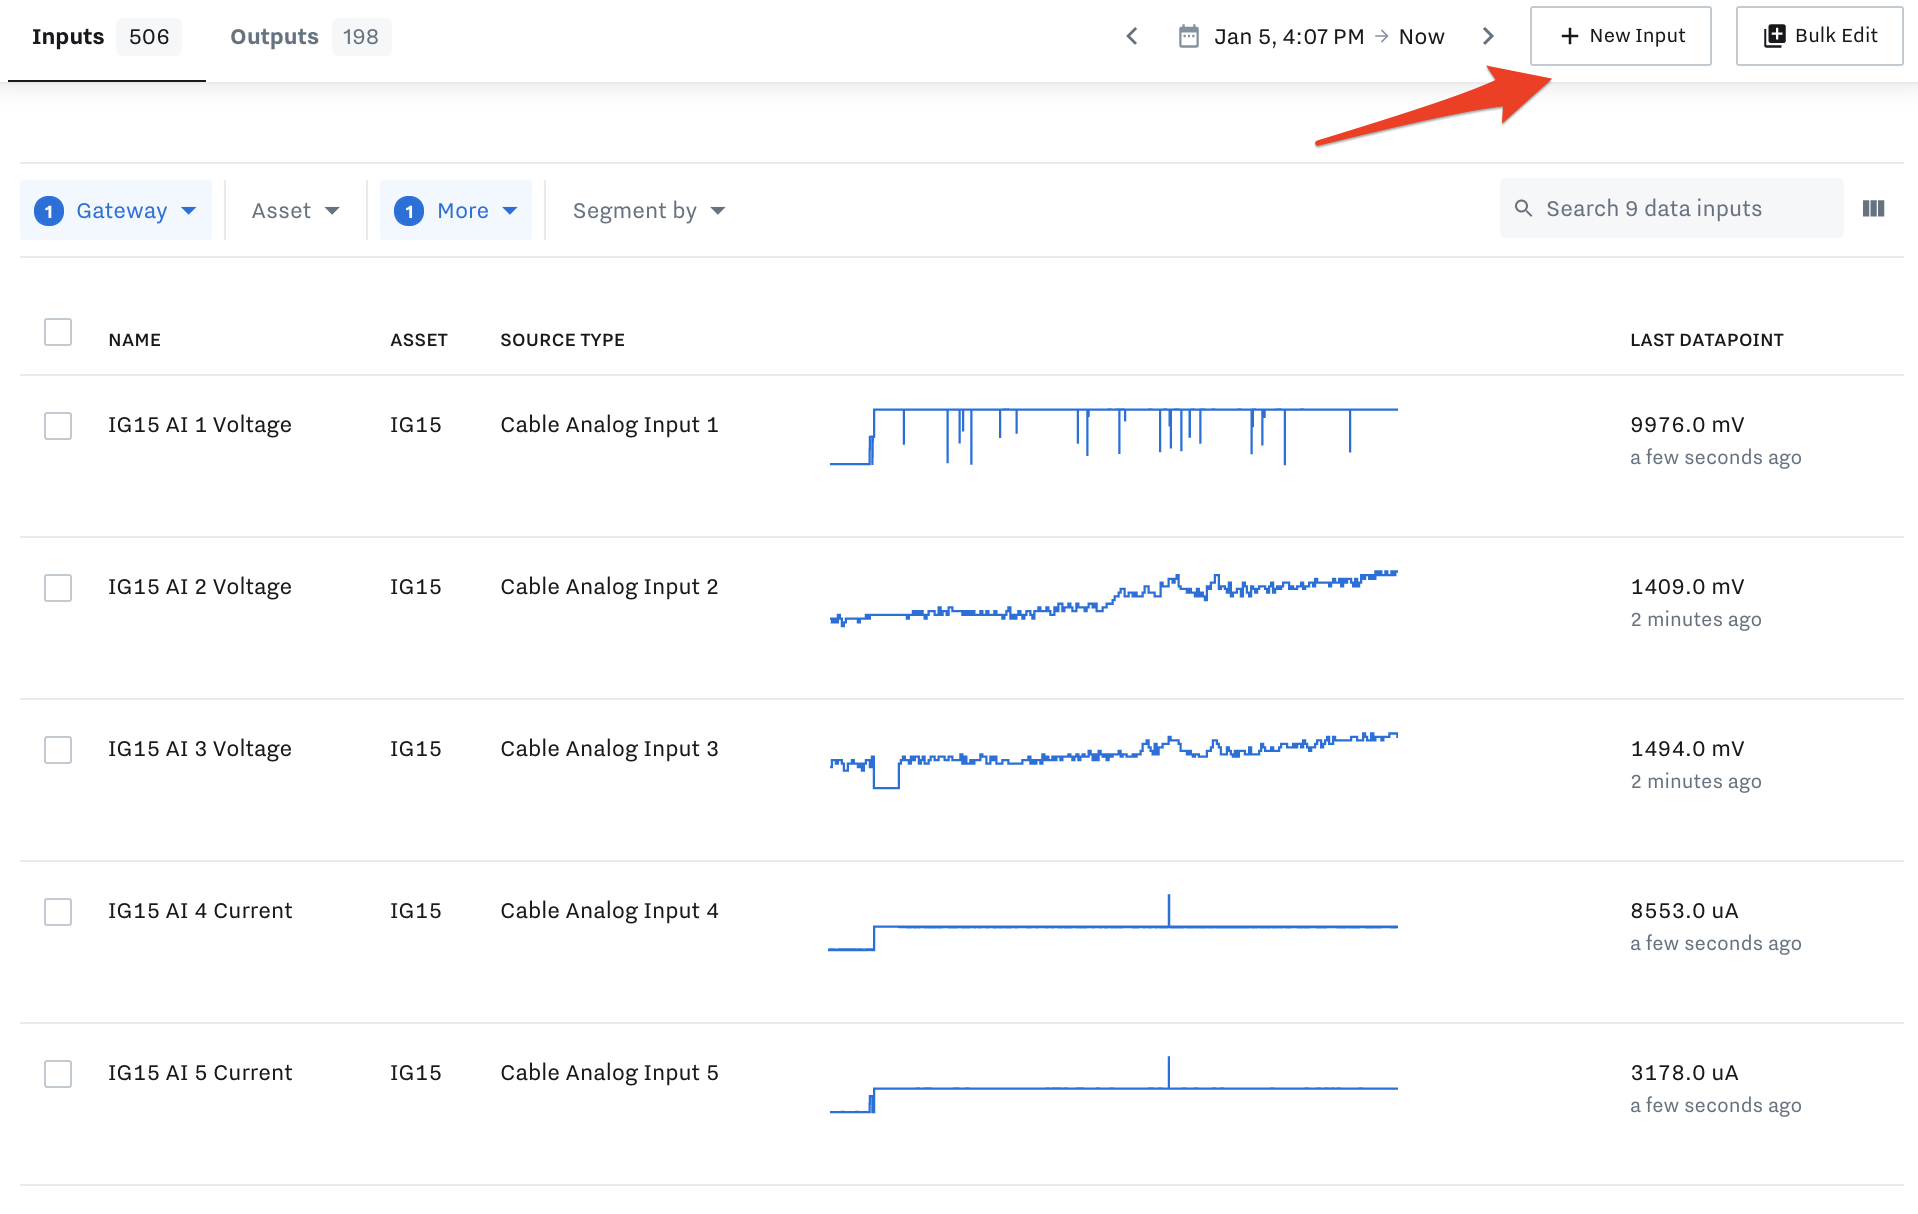
2. Click “New Input” in the upper right to bring up the New Data Input modal.
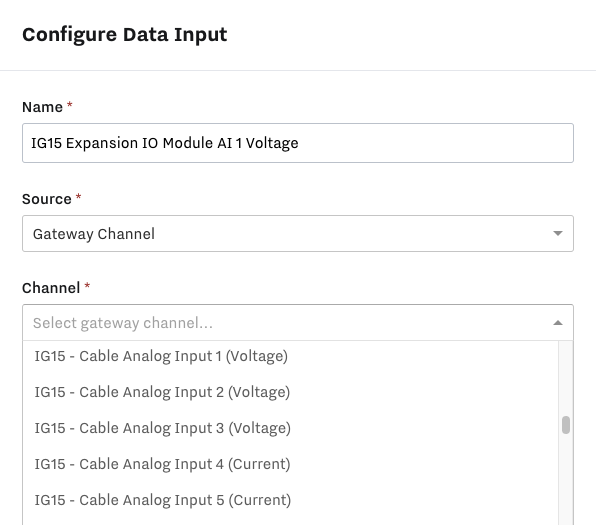
3. Name the input, select “Gateway Channel” for the Source, and select the desired channel from the IG15 Expansion Module. It should be noted that the Channel options will display “(IG15 Name) - Cable Analog Input 1”. The name of the IG15 can be changed on the gateway settings page: Set up Gateways in the Configuration Page .
4. Finish filling in the remaining fields on the data input modal as desired.
5. Repeat the process for as many inputs as needed. These data inputs can now be used on dashboards and in alerts like any other data inputs.