Gateway Channel Inputs for Digital and Analog IO
Summary
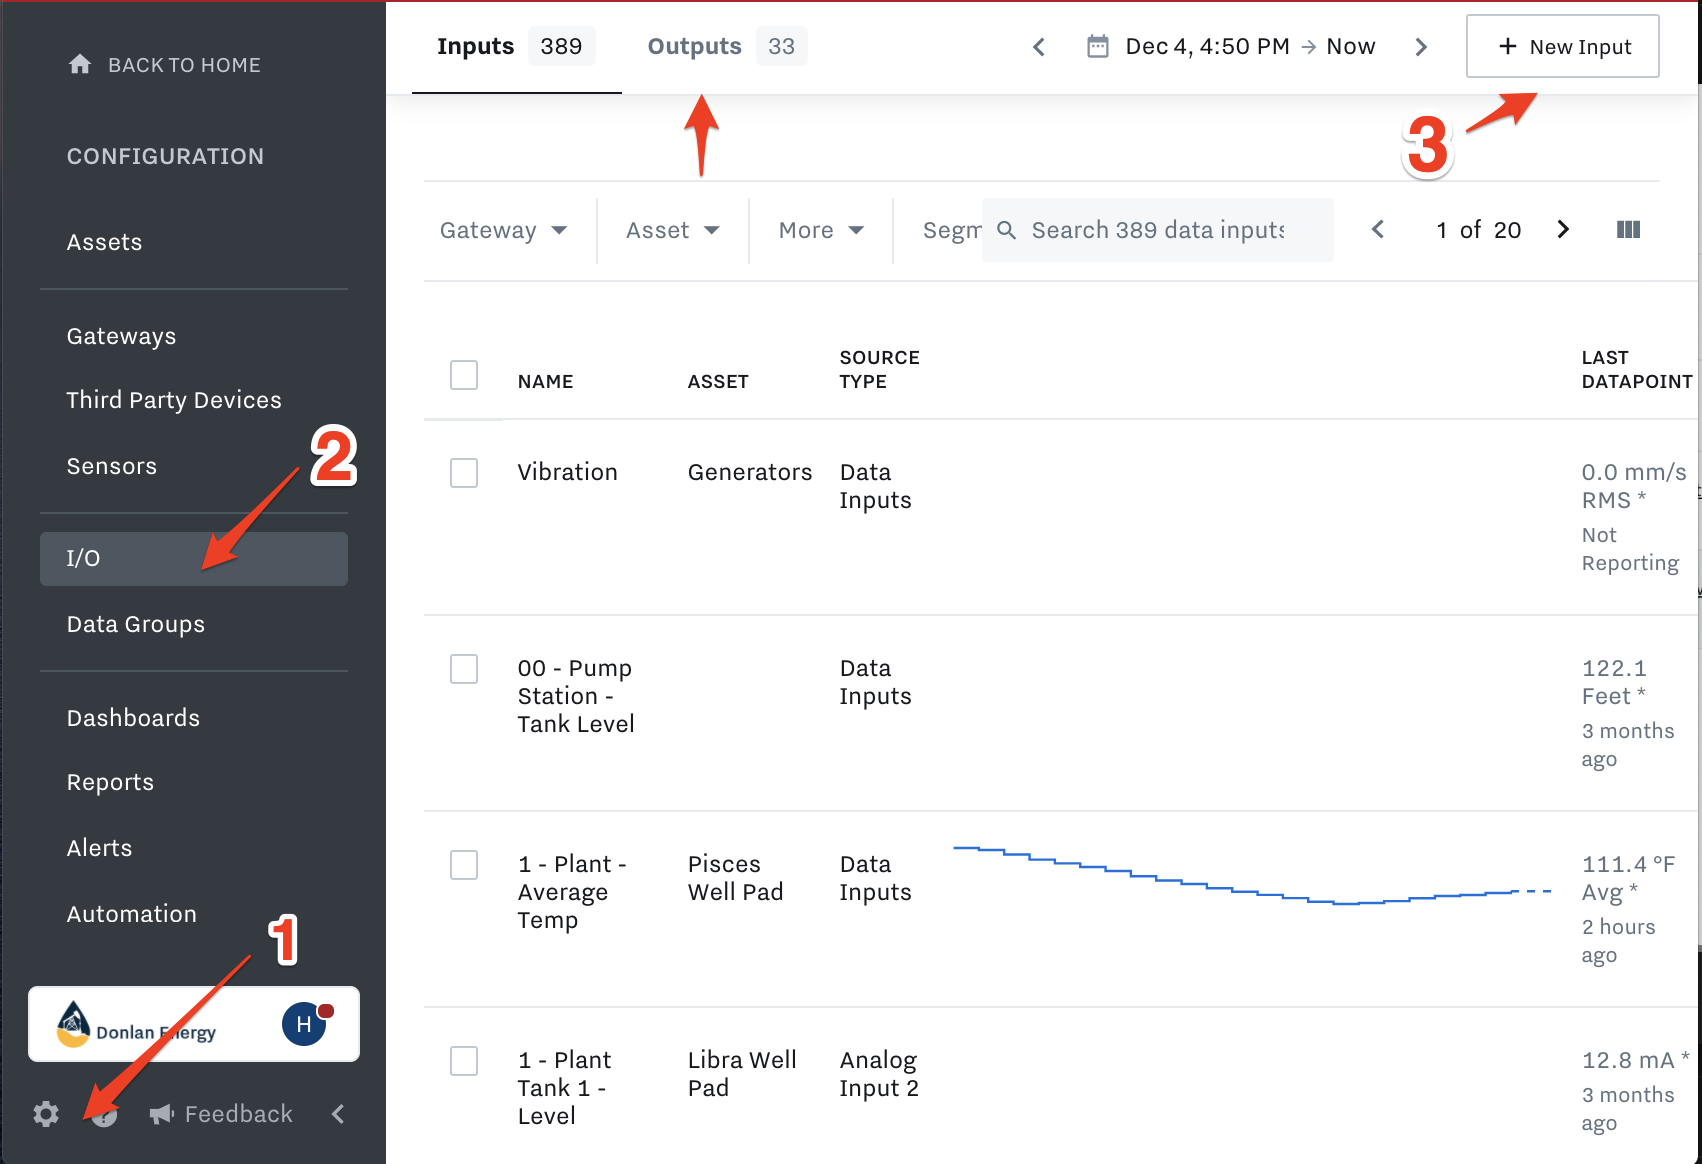
After you Configure your IO on the Gateway Channels (Learn how here: Configure Analog and Digital IO ) you can now create the data inputs. We will walk through those steps in this article.
Create Data Inputs for Digital IO
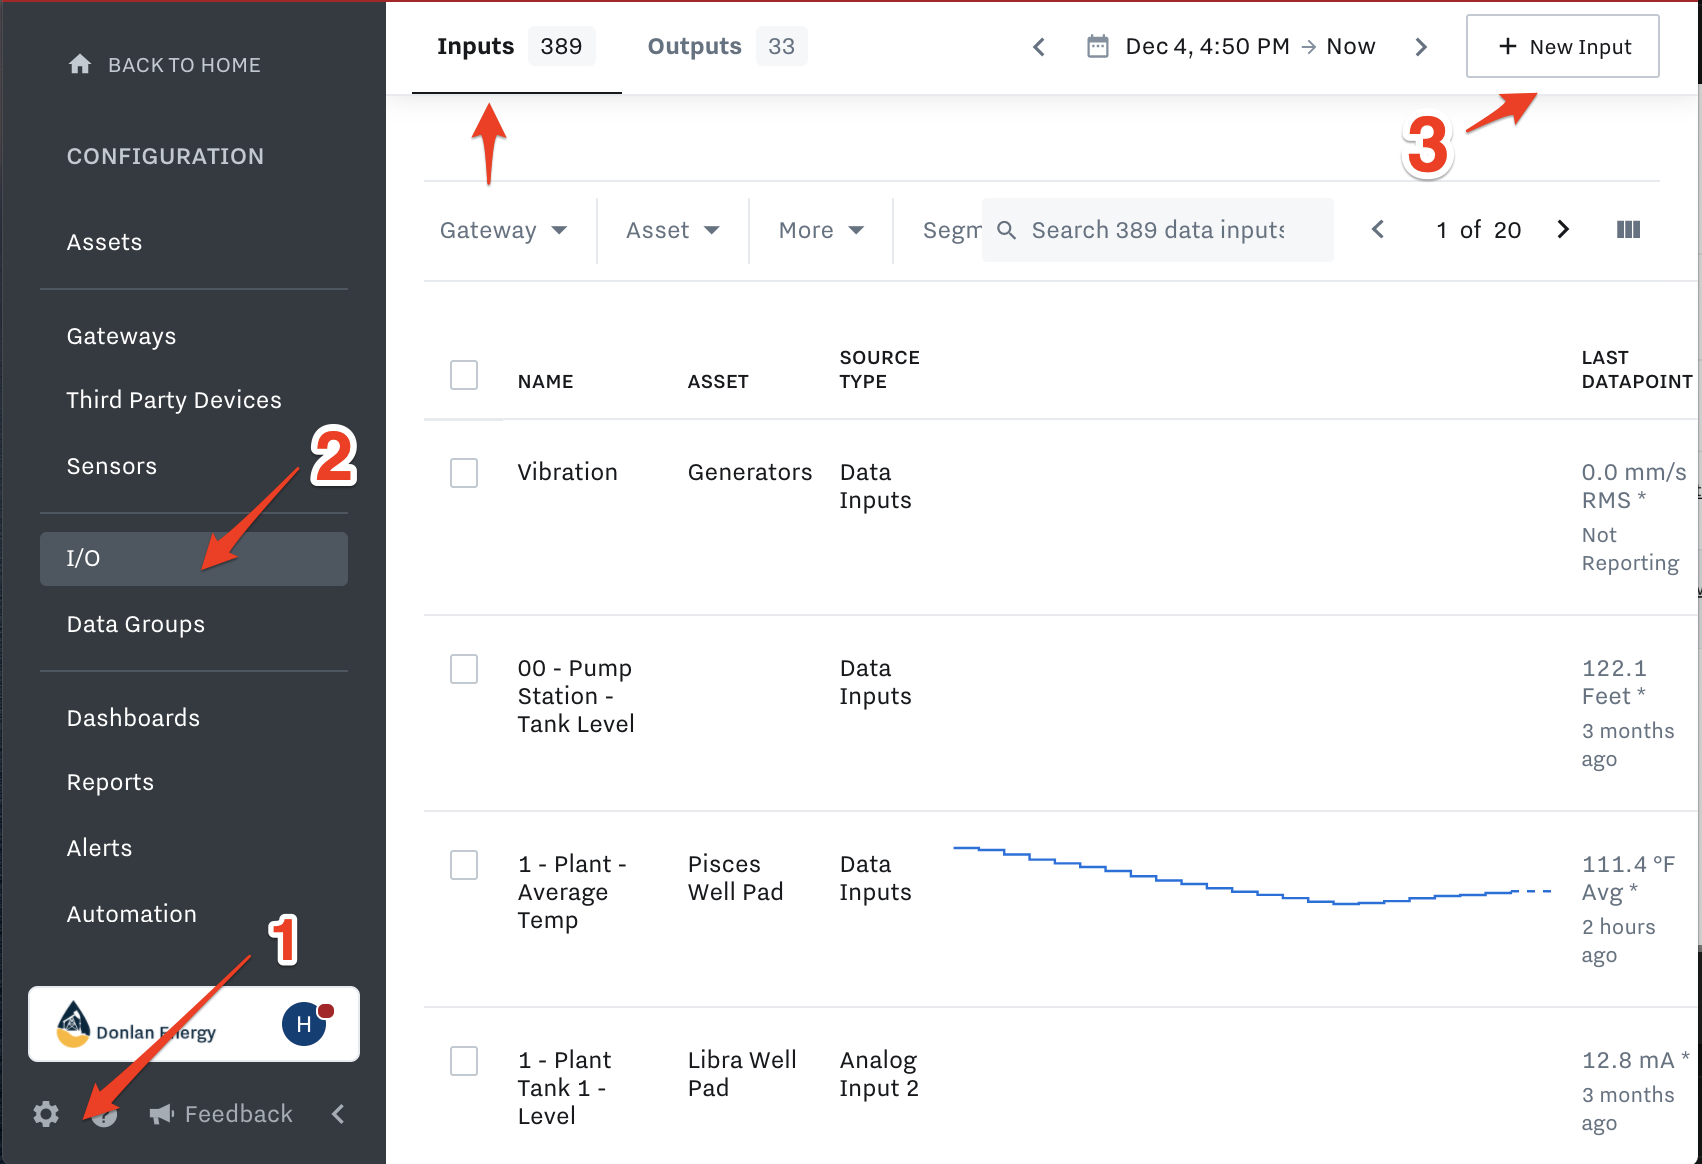
To create a Data Input navigate to Settings > Data Inputs and Configure New Data Input.
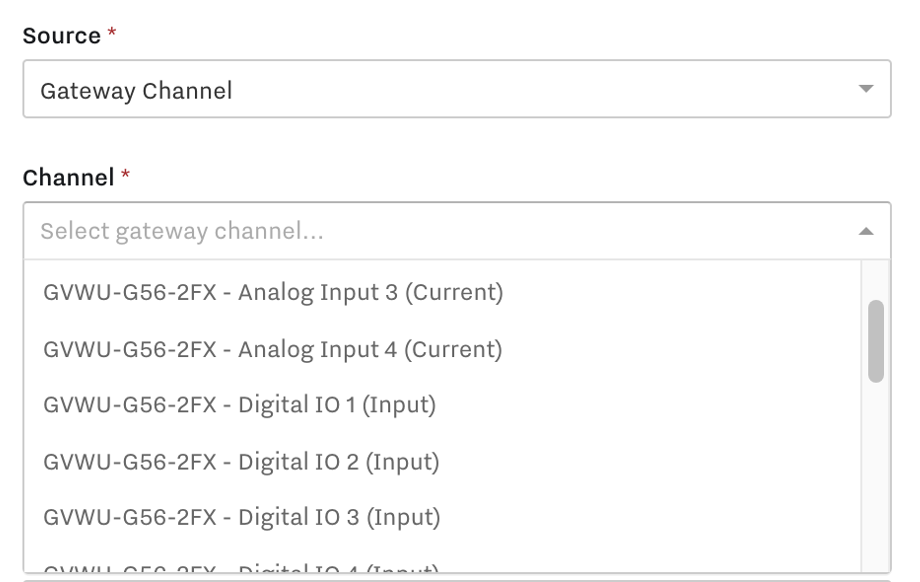
You can choose the Source Type as Gateway Channel and select the port that you’d like to use.
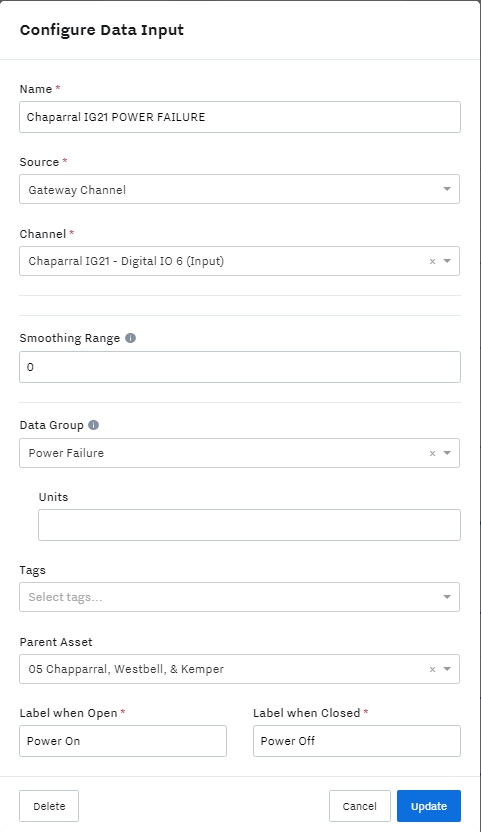
The fields following Channel are optional until you are asked to specify value open and value closed. These refer to the state of the contact being read by the input. The Value Open field is what will be shown when the contact is open (Normally the OFF state). Value Closed is what will be shown when the contact is open (Normally the ON state).
For normally closed circuits the logic may be reversed. If the state seems to be backwards simply swap the words in the value open and value closed fields.

Example of Digital I/O Input
Create Data Inputs for Analog IO
Once the input channel is configured, you need to make data inputs for use in the dashboard. Navigate to Settings > Data Inputs > +Configure New Data Input
A configuration screen appears with several fields and dropdown boxes.
Name: Name your Input. Read Best Practices here: Name Data Inputs and Outputs
Source: Choose Gateway Channel
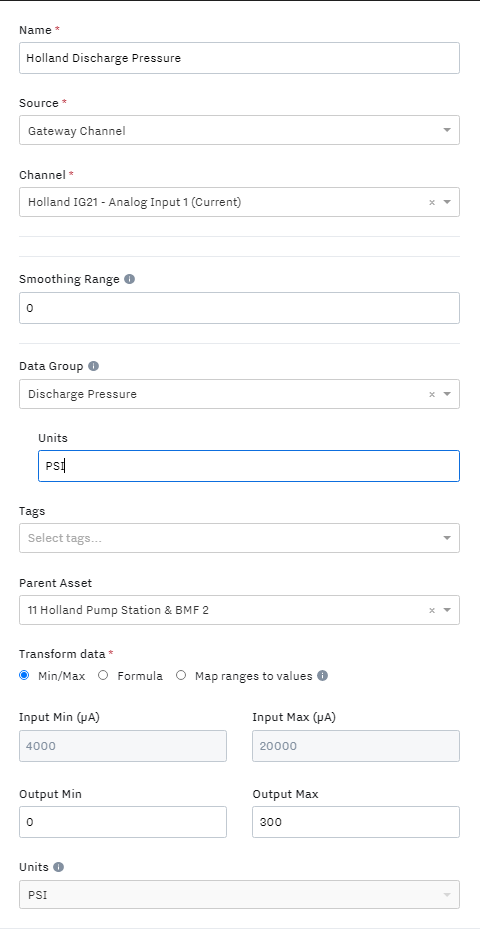
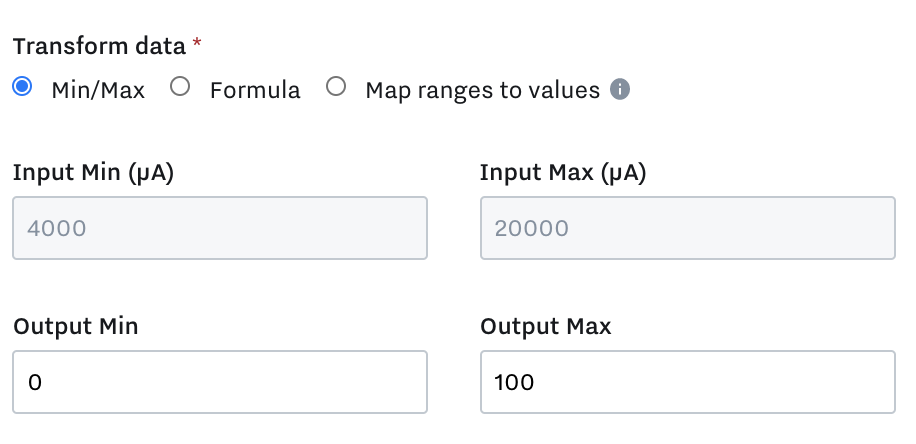
Transform data: The next section allows you to customize the scale of the input to match your application.
With a Current source, the input scale is fixed at 4-20mA (listed as microamps on screen). The output scale is entirely changeable and determines the dashboard value based on current input. Your analog sensor will most likely specify what its output range is and should match these fields. For example, if your 4-20mA pressure transducer read 0-100PSI, you would enter 0 for output min and 100 for output max.
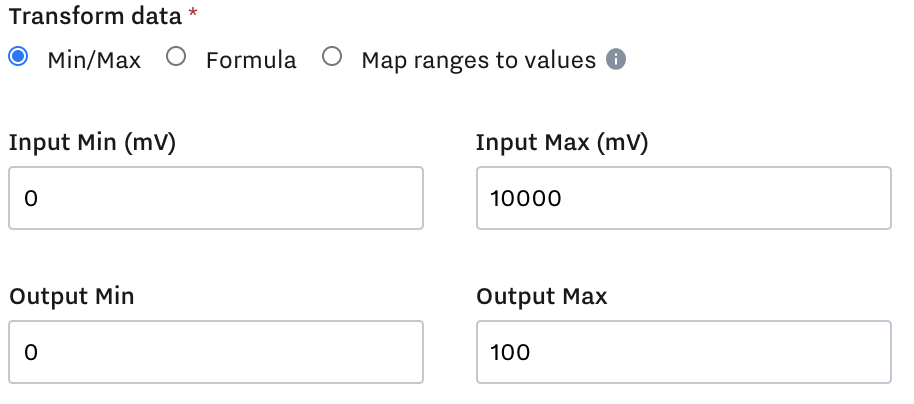
A Voltage source is slightly different in that the input range is also customizable. While many devices will output a 0-10V signal, 0-5V or others are also compatible with the IG21.
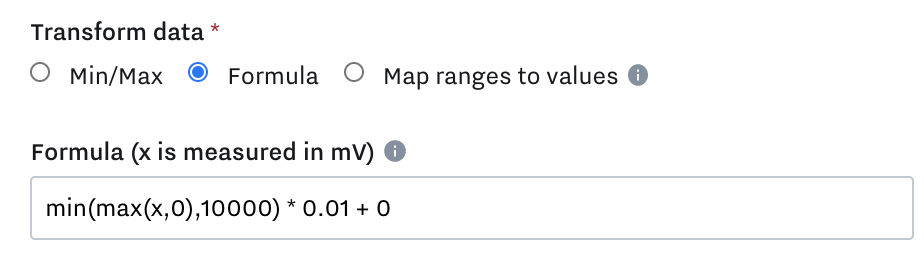
Alternatively, a formula may be selected and is useful for pulling raw data or performing mathematical calculations as the data streams in.
An example might be scaling values or creating an offset. Use 'x' for the raw data being measured. Notice the field populates automatically when switching over to this mode.
Finally, select the units and click Create. To create a custom unit, type in the field and select create option.
The input is now created and ready to be used. To edit its properties, click on it to bring the configuration window up.
Example of Analog I/O Input