Set up Third Party Device Templates
Summary
When you're managing many similar assets, Third Party Device templates significantly reduce configuration time. Rather than spending hours recreating third-party device configurations for each of your assets, third party templates allow you to clone third party device instances across multiple assets in just a few clicks.
Third Party Device Templates can be created in 3 ways: From Scratch, From an Existing Third Party Device, and From An Existing Third Party Device Template. We’ll cover how to create each type below.

Third Party Device Templates are currently supported the protocols: Modbus RTU, Modbus TCP, and CAN Bus.
Definition
An Instance is a third party device configured using a template. As long as an instance remains associated with a template, any time you make changes to the template, they will also be reflected in all of the linked device instances.
Instance IO is auto-created for every row in a Third Party Device Template.
How Third Party Device Templates Work
During a trial with Samsara initial Third Party devices are set up individually. Once the project expands into full implementation, it is time to use Third Party device templates to easily replicate across assets.
How these templates work:
Used to create with specific IO (e.g. Voltage) for a specific Asset from a specific Third Party Device on a specific Gateway
Populated with Data Groups (e.g. Voltage) as a generic representation for the IO
When the Template is applied to an Asset (e.g. Generator XYZ), the visualization will auto-create named IO (e.g. Voltage) associated with the Data Group (e.g. Voltage) for that Asset
When the Third Party Device Template is linked to a Gateway + Device, the Third Party Device Template will bring in the appropriate registers for the auto-created IO
Assets & Gateways are required to create an instance of the Third Party Device Template. An instance can be created one-by-one by adding both the Gateway and the Asset.
IO should be named generically instead of being prefixed by the Asset (e.g. “Generator XYZ Voltage”), as the IO will be applied to several Assets. The IO name should be similar to generic Data Group names (e.g. Voltage)
IO from a Third Party Device Template should interact with Dashboards, Reports, Alerts, etc. in the same manner as other non-Template IO.
Third Party Device vs. Third Party Template
Third Party Devices and Third Party Device Templates behave identically:
Define Third Party Device registers for a particular Gateway (on the instance, not the template)
Create IO and assign IO to assets (on the instance, not the template)
But Third Party Device Templates are easy to set up and maintain at scale:
Create 1 Third Party Device Template and apply to multiple assets at once
Make a change to the template and apply changes to multiple assets at once
Create Third Party Templates from Existing Device
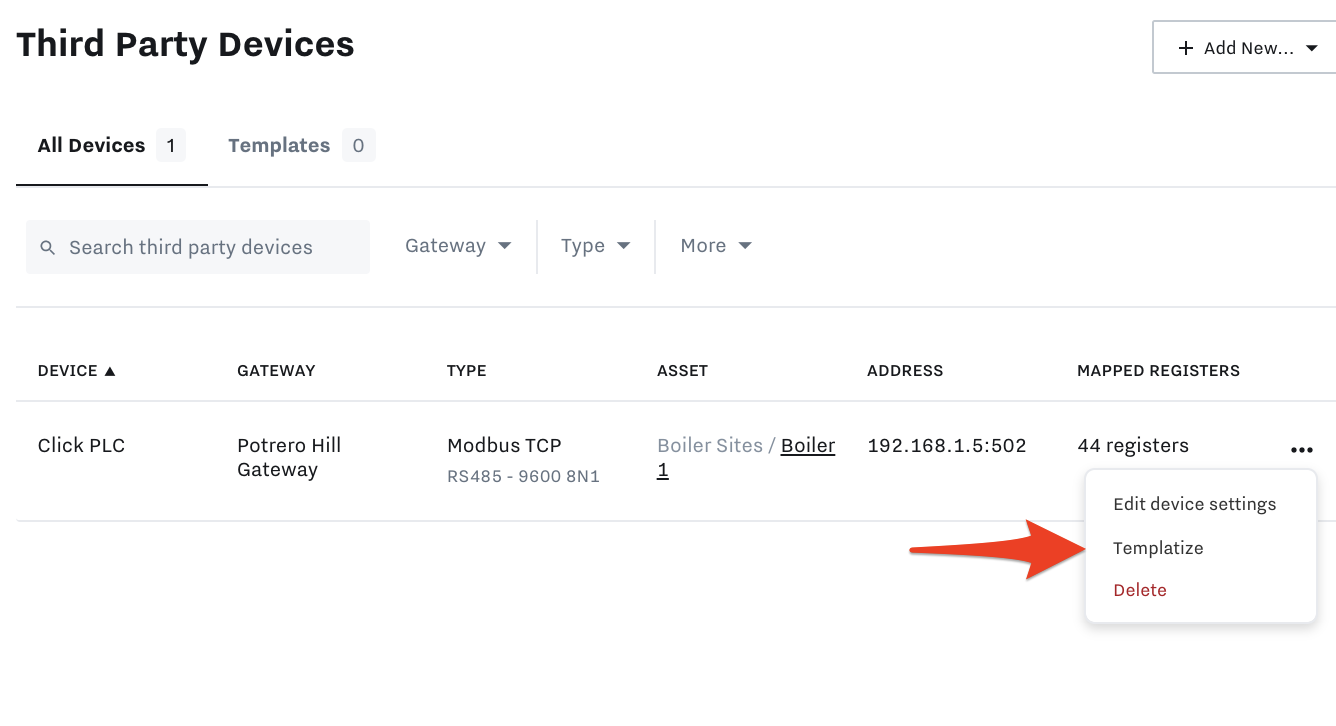
To create a template based off of an existing device, find the third-party device of interest in the ‘Third-Party Devices’ section of the Industrial configuration page. Next click the three dots on the far right-hand side of the page for the device and select ‘Templatize’.
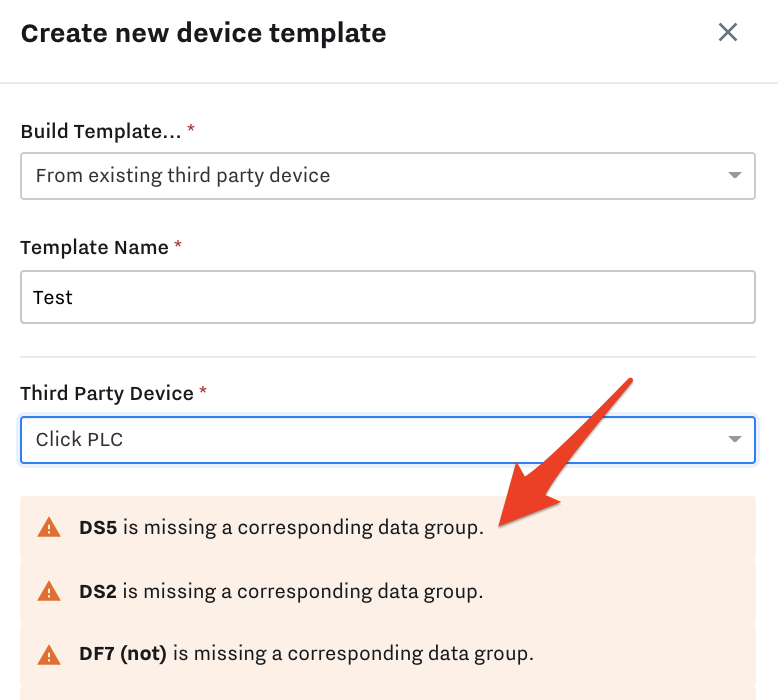
Name your template and select ‘Create’.

Once created, the Dashboard goes through the following conversion:
The “Asset” column is removed (since the Third Party Device Template is not associated with an asset)
The “Tags” column is removed (since tags are not relevant to the IO)
Data Groups need to be set for all I/O: You must have data groups configured for each of your devices registers (SPNs for CAN-based devices) in order to templatize an existing third-party device. If you attempt to templatize a Third Party Device that contains data inputs or data outputs without a Data Group, an error modal will appear letting you know which IO do not have the appropriate Data Groups, or which IO have duplicative Data Groups. At this point, you can go to the “I/O” tab to find the IO and ensure there is only 1 data group per row before attempting to templatize again.
There are certain elements of a Third Party Device that will not templatize. Instead, they will be defined on the instance. Specifically:
The “Asset” column is removed (since the Third Party Device Template is not associated with an asset)
The “Tags” column is removed (since tags are not relevant to the IO)
The “Gateway” association is removed (that is defined on the instance of the template)
Any “Networking” settings are removed (that is defined on the instance of the template)
Before creating the Third Party Device Template, you should specify the following:
Template Name - A generic name describing the dashboard for all assets (e.g. Generac Device)
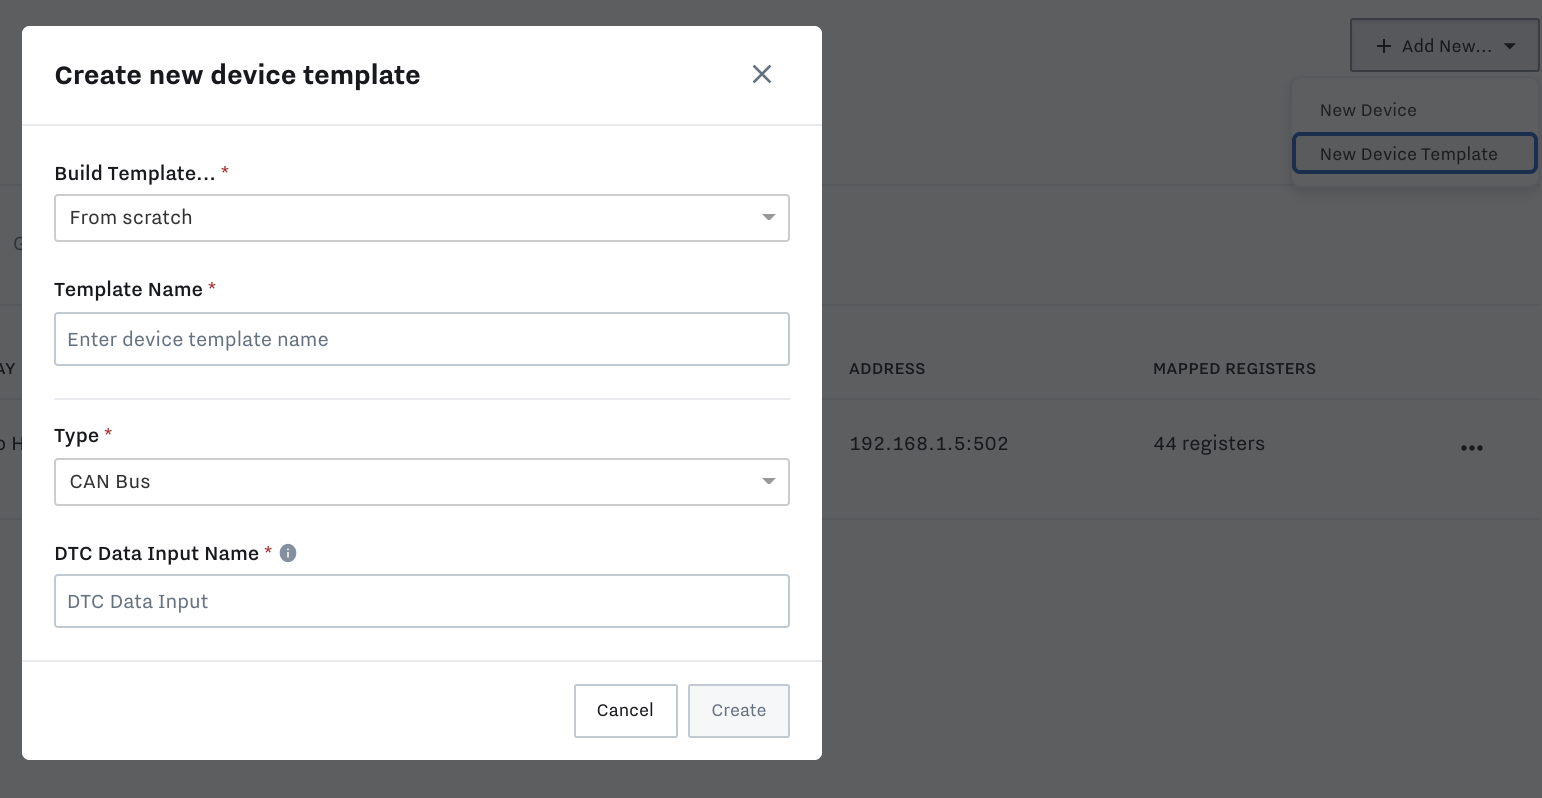
Create Third Party Device Template from Scratch
For integrators or customers that know they will only be assigning 1 asset to 1 device or will be expanding to many identical assets, they may elect to set up this Template from scratch.
Follow the following steps:
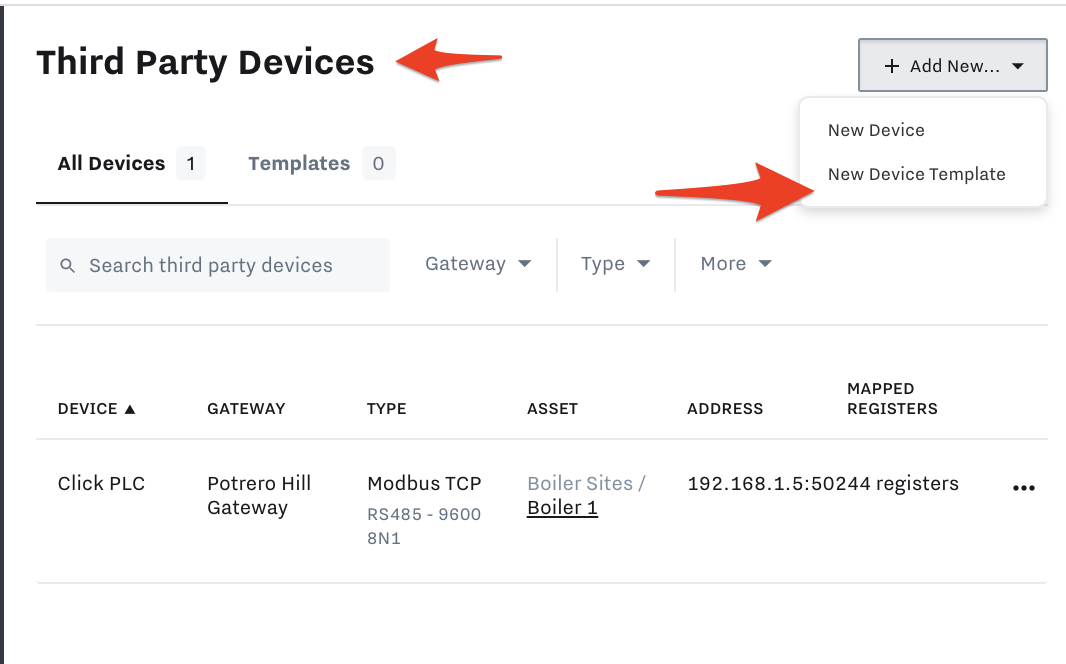
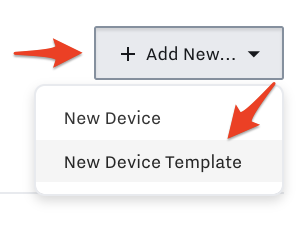
Click "Add New…” , then select “New Device Template.”
Define the build “From Scratch” (capability exists to also build from existing Third Party Device)
Define the generic Template Name (e.g. Generac Device)
Specify the protocol type
Configure protocol-specific settings:
CAN - set the “DTC Data Input Name” that will apply to all instances
Modbus TCP - define the default networking settings
Modbus RTU - define the default networking settings
Once you have selected your device type, adjust your device’s settings appropriately. For reference, you can find more detail on basic configuration of third-party devices: Create Third Party Devices
All networking settings will be defined and saved on a per instance basis. It will not be possible to edit the networking setting on the template and have it populate to all instances. However, you can define the default networking settings that will appear when defining the instance.
Create a New Template from Existing Templates
For integrators or customers looking to use another Third Party Device Template as a starting point for creating a new Third Party Device Template, the user has 2 options:
Duplicate an existing Third Party Device Template (from “Template” tab)
Create a Third Party Device Template from Another Third Party Device Template
Duplicate an existing Third Party Device Template
Click "Add New…” the user can select “New Device Template.”
Define the build “From Existing Template”
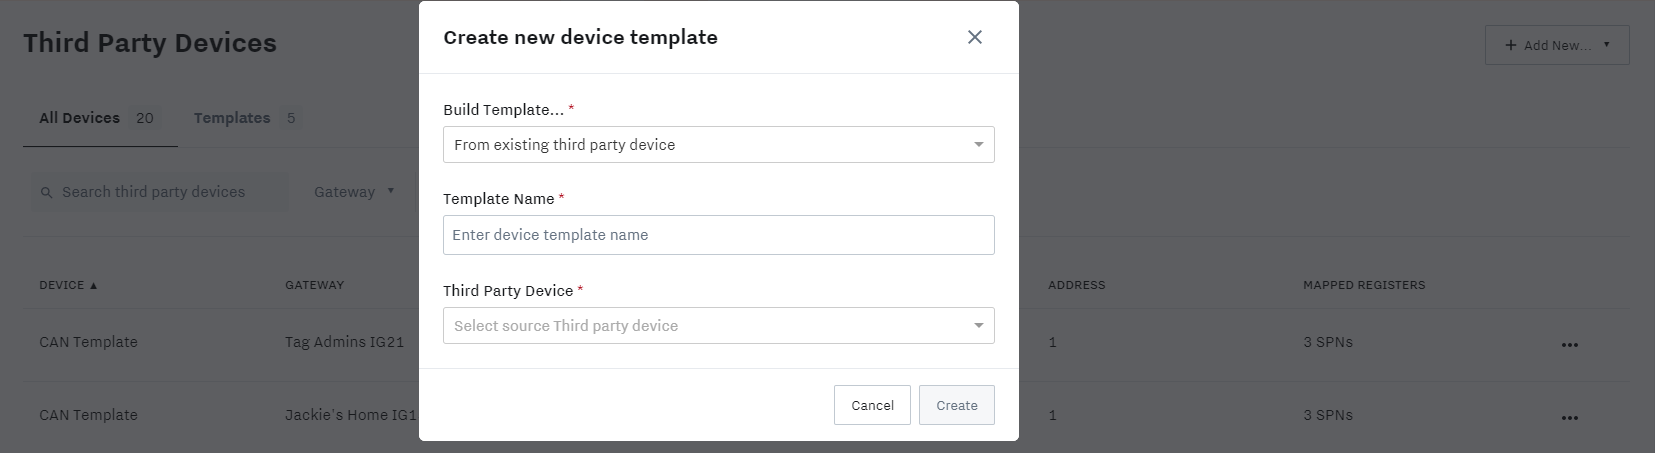
Define the generic Template Name (e.g. Generac Device)
Specify the existing 3PD Template to use a starting point
All networking settings will be replicated in the new 3PD Template. You can now make any changes to the template and apply to new assets without affecting the original template.
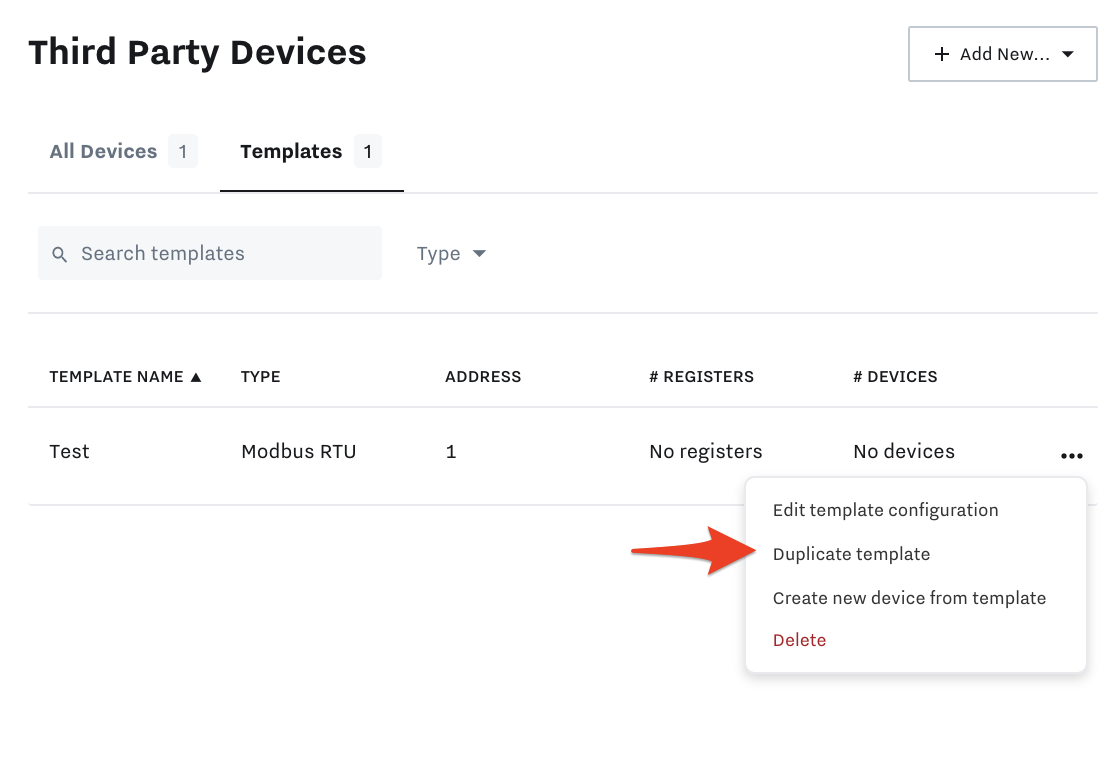
Create a Third Party Device Template from Another Third Party Device Template
Navigate to and select the template you would like to clone, then select the “Duplicate Template” button.
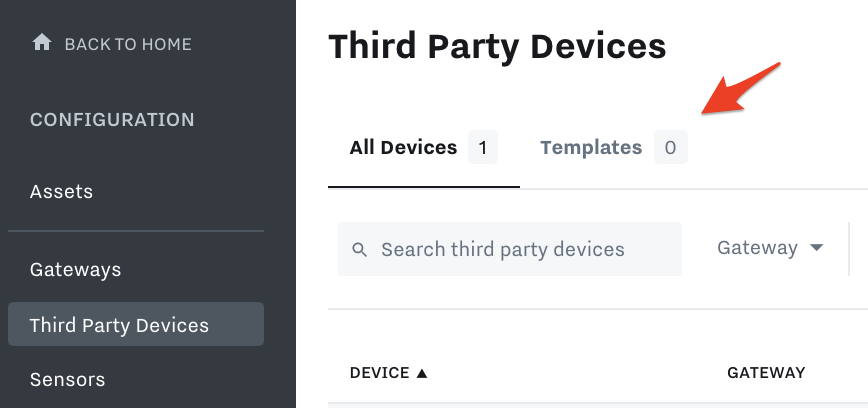
View your Third Party Device Templates
You can access all of your templates by clicking on the ‘Templates’ tab from the ‘Third-Party Devices’ section.
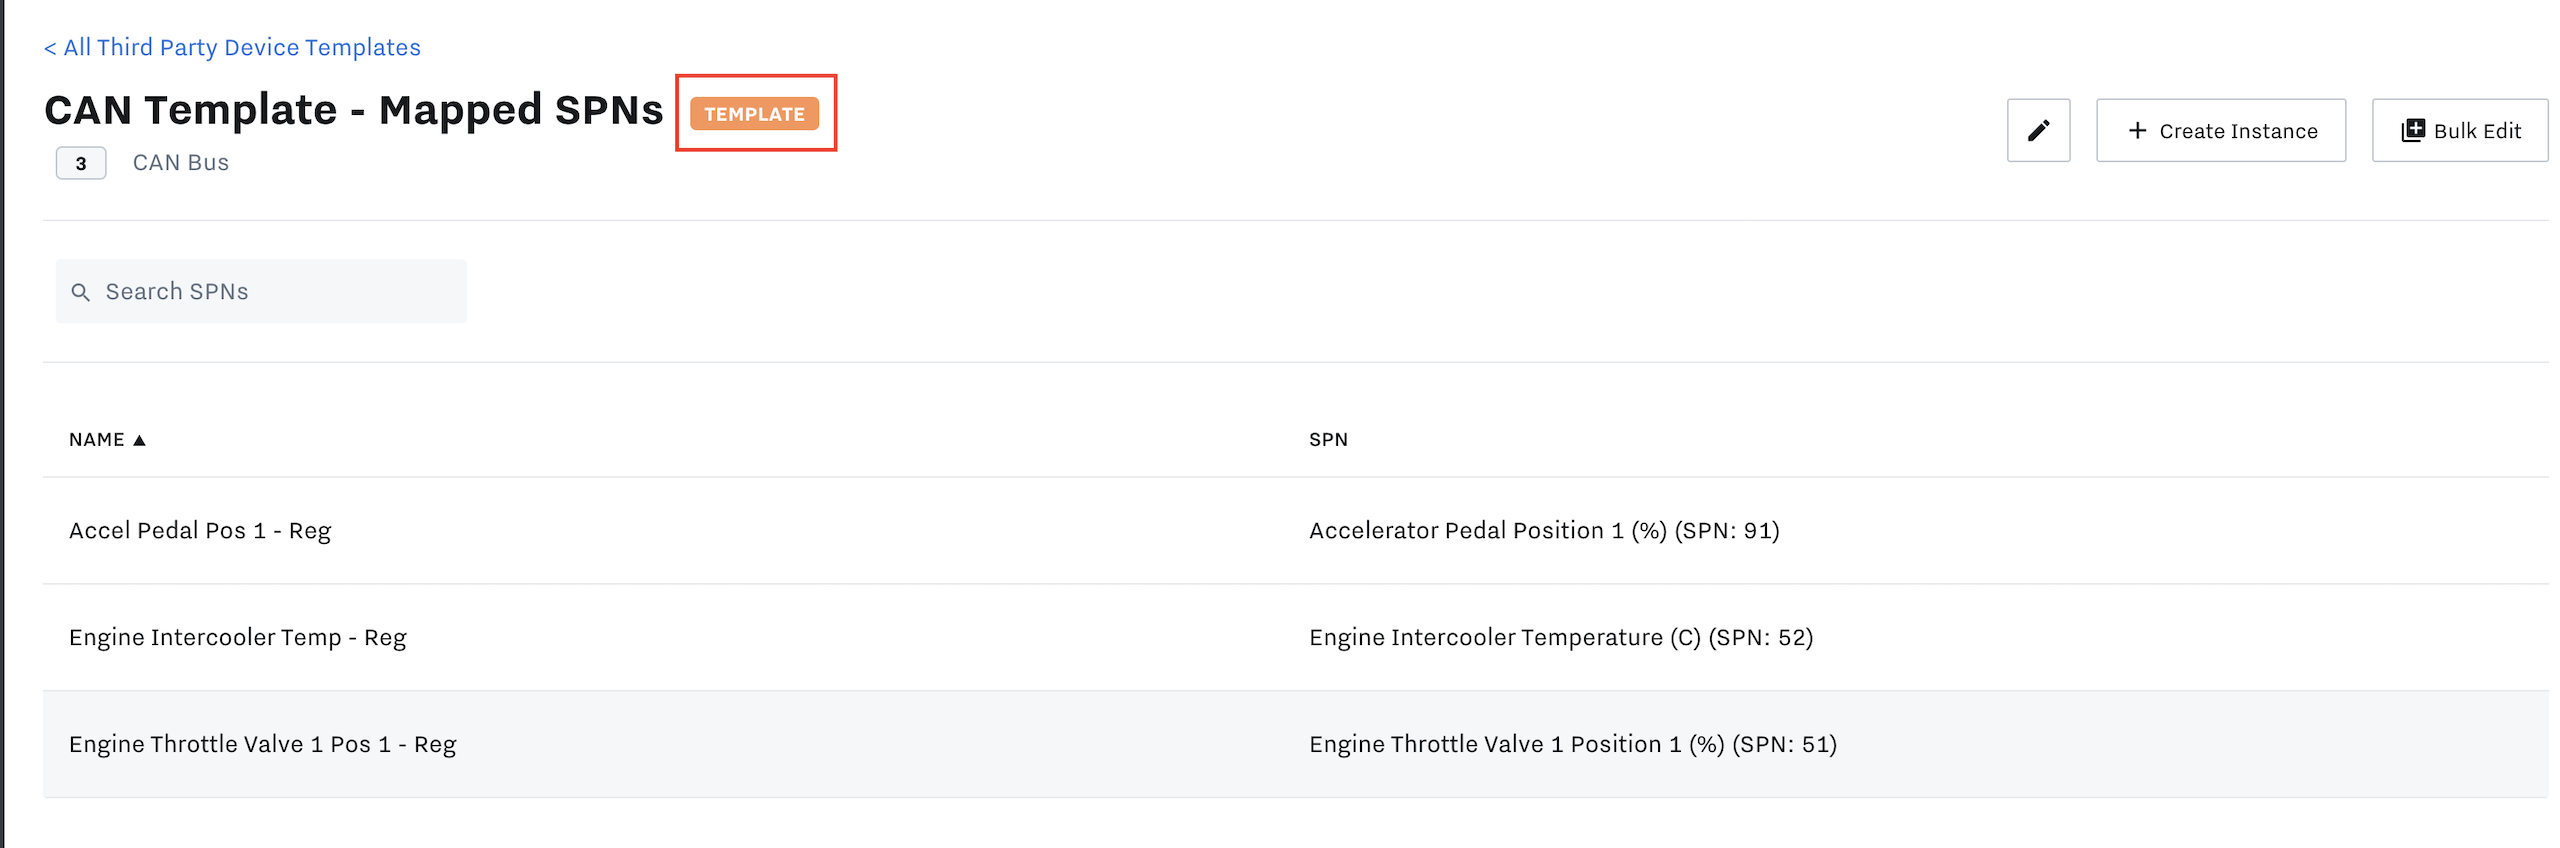
When you click into your newly created template, you’ll see an orange template indicator at the top of the screen, next to the template’s name.
Create a New Device Instance Using a Template
To create a new device instance from an existing template, navigate to and select the template you would like to clone, then select the “Create new device from tempalte” button.

Choose your gateway, select the asset to which you’d like to assign the device and then select ‘Create’. This will create a new instance of a third-party device with the same I/O for a different asset.

Note: Assigning a device template to your asset will unassign already associated third-party I/O
Instances and Updating Templates
An instance is a configuration that has been created using a template. As long as an instance remains associated with a template, any time you make changes to the template, they will also be reflected in all of the linked instances.
Each template also displays how many instances will be impacted by the change.

Similarly, when you view a data input created based off of a template, it will have an orange ‘view-only’ indicator. To edit these data inputs, the template must be edited or the device with which they are associated must be unlinked from the template.

Impact to Instances when Templates are Edited
Any change made to a 3PD Template setting or a register on the 3PD Template will be made to all instances of the 3PD and the associated 3PD IO (e.g. formula, unit change, IO name change). If a change fails to update on any of the associated 3PD instances, the entire update will be rolled back, so all 3PD instances follow the exact same configuration.
A 3PD Template can only be deleted if there are no more associated children. Instances can be removed from a 3PD Template by going to the “All Devices” tab, filtering to the applicable 3PD Template, and then deleting (or “unlinking”) one-by-one.
Unlinking Instances from Templates
If you no longer wants a 3PD instance to follow the logic of a Template, you can unlink the instance from the template (from the “All Devices” tab). This action cannot be undone, so a notification will be prompted to the user.
To unlink an instance from a template, navigate to your instance in the ‘Third Party Devices’ section of the configuration page, select the three dots on the right hand side of the page for your instance and click ‘Unlink from Template’.