Add Third Party Device Registers with the Bulk Edit Tool
Summary
In this Article, we will go through how to add registers in the Cloud.
Note: This tool does not currently support Modbus ASCII or OPC UA
Bulk Edit Tool for Registers
The Bulk Data Setup Tool helps easily set up the registers, pins, or tags from your third party device and automatically create data inputs or outputs. This saves time for deployments that have a large number of registers, pins, or tags to map in the system and makes it that much easier to get up and running.
Before adding registers, first configure the Third Party Device: Create Third Party Devices
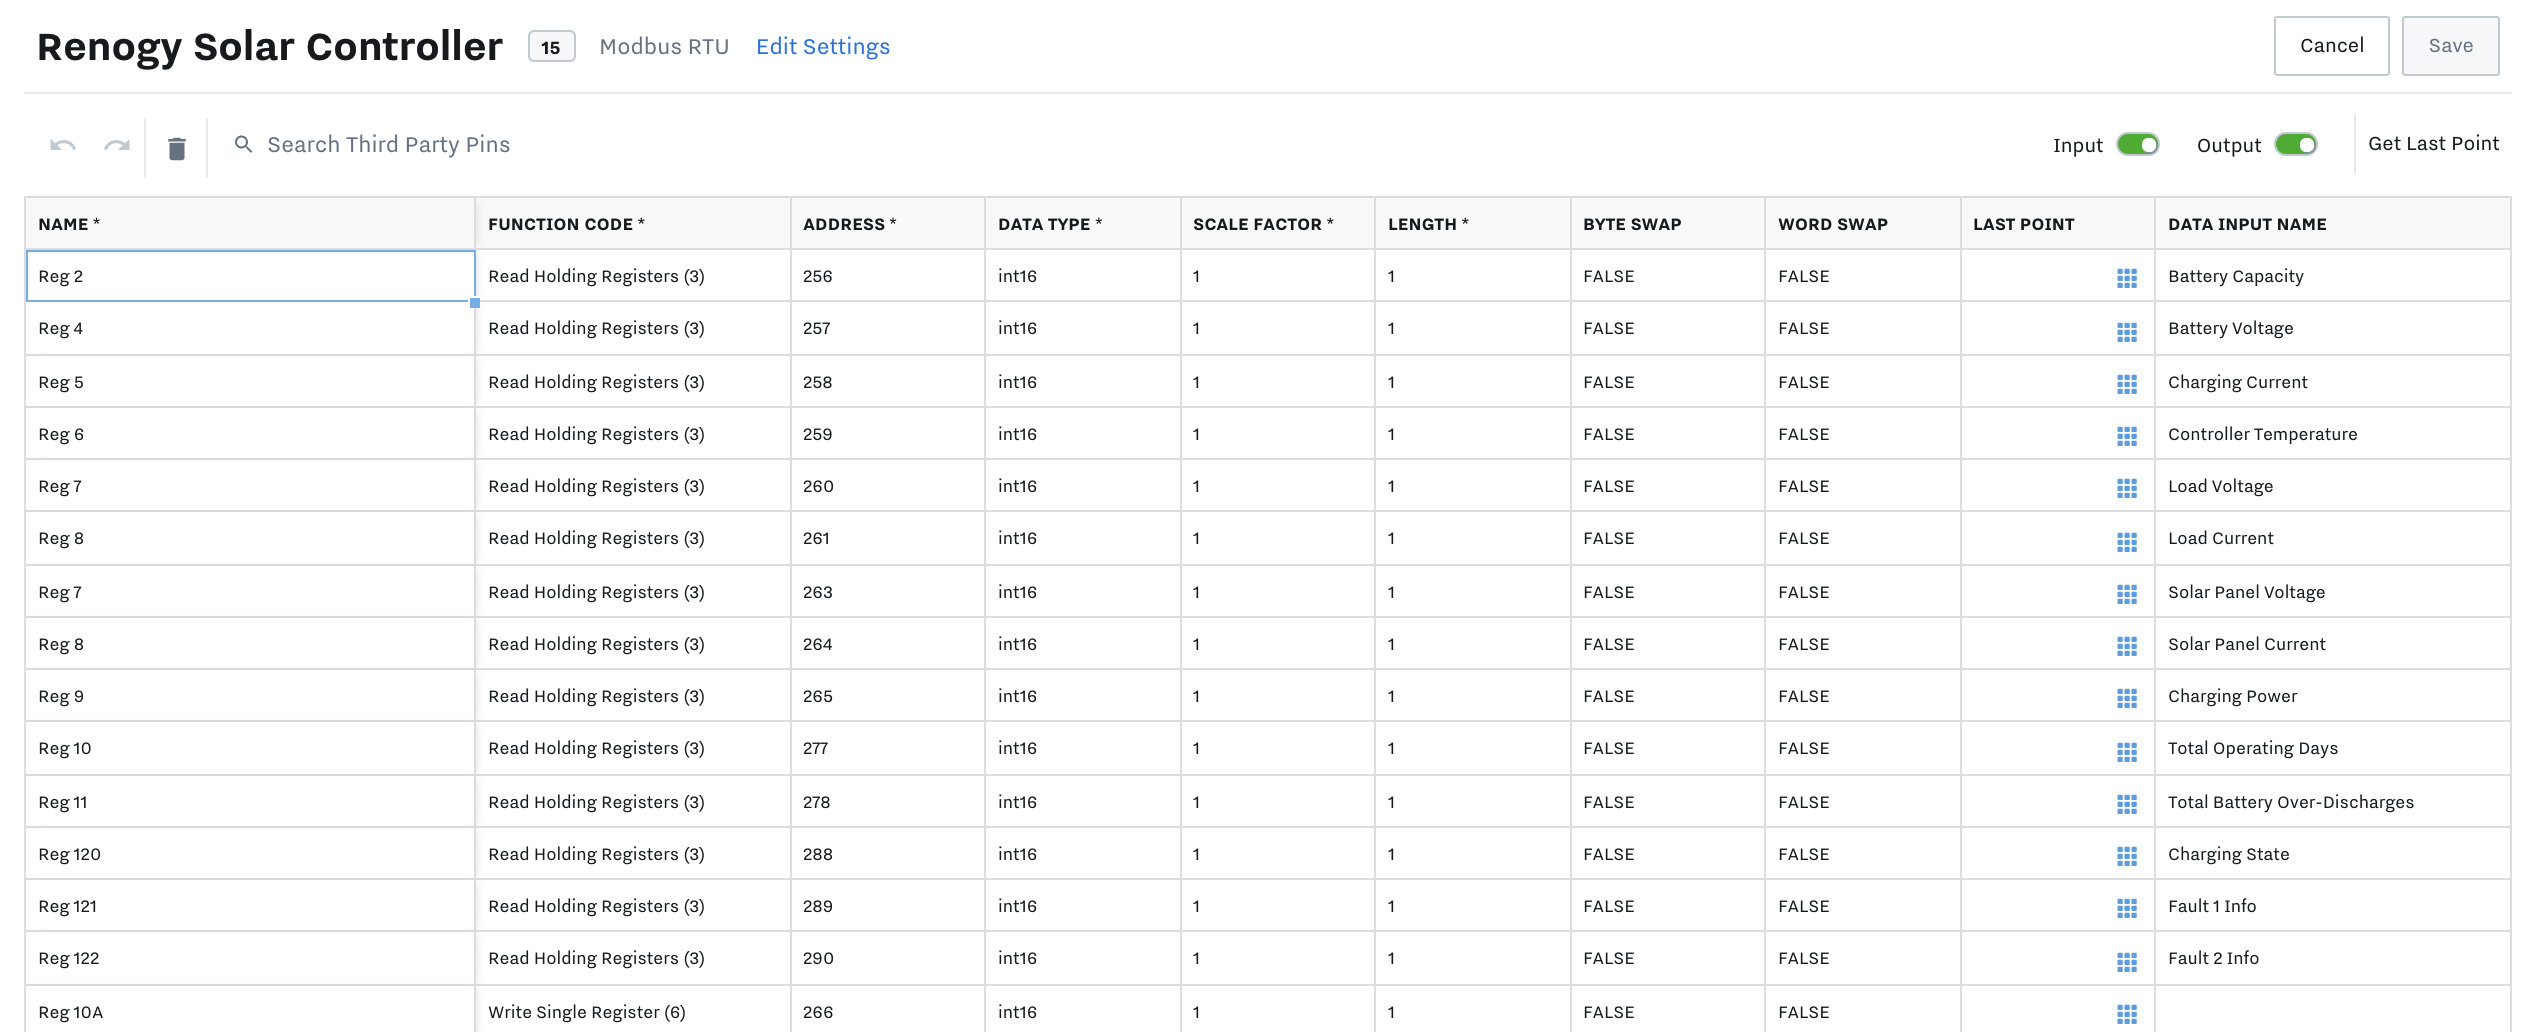
Once the device is created, click into Device > click Bulk Edit

Now you will be able to copy and paste from an excel spreadsheet of registers, pins, or tags, multi-select and edit data, search for specific registers, and toggle view for data inputs, outputs, or both. The column headers will be pre-configured for each device type.
Create and Update Registers
Each row represents one register. To edit an existing register, simply click in and update the fields you want to change. To add a new register, fill out the fields of a blank (new) row. You can add and edit multiple registers at a time.
Delete Registers
Select the registers you want to delete by:
Clicking an individual registers
Click and drag to select a range of registers
Click the checkbox at the top to select all registers
To delete a register, click the Trashcan icon in the menu bar. Then click “Remove selected rows”. As with all changes in the spreadsheet, your changes will only be saved once you click “Save”.
Copy and Paste Registers
You can copy & paste within the bulk edit tool to and from an Excel or Google spreadsheet. IMPORTANT NOTE: Pasting over an existing row will not delete the register and replace it with a new one; it will just update the existing register. This WILL change data inputs that you already have associated with alerts, dashboards, reports, etc., so only do so with caution.
Undo Changes
You can click the Undo or Redo buttons (or use common keyboard shortcuts) to undo or redo your last cell edit. If you need to, you can also click “Cancel” to revert to the last saved state.
Save
Once you hit save, all of the data inputs or outputs will be automatically created and available in the Data Inputs or Data Outputs tab in the left side settings bar.
Selecting Input vs Output
To specify whether you want to create a data input, output, or both, update the “Read / Write” dropdown column (“Read” → Input, “Write” → Output, “Read / Write” → Input and Output).
Note that for Modbus, you will use the Function Code column to determine whether a register should have an input or an output.
If you update the Read / Write column for a register that already has a saved input or output, it will update the input or output to match the new value. For example, if you switch from “Read” to “Write”, the input will be deleted, and it will create an output. If you switch from “Write” to “Read / Write”, it will leave the output as-is, and create an input alongside it.
Optional Fields
All of the fields created for the data inputs or outputs are optional, and if you leave them blank, they will be filled in with default values. Notably, if the “Data Input Name” field is left blank, it will automatically be set to the name of the associated register. If you want to override any of these default values, you can fill them in while creating your data input or output, or update them later after they are created.
Dynamic Options
Some fields have options that are unique to your organization - for example, Data Input Type and Associated Asset. For these fields, you can click the blue button in the cell to bring up a modal, where you can search for a value for that field. If you already know the name you want to enter, you can still type or paste it in.