Set Up and Manage Data Groups
Summary
Data Groups are generic representations of data inputs or outputs in that you assign to unique I/O in Samsara Industrial platform. They allow the platform understand that two or more unique I/O between two or more different assets represent the same type information. They are then used to map those I/O to the right places inside of templates.
In this article, we will walk through Data Groups and how to use them to set up your Samsara Cloud organization.
Note: If you only have a few assets for your Trial, you do not need to use Data Groups quite yet. Data Groups are needed when you have multiple assets to manage and provide the ability to scale assets easily.
Navigate to Data Groups
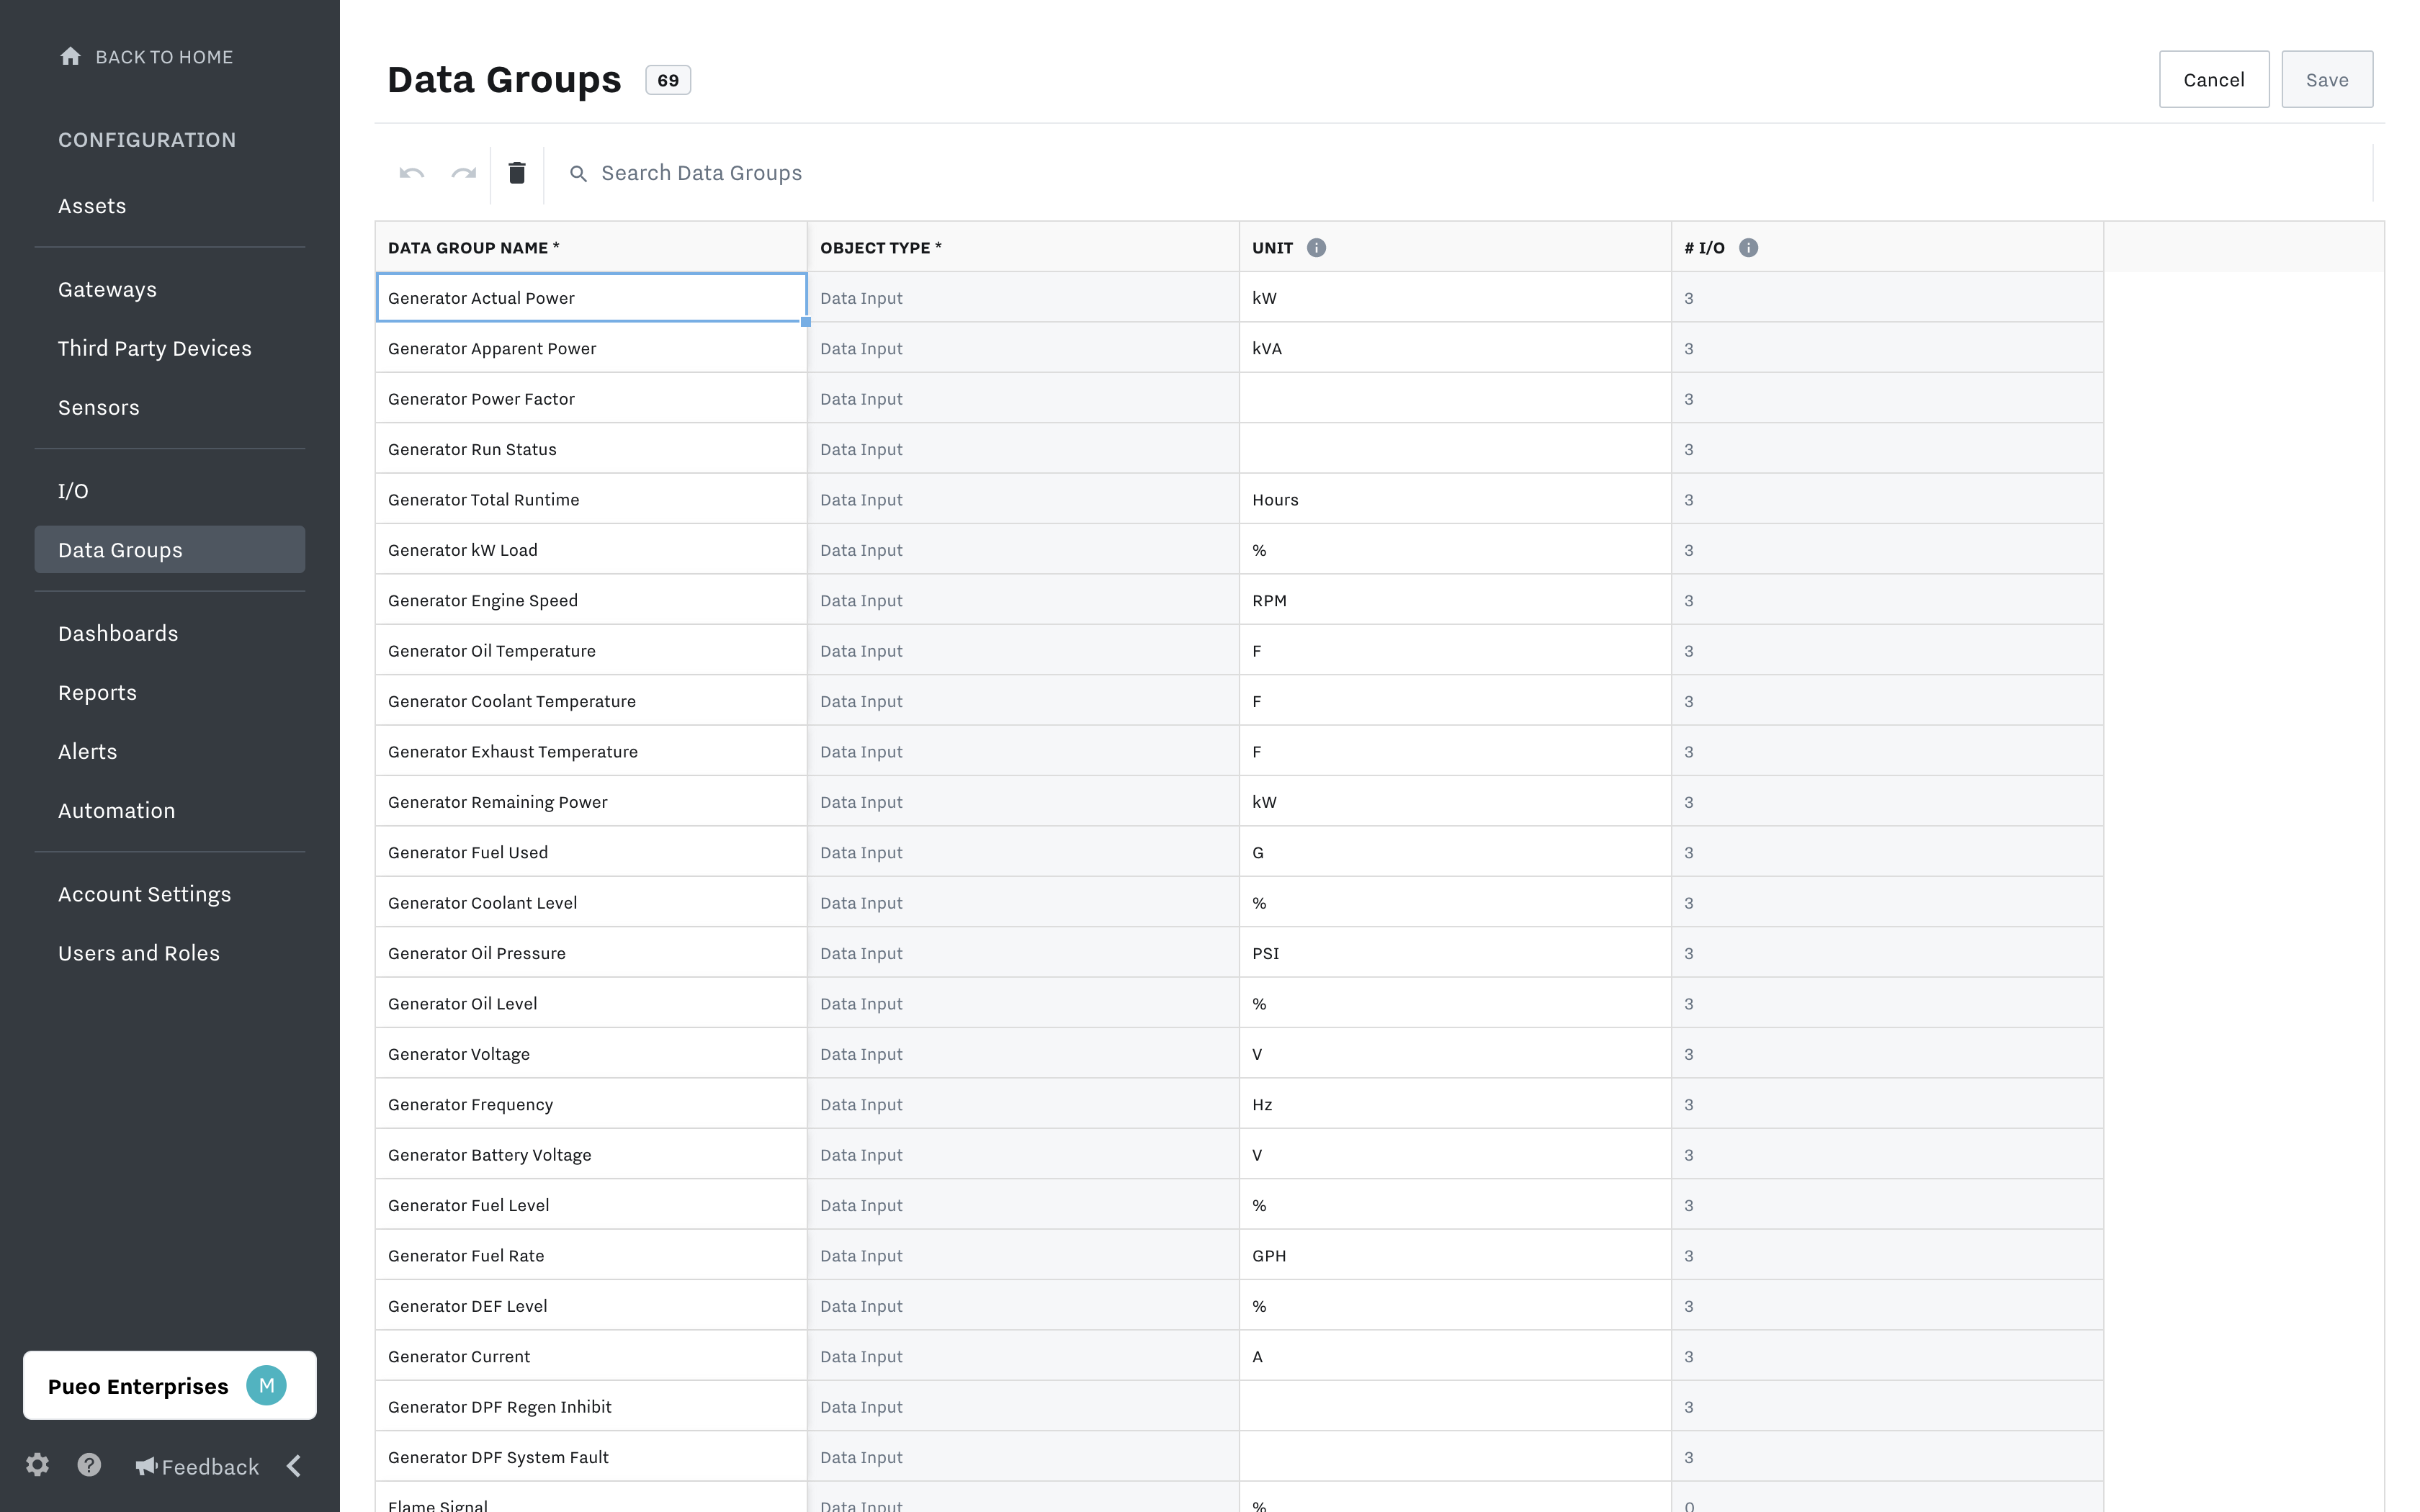
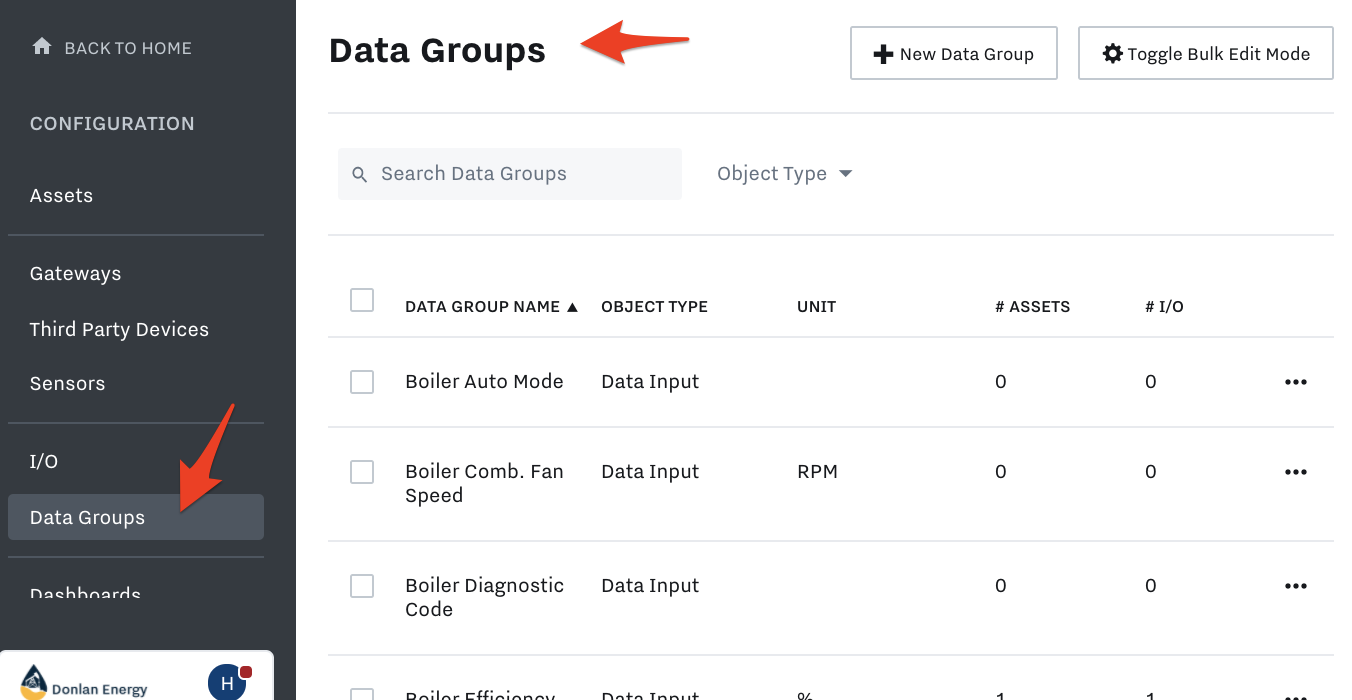
To get to Data Groups in the Configuration page (Configuration Page Overview ), go to Settings (bottom left gear icon) → Data Groups on left sidebar. This is where you can:
View data groups to verify configuration
Create and manage data groups
Data Group Overview
To understand how Data Groups work, you must first know how they are used within the Samsara platform. The three primary uses are:
Dashboard Templates: They are how the template pulls in the correct I/O when it is applied to a specific asset.
Aggregate Formulas: They are how aggregate formulas know which I/O to add together when calculating a value
Asset Reports: They allow you to compare the same parameters across different assets in reports
In each of these cases, Data Groups are essentially helping the platform build an imaginary table that a template can then reference as it figures out which I/O to pull into a template or to compare in a report or a formula. For example, if you were managing multiple pumps in your operation, that “table” would look something like the following.
Example Data Group Mapping
Data Group | Alpha Pump Data Inputs | Beta Pump Data Inputs | Gamma Pump Data Inputs |
|---|---|---|---|
Pump Voltage | Alpha Voltage: 210V | Beta Voltage: 215V | Gamma Voltage: 230V |
Pump Speed | Alpha Speed: 1200 RPM | Beta Speed: 1500 RPM | Gamma Speed: 3000 RPM |
If you had a Dashboard Template that used the Data Group “Pump Voltage” for a particular widget, when you applied it to these pumps, it would know to pull in the value 210V for Alpha Pump and 230V for Gamma Pump even though the Data Input names and values are different.
Create and Apply Data Groups
Before getting started creating Data Groups, keep the following in mind:
They can only be applied once per asset (i.e. you cannot have two unique voltages on a single pump share the Data Group “Pump Voltage”. Otherwise, the platform would not know which value to reference–see the table above).
They are case-sensitive (i.e. “Ambient Temp and “ambient temp” will be saved as separate Data Groups).
Their units will override associated I/O units, if the data group unit field is blank, the original I/O units will remain in place
There are three ways to create data groups. We’ll cover each of these methods below.
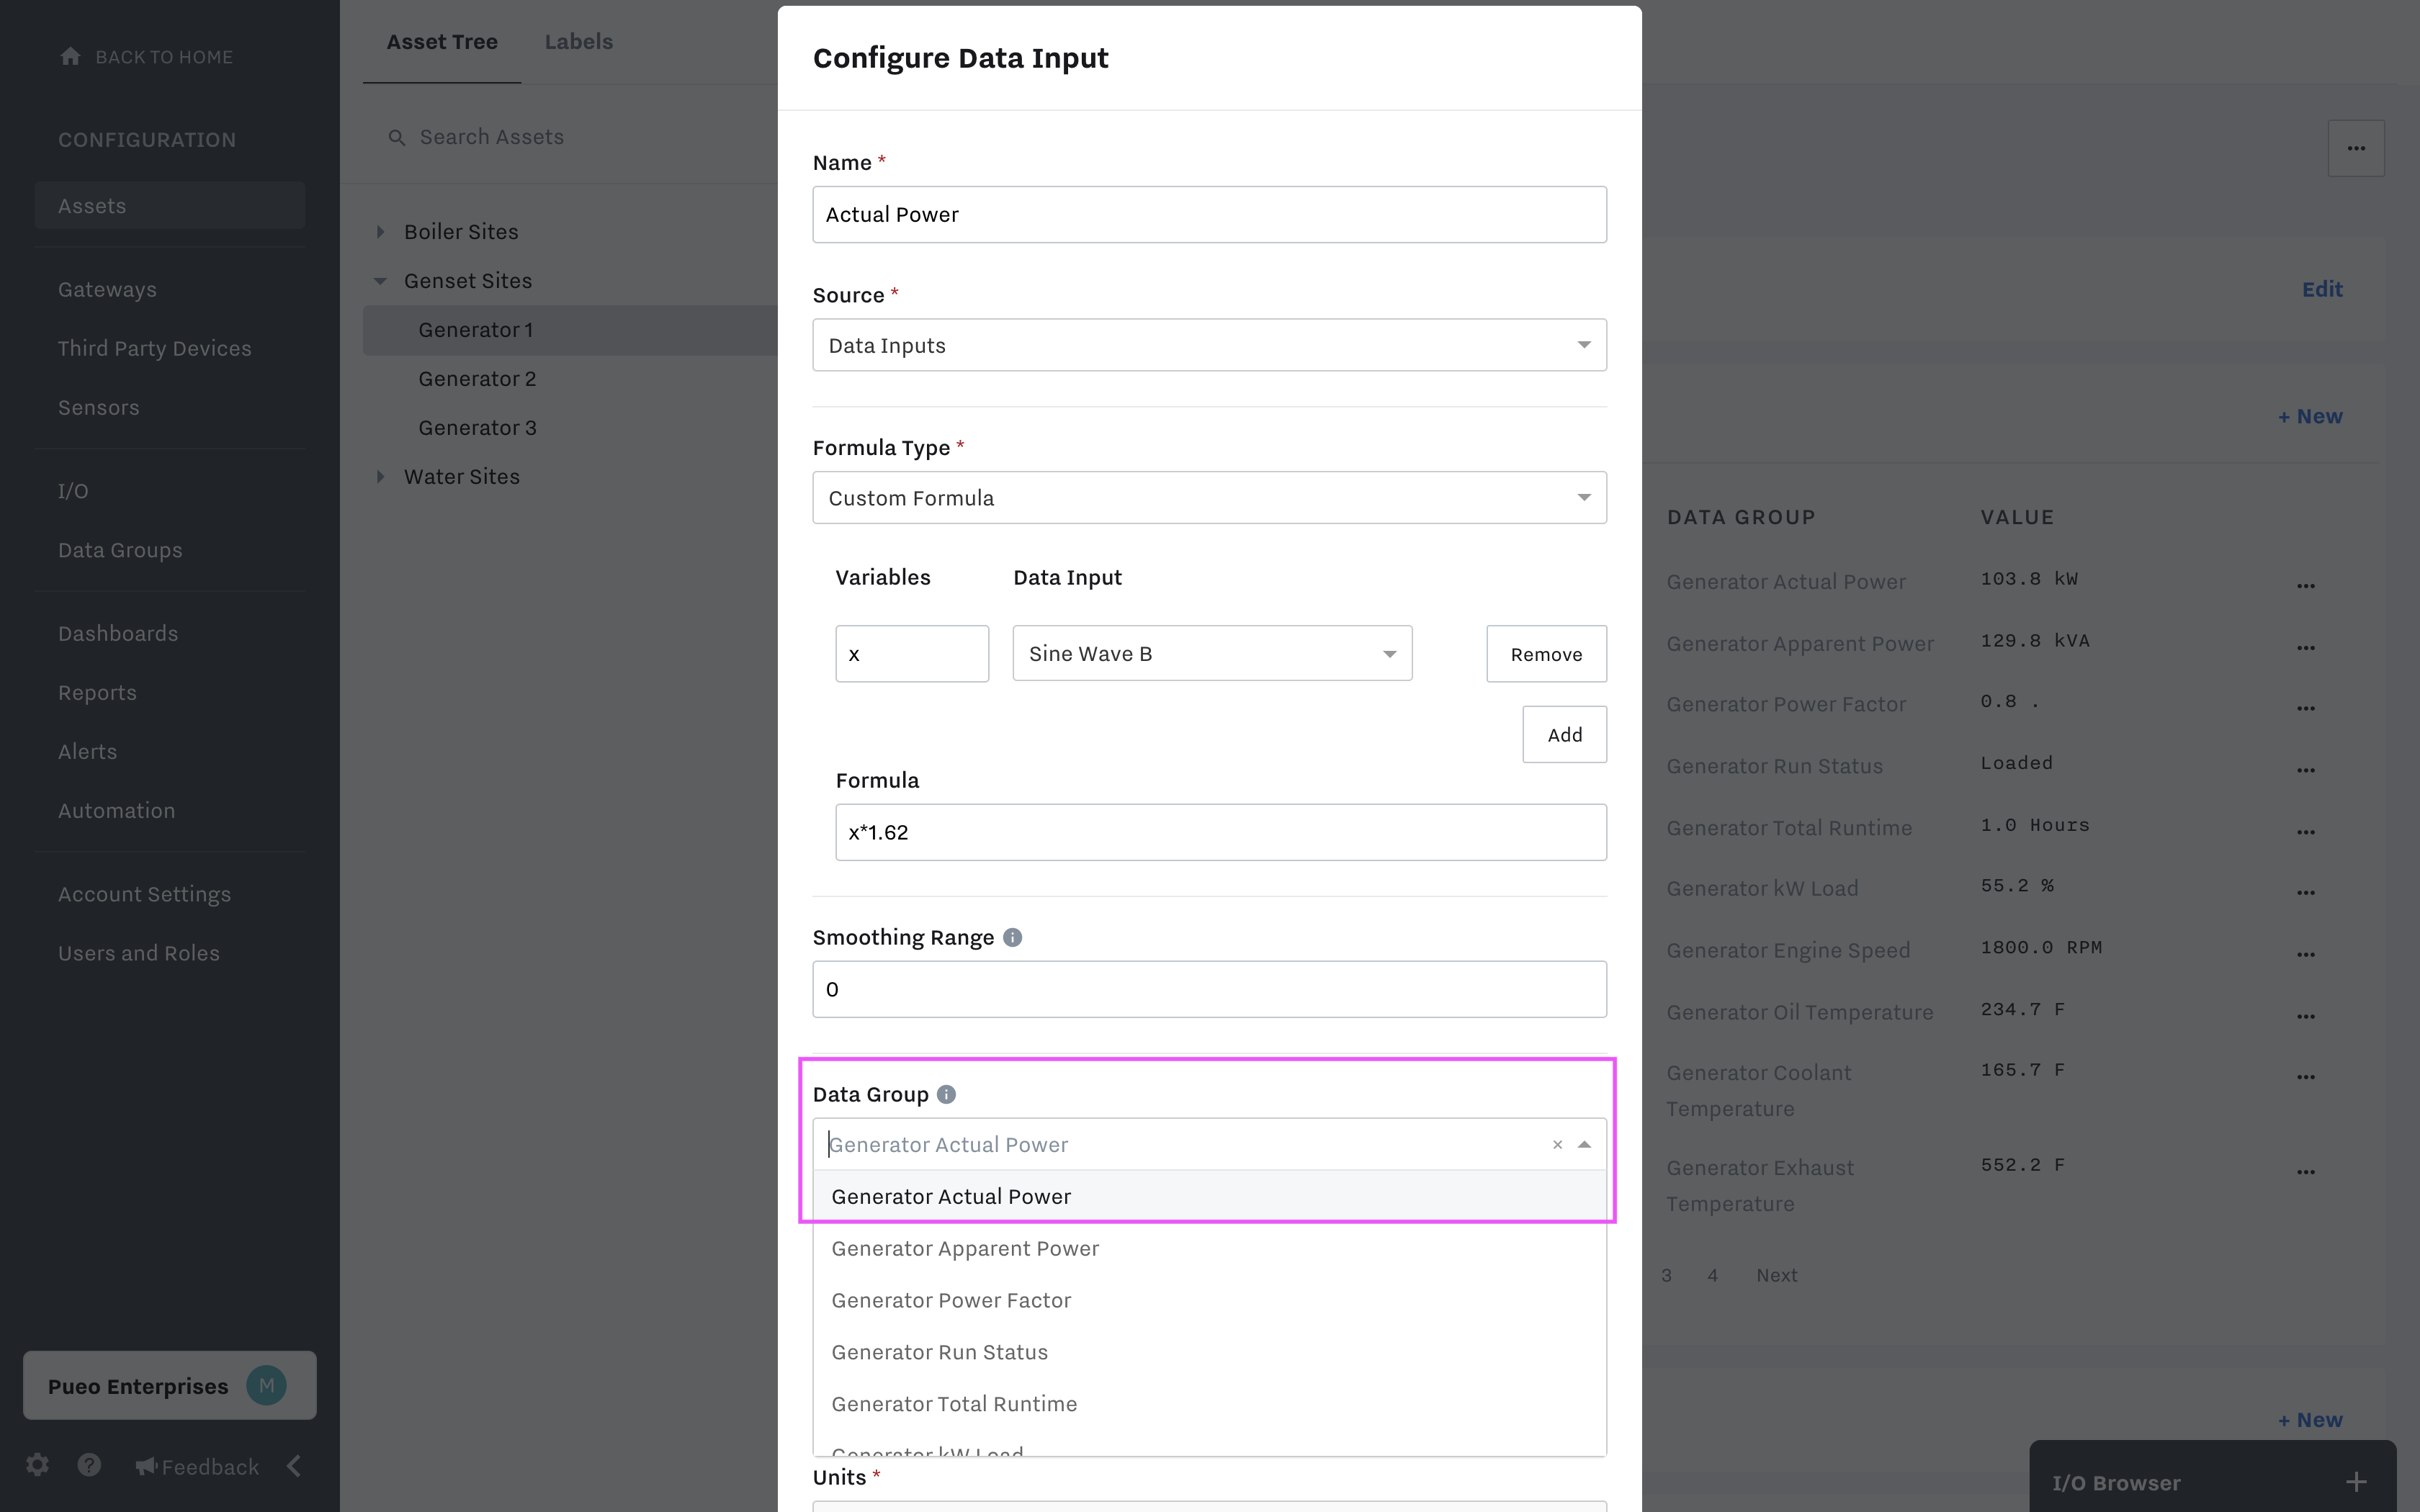
1. Individual creation in the data input/output modal
Navigate to your I/O from either your Assets section or I/O section select it to open the modal window.
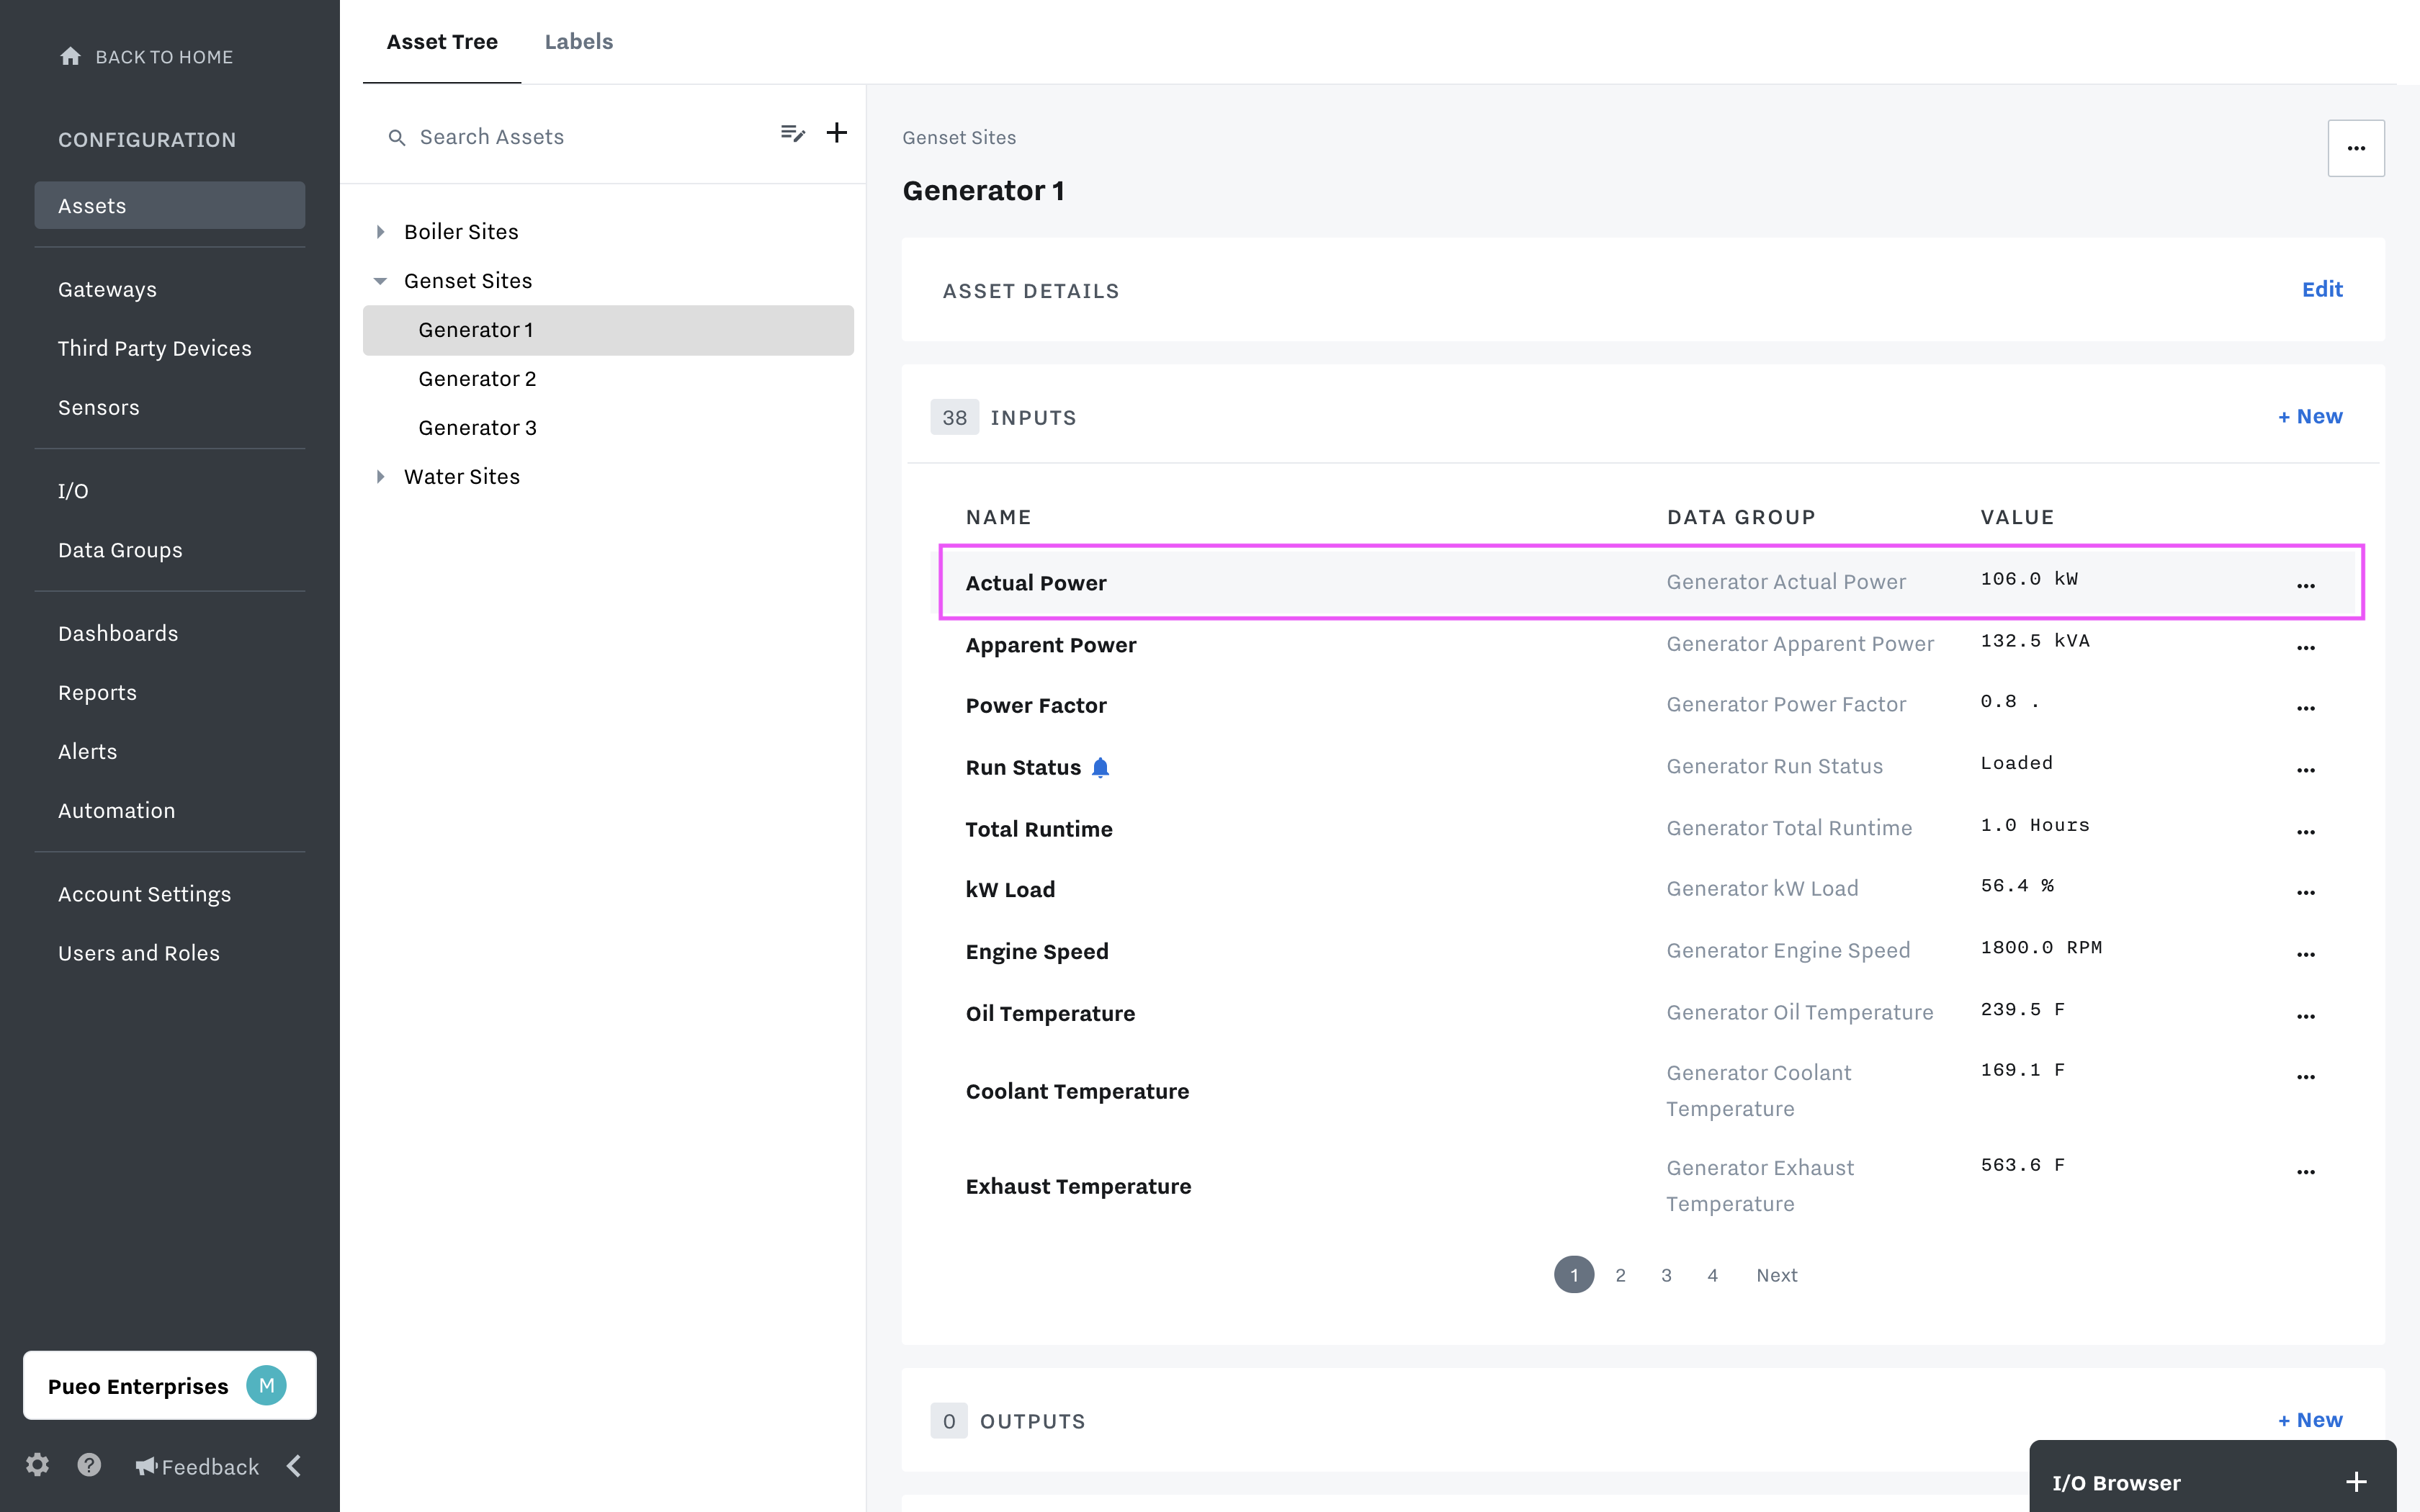
Create your data group as a new option from the Data Group dropdown field. Alternatively, if the data group already exists in the system, you can select it from this list as well.
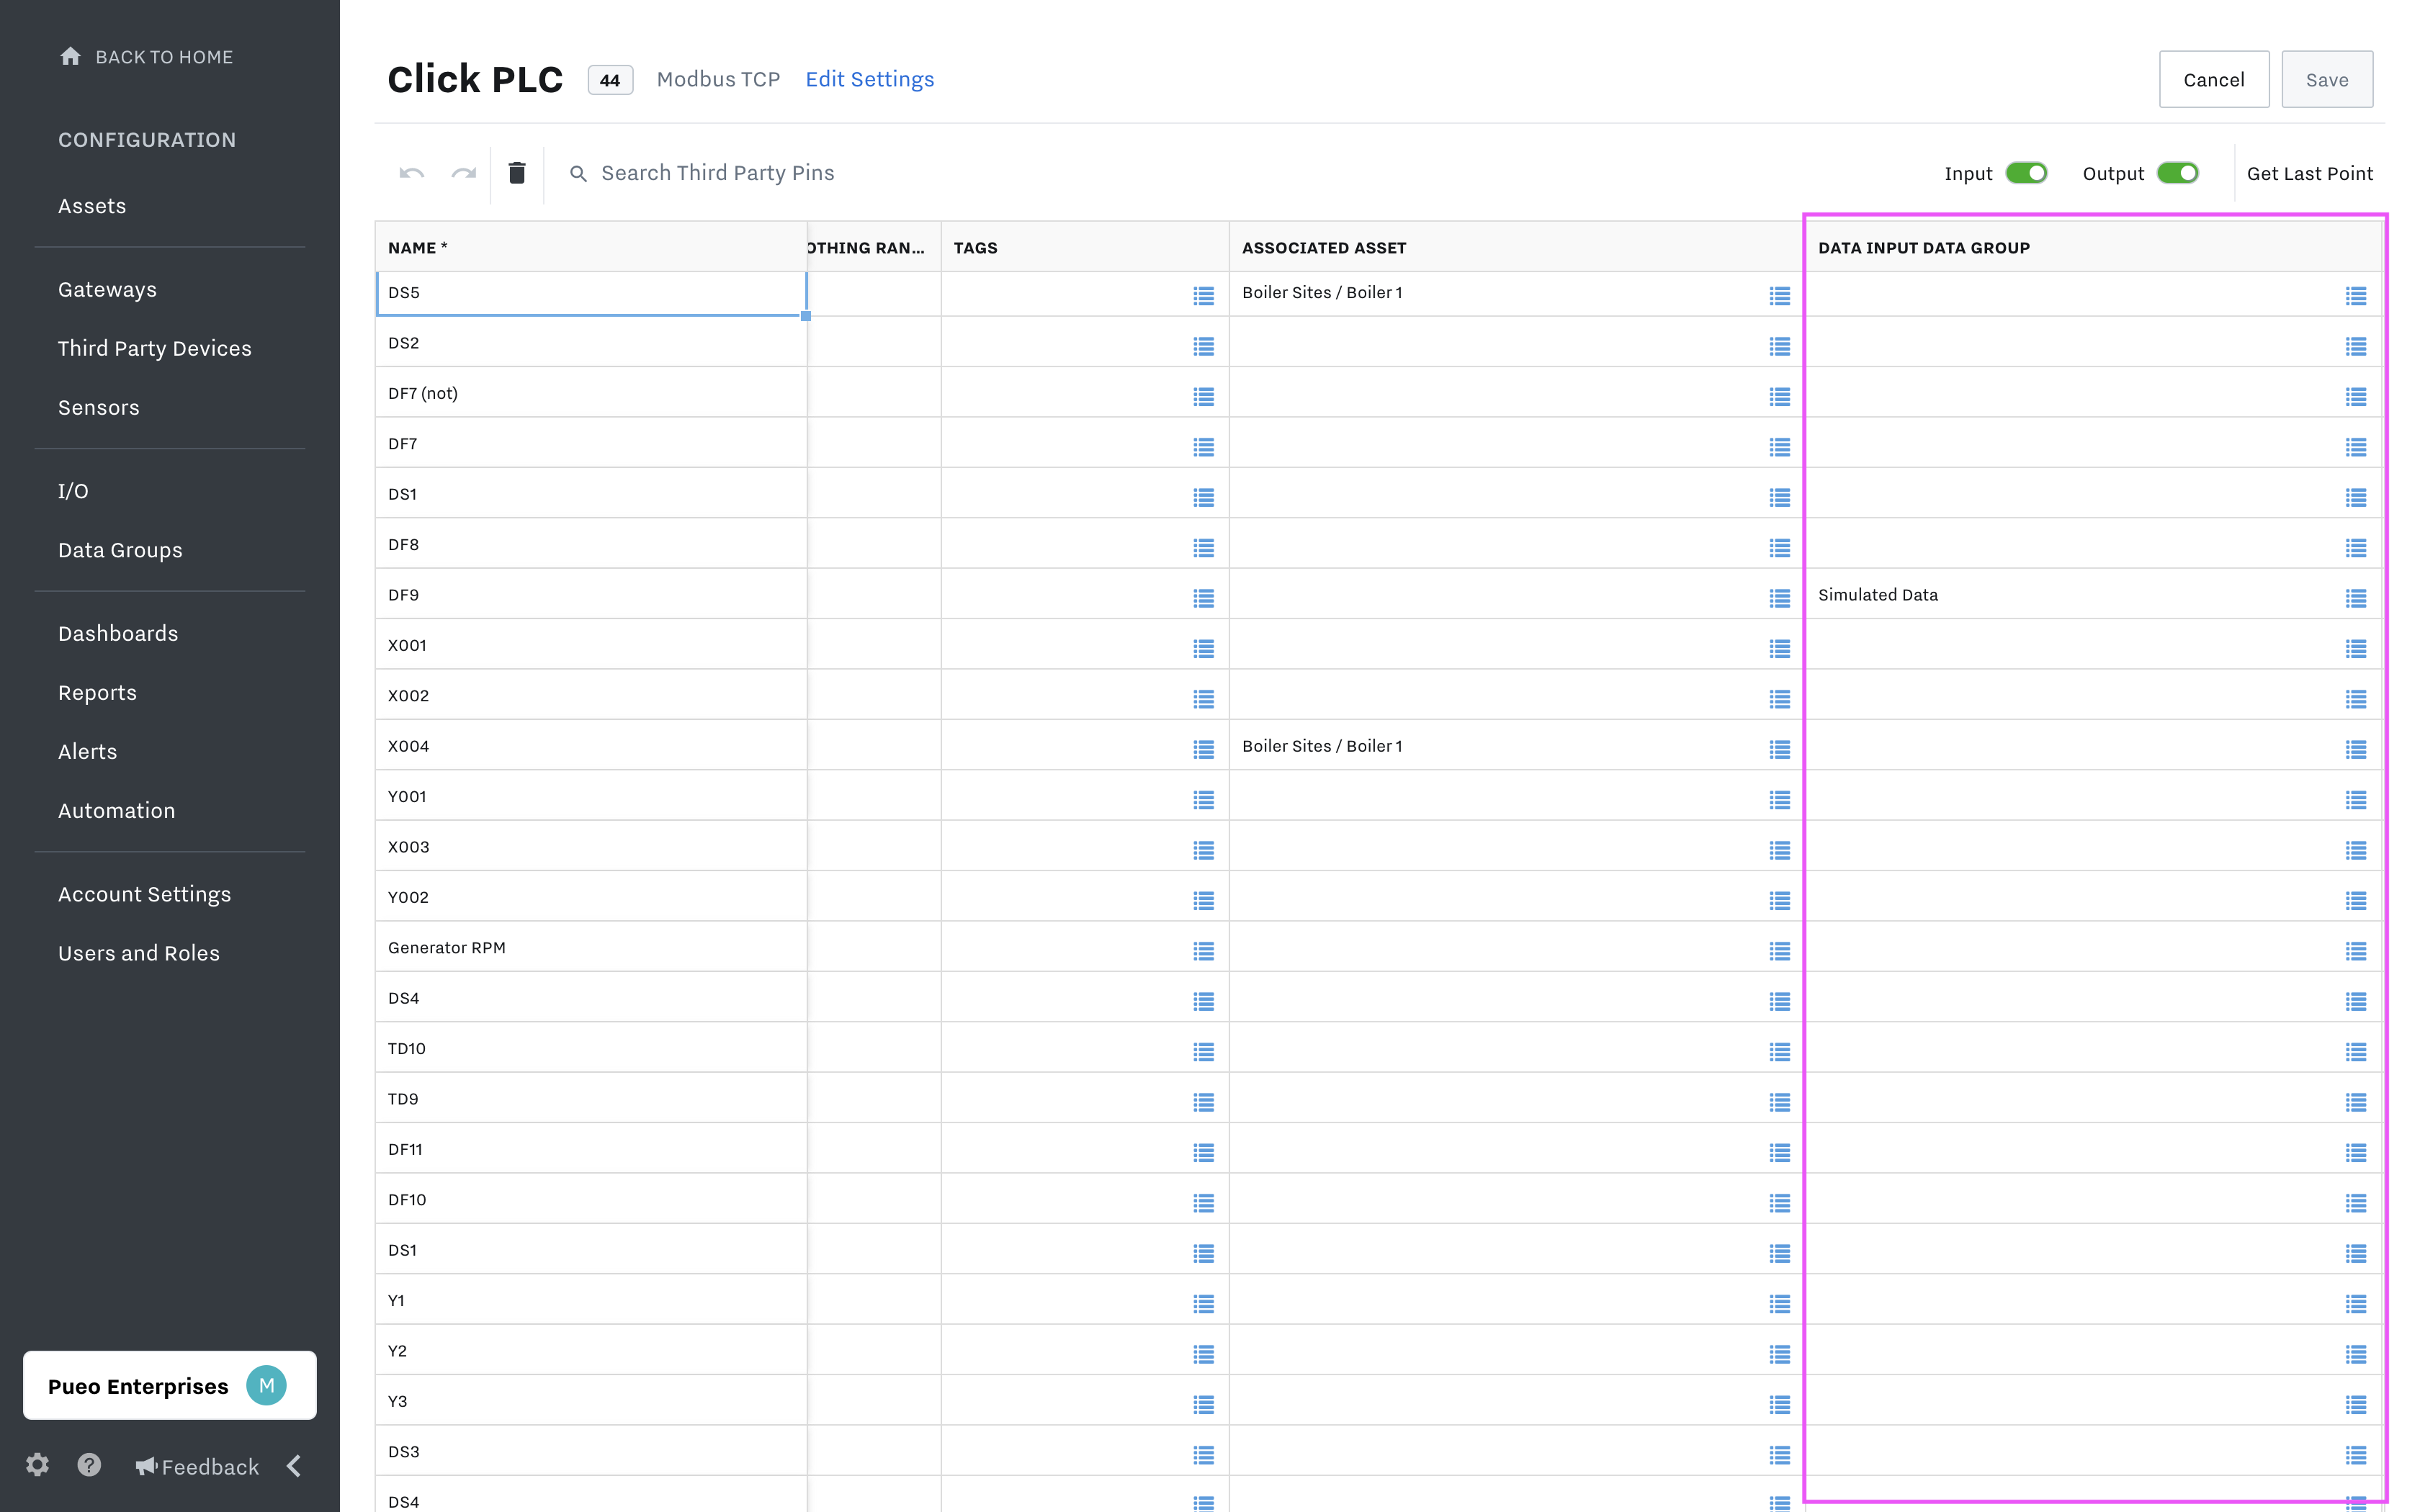
2. Create alongside third-party device configuration
When creating Data Groups alongside third-party devices in bulk edit mode, simply add a column to the spreadsheet for Data Groups.
3. Create on the data group management page
Note that while you can create data groups on the data group management page, and view which I/O the Data Groups are associated with, you cannot assign them to assets from this page
Navigate to the Data Groups section of the configuration page, and click the “New Data Group” button
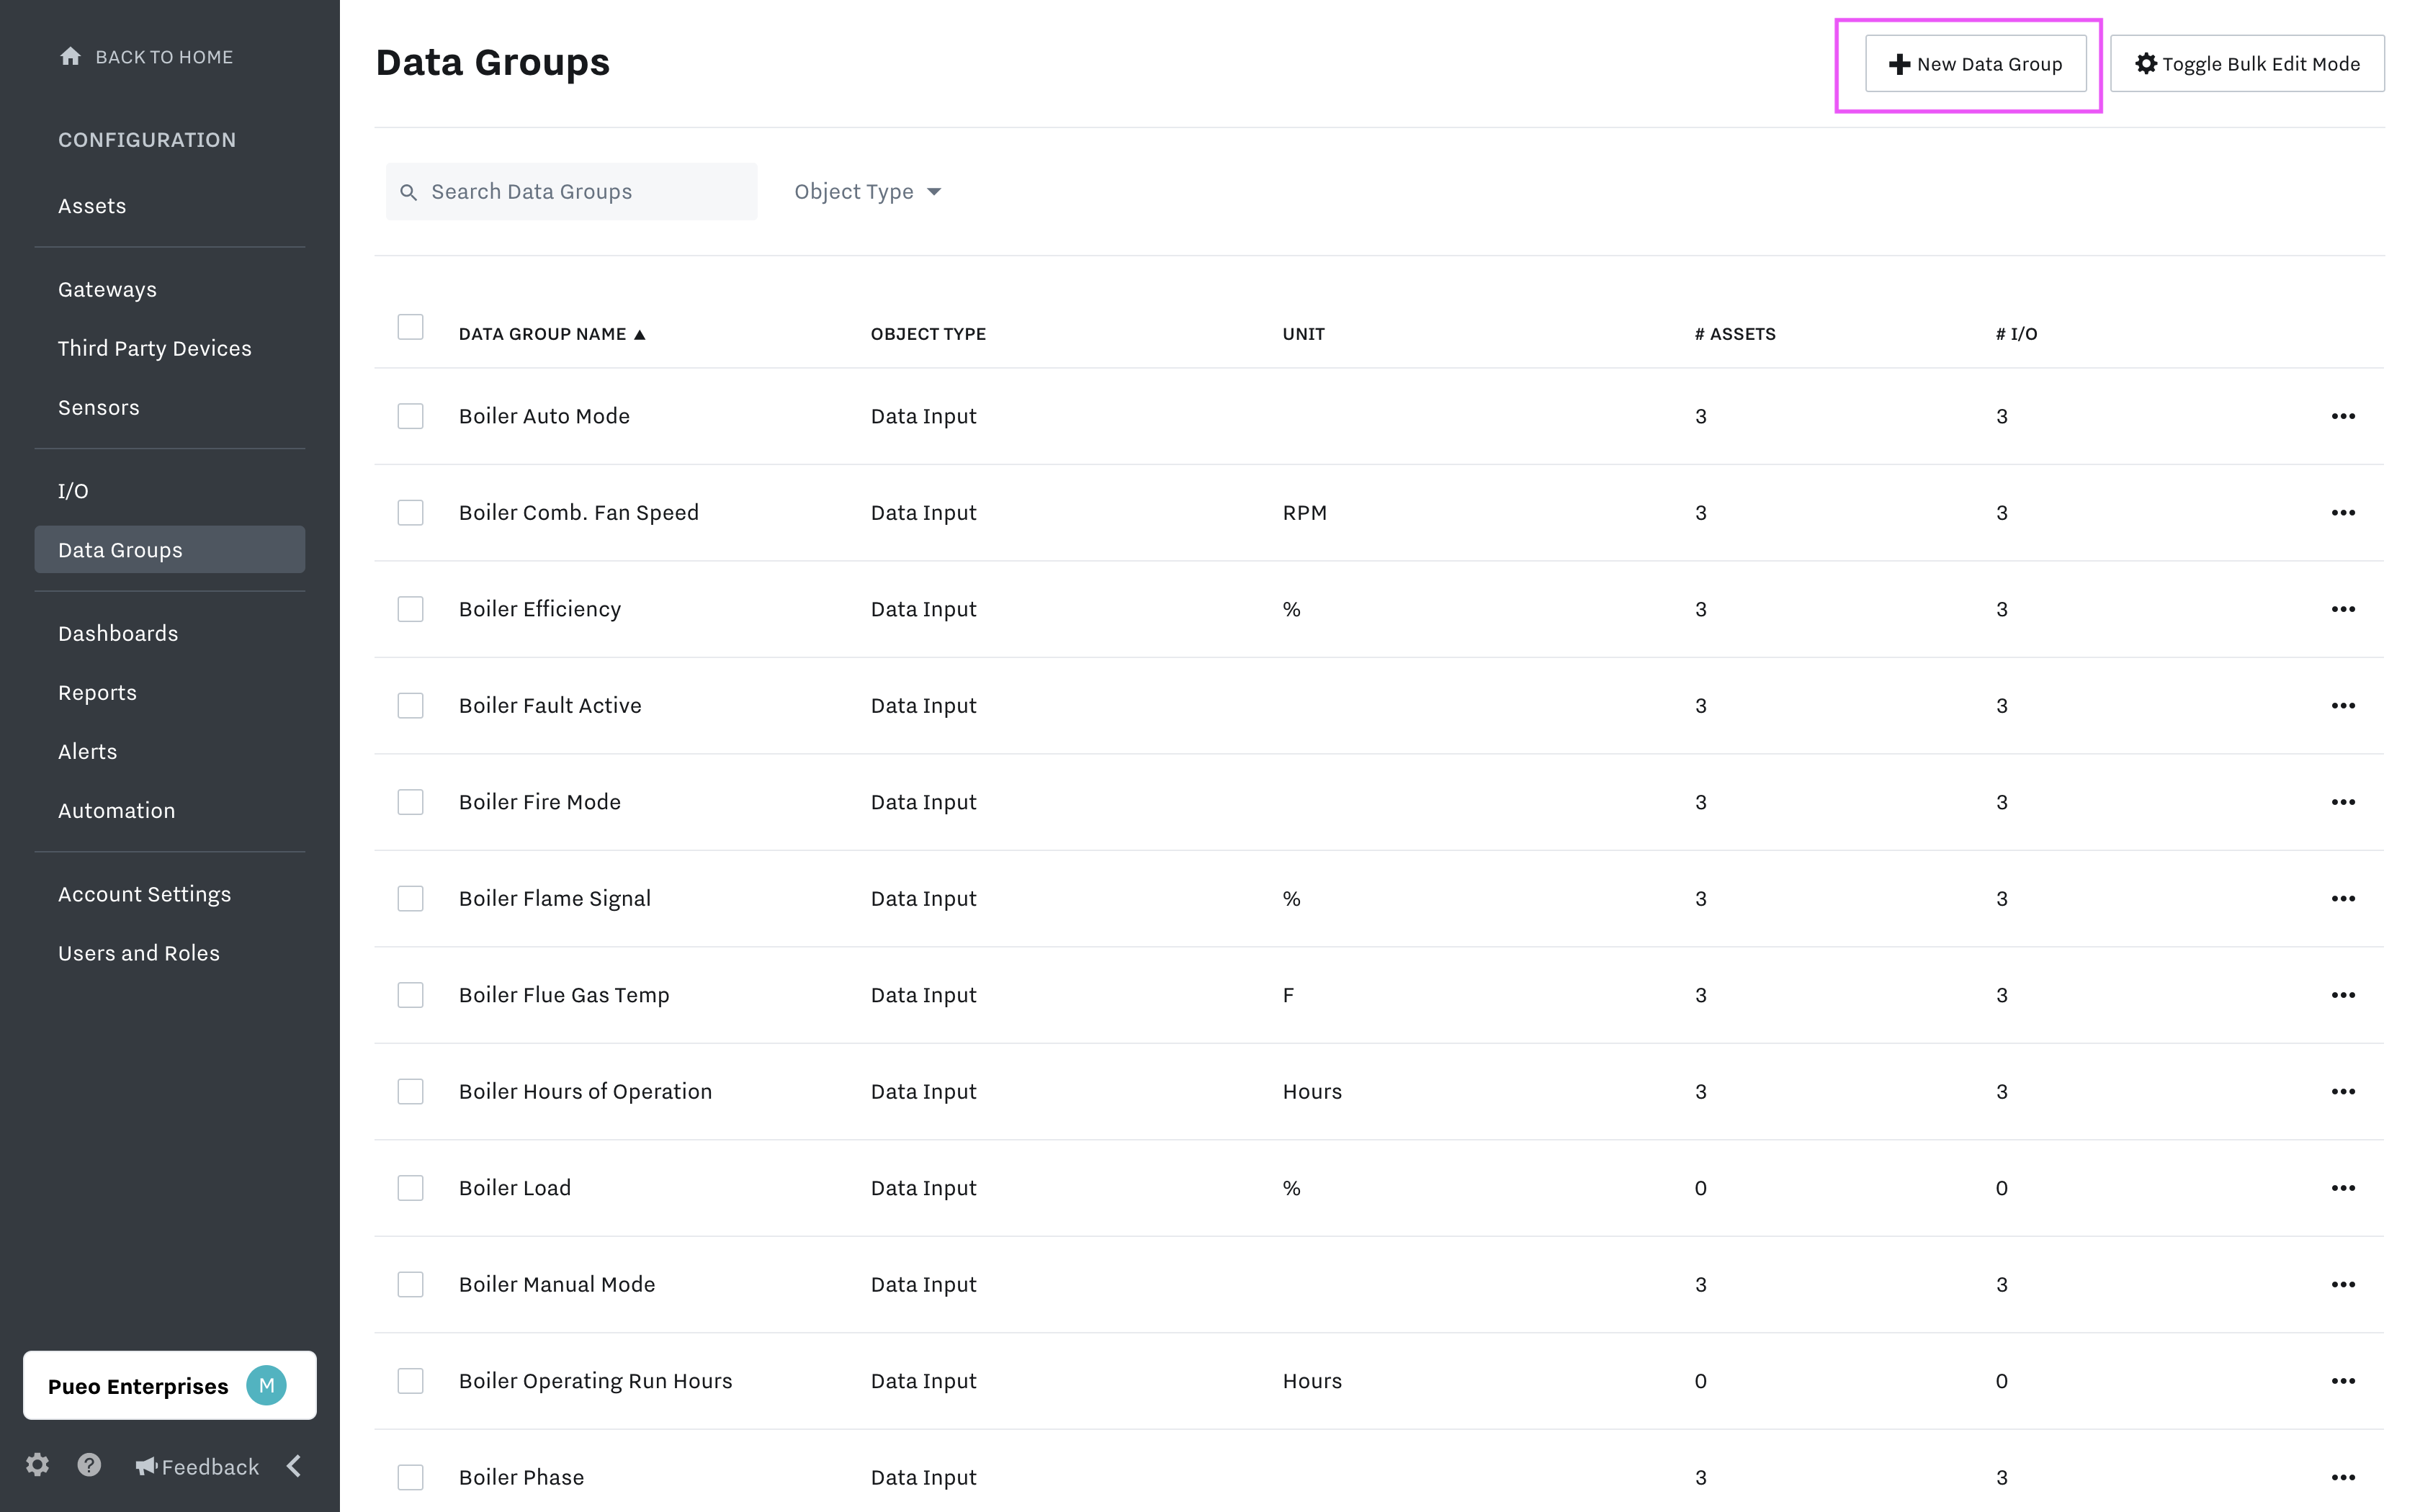
Alternatively, you can also edit and add Data Groups in bulk by selecting the Toggle Bulk Edit Mode in this section.