Configure & Install the HMI
The Human Machine Interface (HMI) has touch screen functionality that allows users to start and stop runs, view run progress, and input downtime reasons.
HMI Datasheet
Installing the Samsara HMI device:
What’s included: HMI, 4 button head bolts #3, 1 ethernet cable, 1 trial power cable, 1 trial power supply
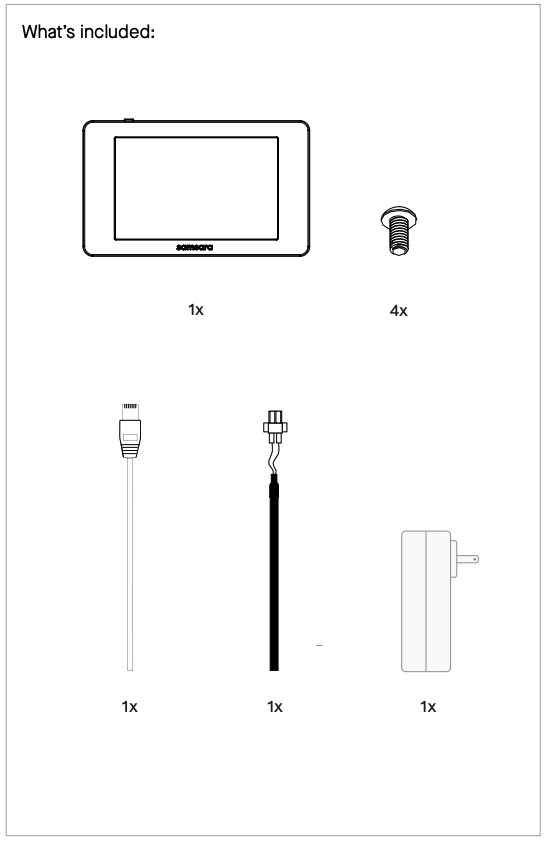
What to get: It is recommended that you buy an industrial power supply (24V) to wire HMI into power. Get 4.5 MM drill bits to drill the holes into the panel
Mount the HMI using the included stencil that comes in the box.
Watch the HMI install and mounting video tutorial
Mount the HMI:
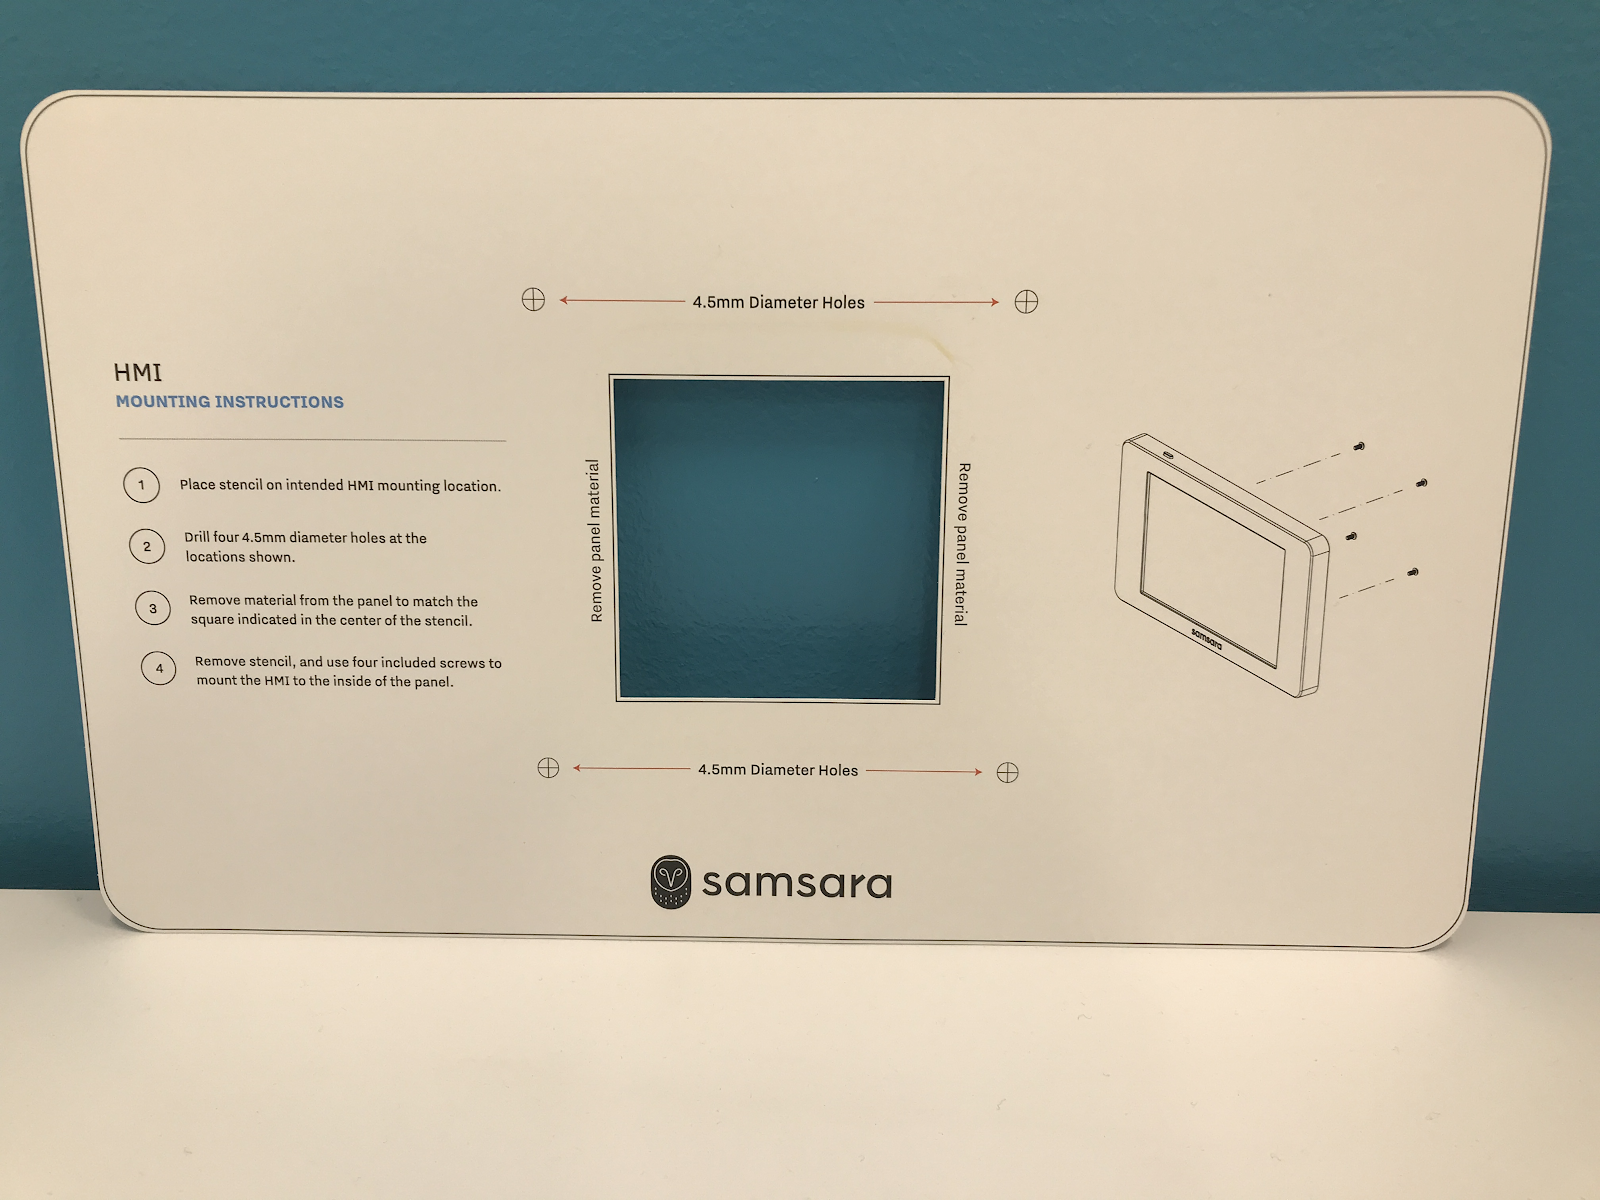
HMI Installation Steps:
Drill holes into the panel through the paper slip with your 4.5 MM drill bits (not Samsara-provided)
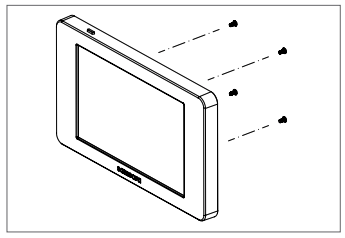
Cut the square hole of the paper slide out of the panel so you can wire the HMI up in the back through the panel, then screw the Samsara-provided button head bolts #3 from the backside to properly mount your HMI
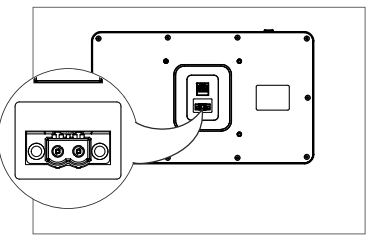
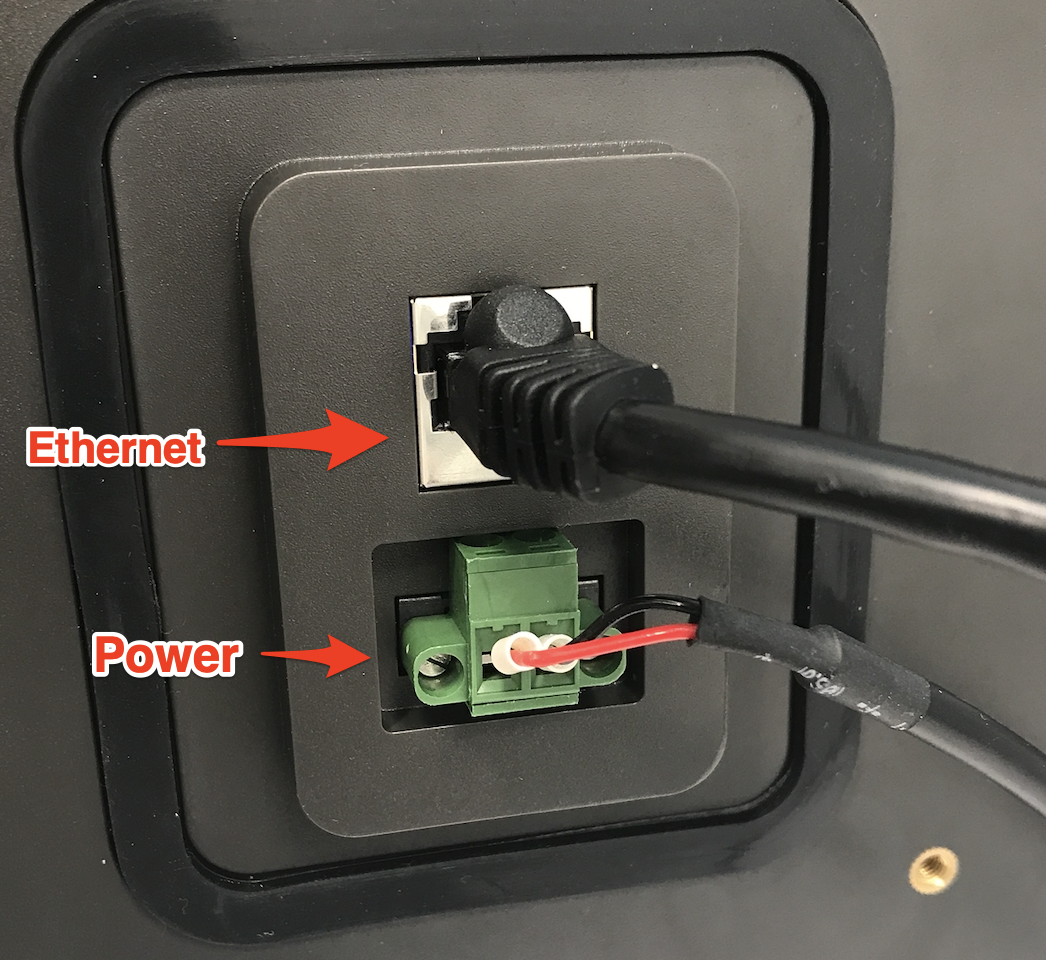
Connect the ethernet cable and the power cable (and screw it in) into the back of the HMI. Then, connect the power supply and turn HMI on.
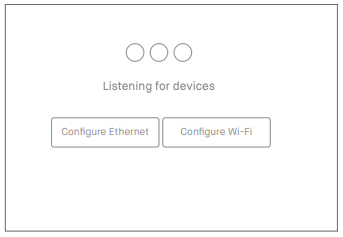
Select how you would like to connect your device - through Ethernet or Wifi
How to Configure HMI
i. Configure through Ethernet -
3 types for Ethernet:
Direct Connection
Managed Switch (use DHCP)
Unmanaged Switch (use Static IP)
DIRECT CONNECTION
Plug Ethernet cable directly from HMI into IG
Set up Static IP for the IG by going to your Cloud
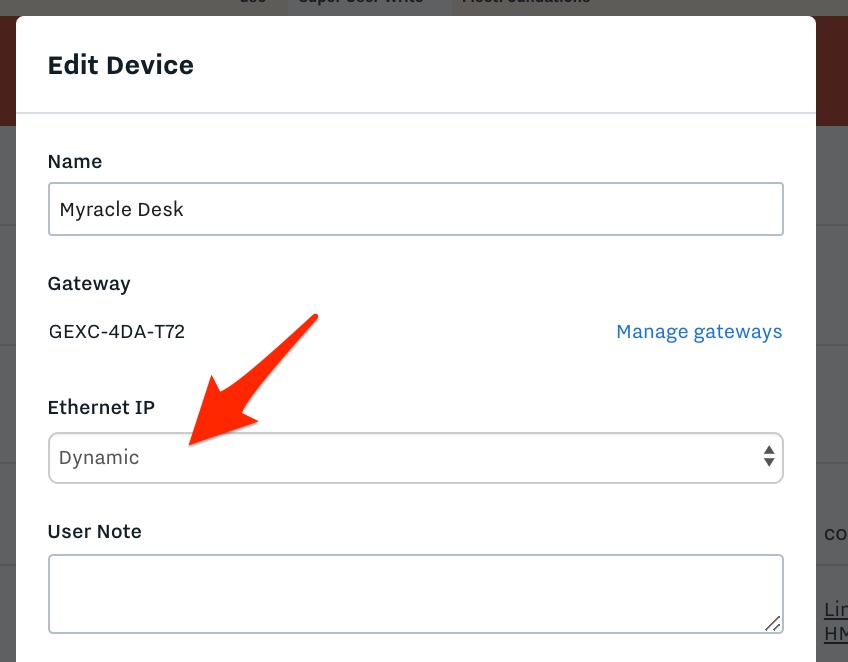
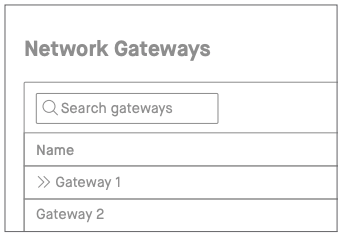
Go into “Gateway” tab on the left in the Cloud, find the gateway that you connected to the HMI, then hit Settings after clicking on the three dots on the right:
Make sure "Ethernet IP" field is set to STATIC

Go to the the IP address + Subnet field of the Gateway and enter 5.5.5.101/24. No other Static IP configuration inputs needed in the fields below.
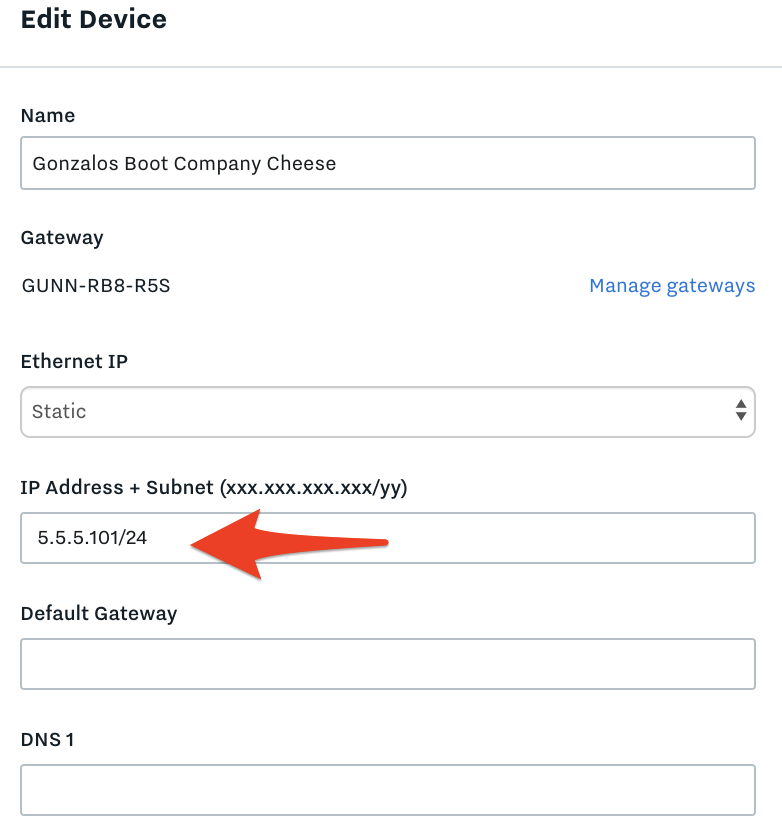
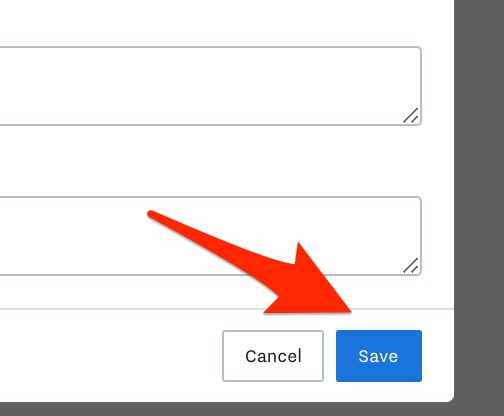
Hit SAVE
Go back to the HMI to set up Static IP for the HMI (HMI must be plugged into power)
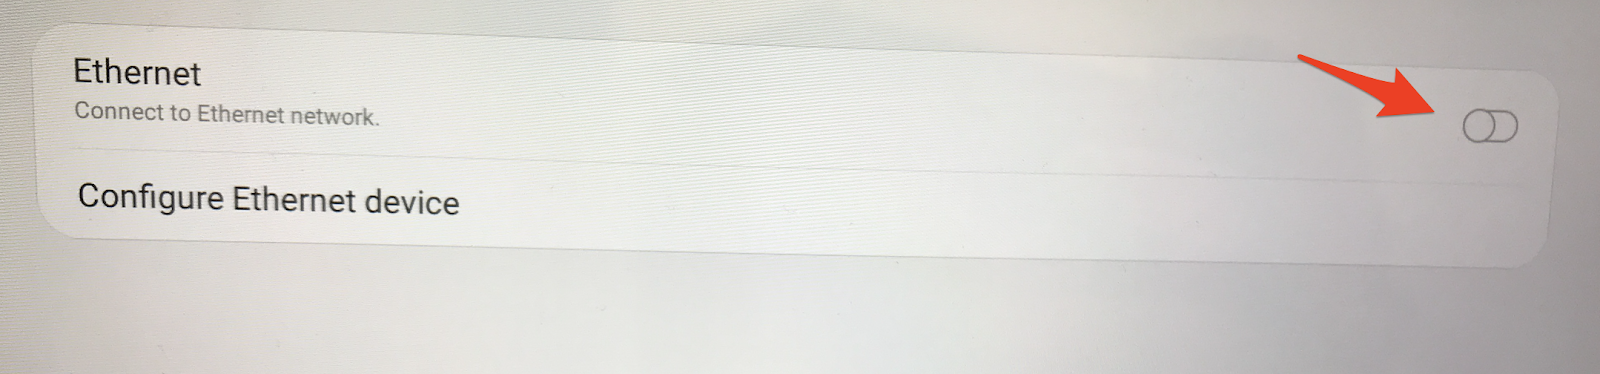
Turn the Ethernet toggle “Off”
Tap "Configure Ethernet"
Tap “Configure Ethernet Device.” You will see "eth0" under "Select Ethernet device"
Now we will ensure the HMI is connected to an active network via the ethernet port by inputting the right information
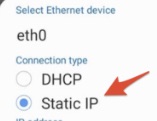
Tap "Static IP" - This should cause the rest of the settings to appear in the drop down
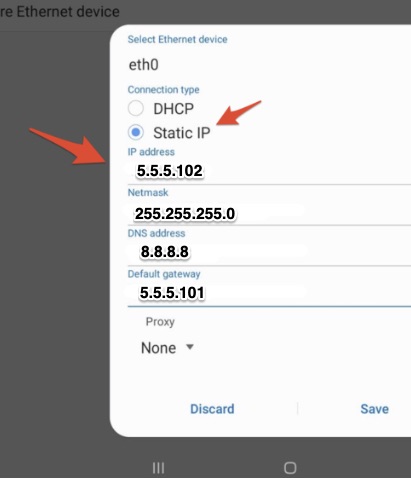
Enter the IP Address as 5.5.5.102 under Static IP (no subnet needed on the HMI).
In the Cloud, we set the IP address + Subnet field of the Gateway as 5.5.5.101/24
The IP Address field on the HMI will need to be off by 1 number from the Gateway in the Cloud or it will cause networking errors, so 5.5.5.102 would work since Gateway in the Cloud is 5.5.5.101/24
Enter 255.255.255.0 for the Netmask
Enter 8.8.8.8 for the DNS address
Enter the IP Address from the Gateway you found in the Cloud for Default Gateway
In this case, it's 5.5.5.101/24
Check you have all the right inputs:
Tap "Save" on the HMI screen under Proxy None on the bottom right
Toggle "Ethernet" to ON
It should show blue when toggled on (should say “Connected” under Ethernet)
Hit the back button in the middle of the bottom of the screen. If it takes more than 5 minutes to connect, turn off and restart again.
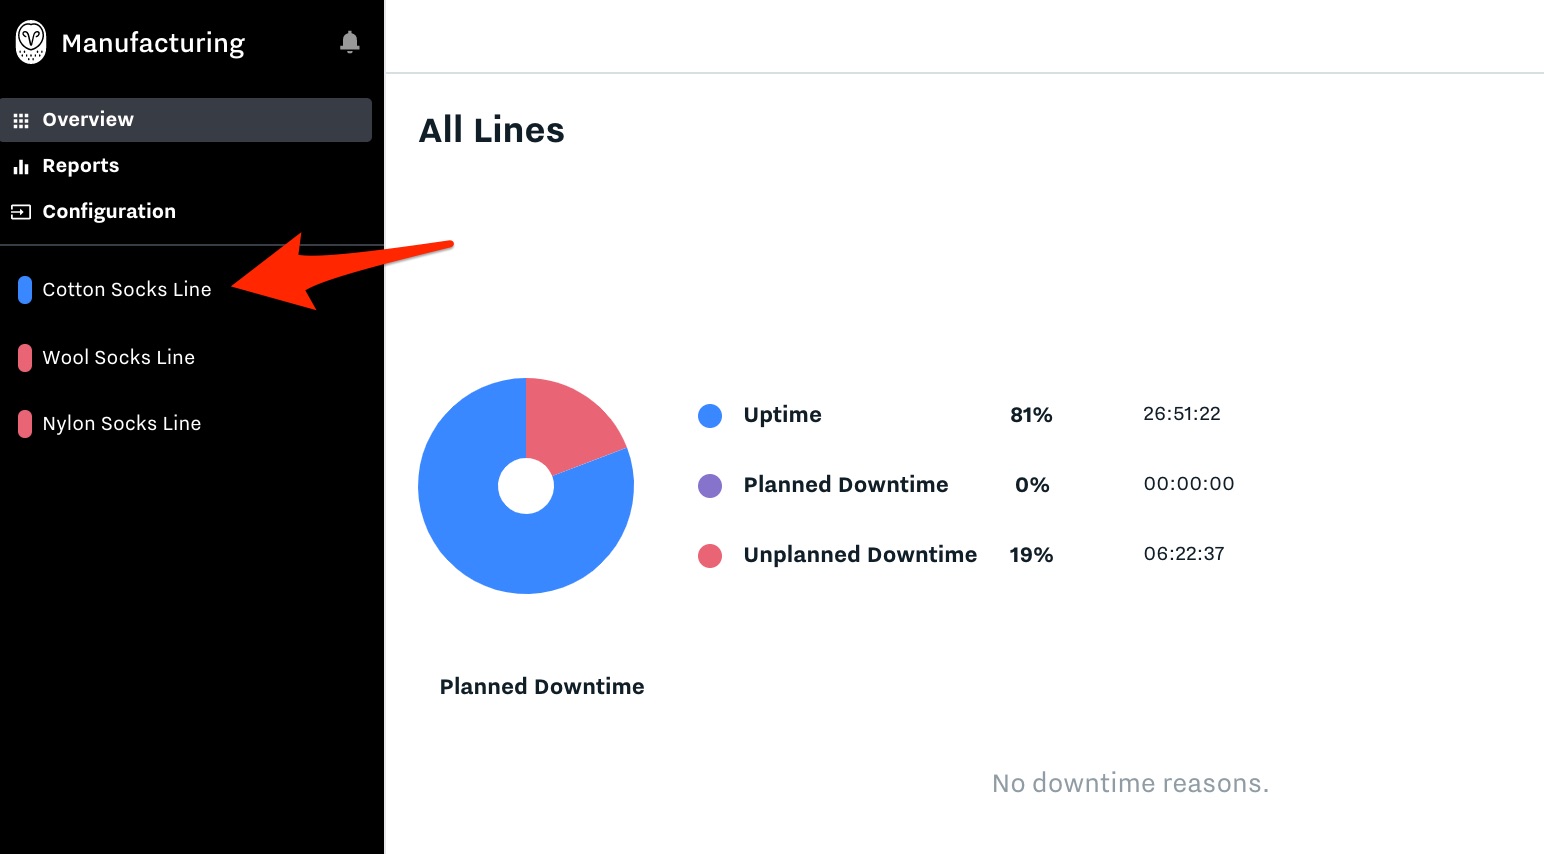
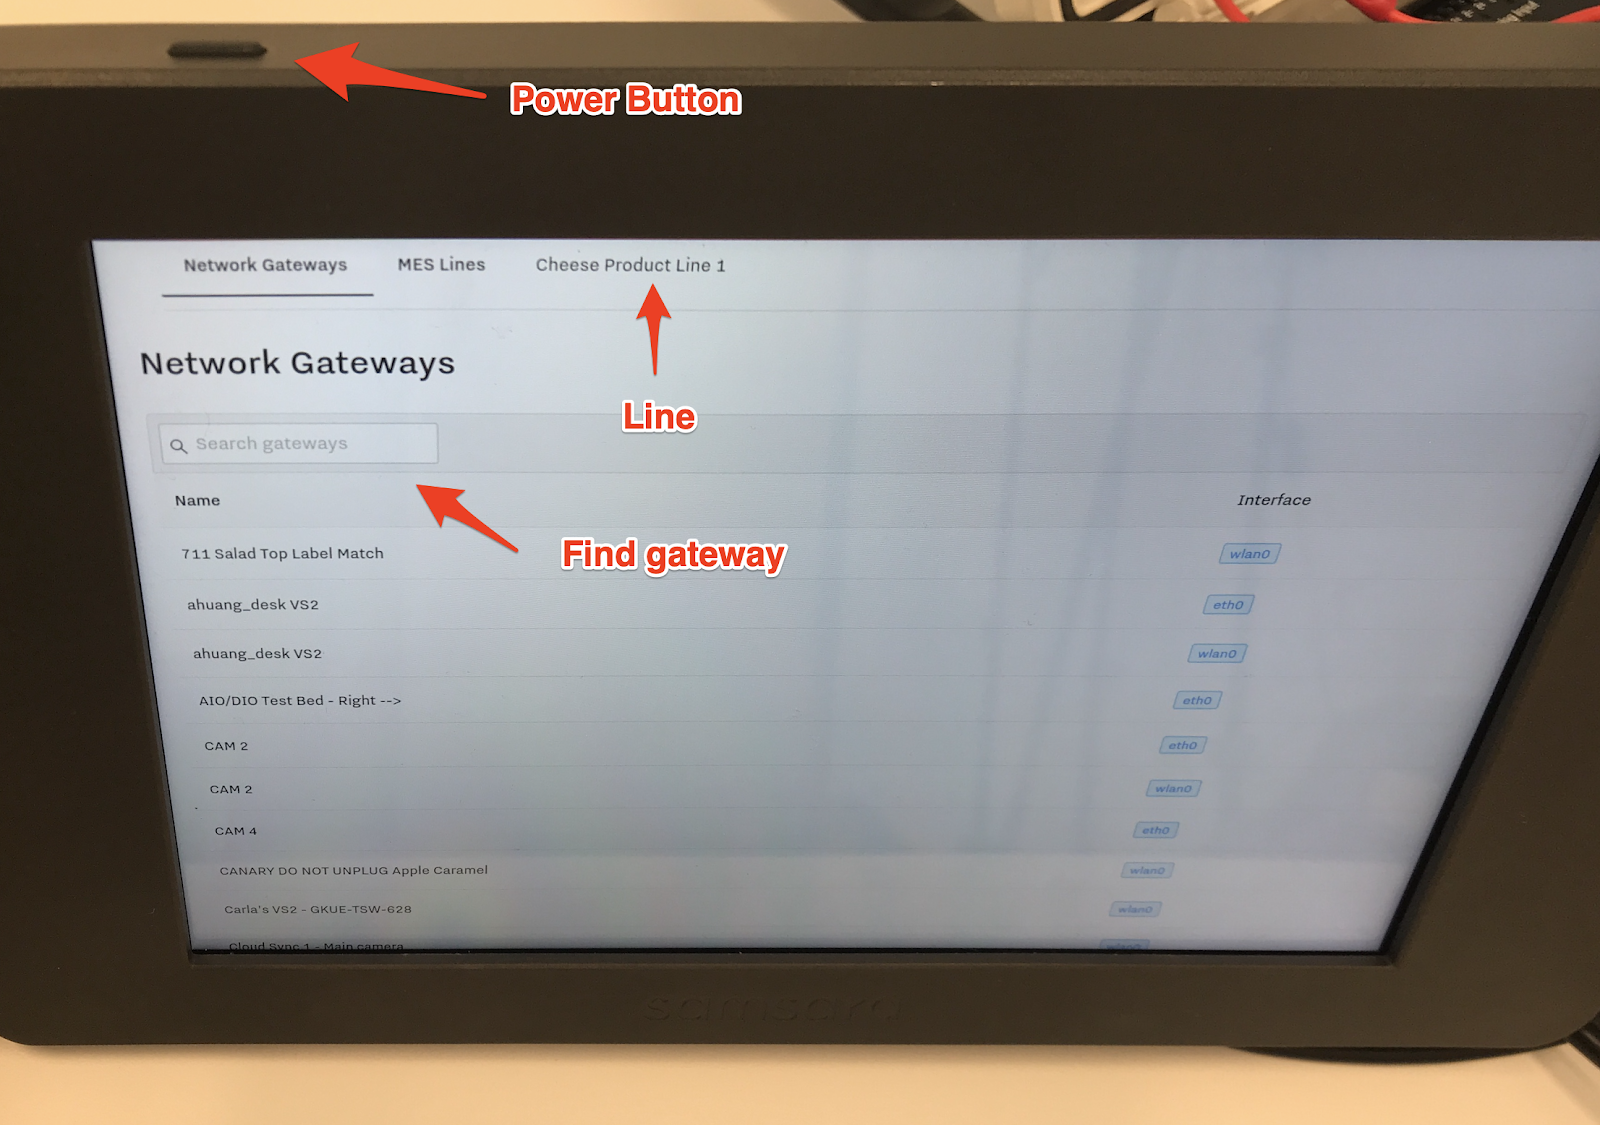
Screen should go white and then load a row of information at the top. Click on your Line in the Cloud and all should be set up!
Managed Switch - use DHCP
Plug both the HMI and the IG into the LAN network
Go into “Gateway” tab on the left in the Cloud & find the gateway that you connected to the HMI, then hit Settings after clicking on the three dots on the right:
Make sure "Ethernet IP" field is set to DYNAMIC
No other Static IP configuration inputs needed in the other fields
Set up DHCP for the HMI - HMI must be plugged into power
Turn the Ethernet toggle “Off”
Tap "Configure Ethernet"
Tap “Configure Ethernet Device.” You will see "eth0" under "Select Ethernet device"
Change to Connection type -> DHCP
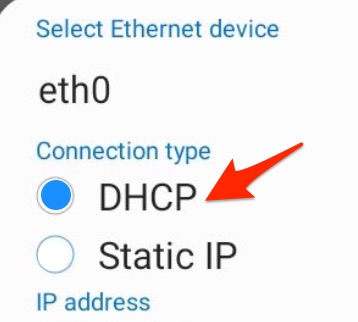
No other configuration inputs needed in the other fields
Toggle "Ethernet" to ON - It should show blue when toggled on (should say “Connected” under Ethernet)
Hit the back button in the middle of the bottom of the screen. If it takes more than 5 minutes to connect, turn off and restart again.
Screen should go white and then load a row of information at the top. Click on your Line in the Cloud and all should be set up!
Unmanaged Switch - use Static IP
An unmanaged switch should be treated the same way as a direct connection. Follow the same steps as the first section above "1. Direct Connection" under Configure through Ethernet.
ii. Configure through Wi-Fi
Turn on the HMI (button on the side of the device)
In the HMI, hit " Configure Wifi
Select your network in the HMI and enter the password for the network, select ‘Connect’, then hit the back button in the HMI
Choose the IG device you would like to use with your HMI:
That device’s local dashboards will now be available under the ‘Dashboards’ tab at the top of the HMI.
If network discovery does not work:
Find the IP Address of the Gateway at the bottom of the IG Page in the Wifi section on the HMI
Click “Enter Gateway IP Address” on the HMI
Manually type in the IP Address of the Gateway and hit Submit