We will go through how to set up inputs and forms for manual entry.
Set Up Data Inputs for Manual Entry
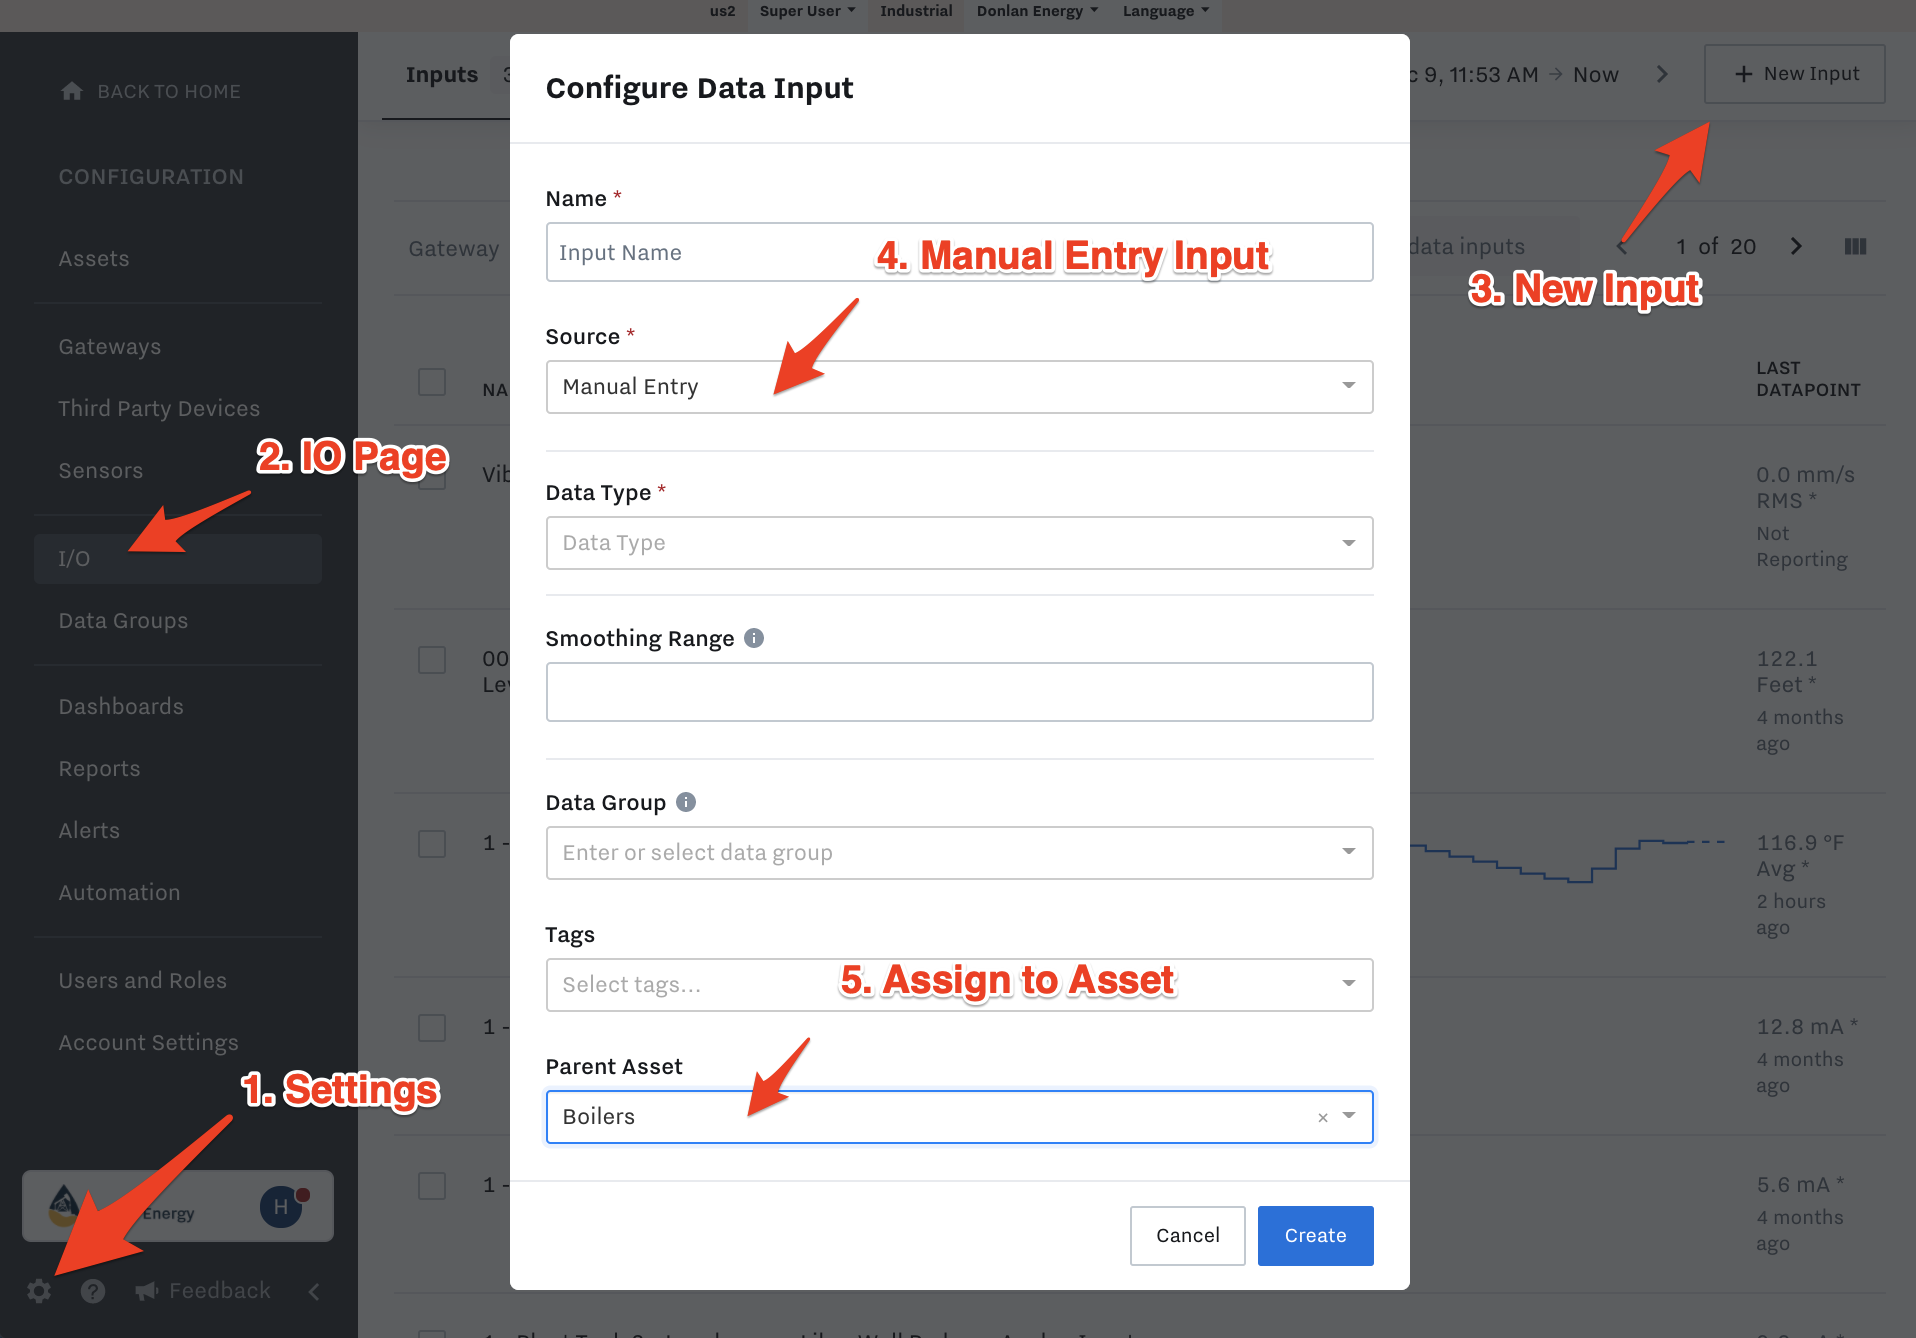
Go to Settings → I/O → New Input
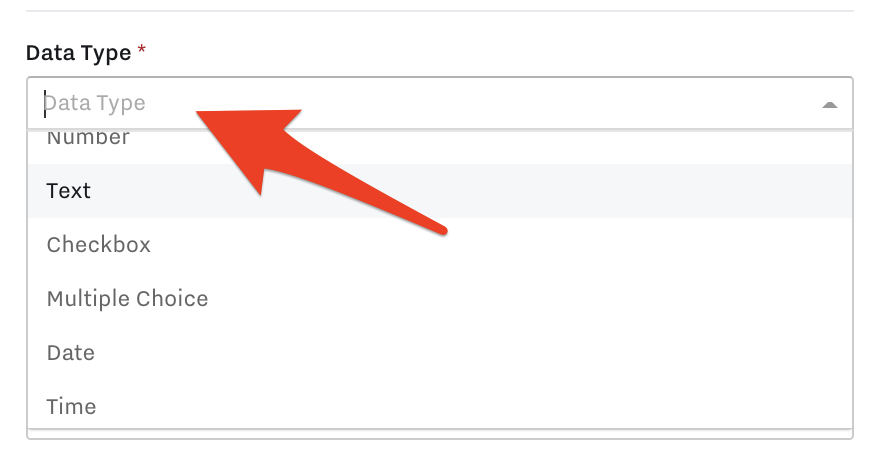
Choose what kind of form field you will need: number, text, checkbox, multiple choice, date, or time
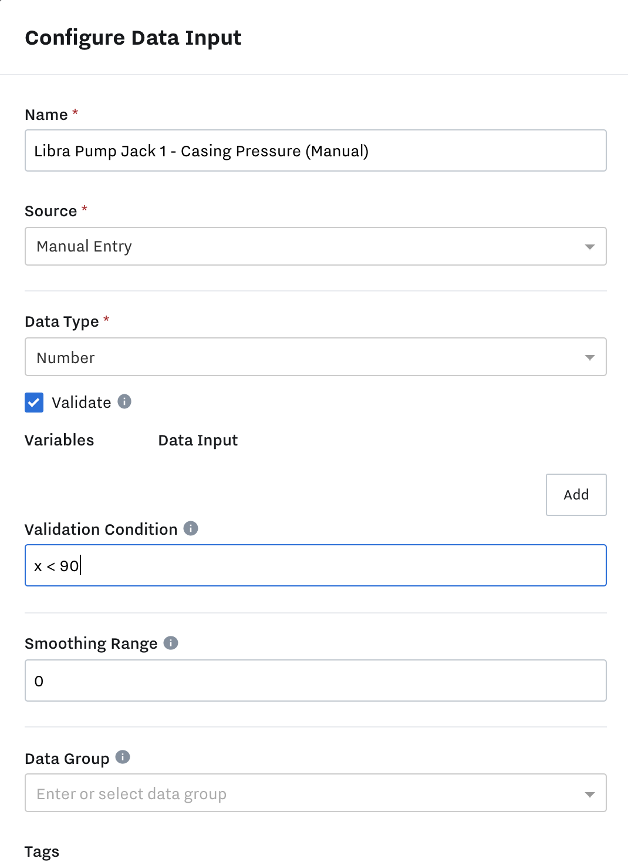
If you choose to use a number, you can set up a validation so that the field technician filling out the form has to stay within certain limits.
For example, you may set up a validation for a tank that cannot hold more than 90 gallons by entering x < 90 in the validation condition. You can ignore the section for variables and data inputs:
Continue setting up data inputs for all of the manual entry form fields you’ll use to create your form
Set up Manual Entry Forms
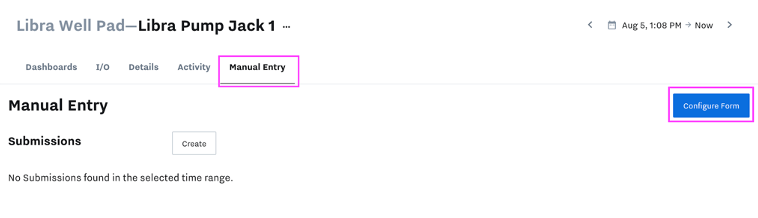
Navigate to the manual entry tab of the Asset
Click Configure Form
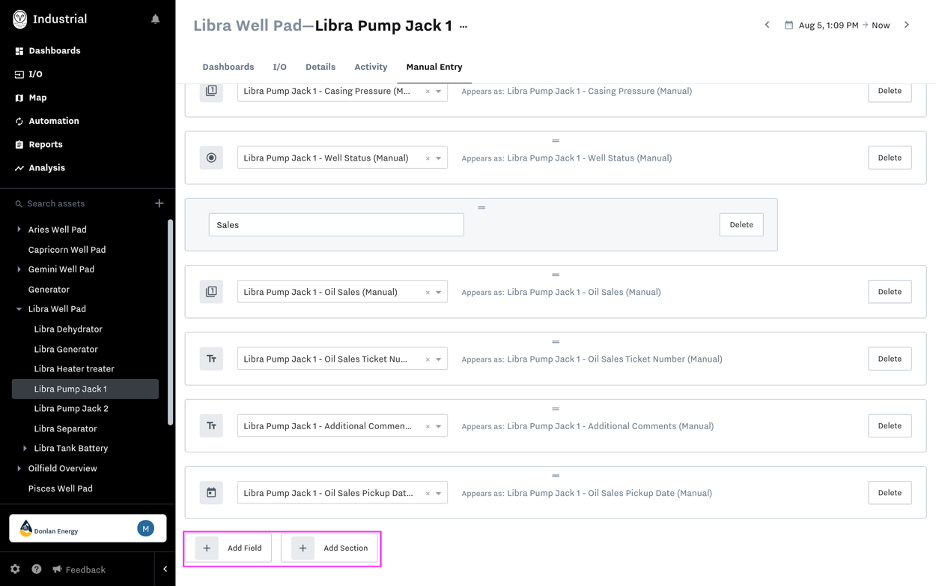
Use the “Add Field” or “Add Section” buttons to create your form
Add Section will create a divider in your form and a title, such as Status or Sales
Add Field will let you select the manual entry data inputs you previously created
You can drag and drop the sections and fields to rearrange the form as needed
Continue building the form until you have all the fields you want captured