Activate Device(s) in the Cloud
Summary
Learn how to easily activate your devices in the Samsara Cloud before completing the physical install to validate the device is online and reading in the cloud.
Activating Devices for New Users
When you purchase new devices, you will receive an email with instructions on how to activate your new devices. Click on the activation link in the email, or go to www.samsara.com/activate.
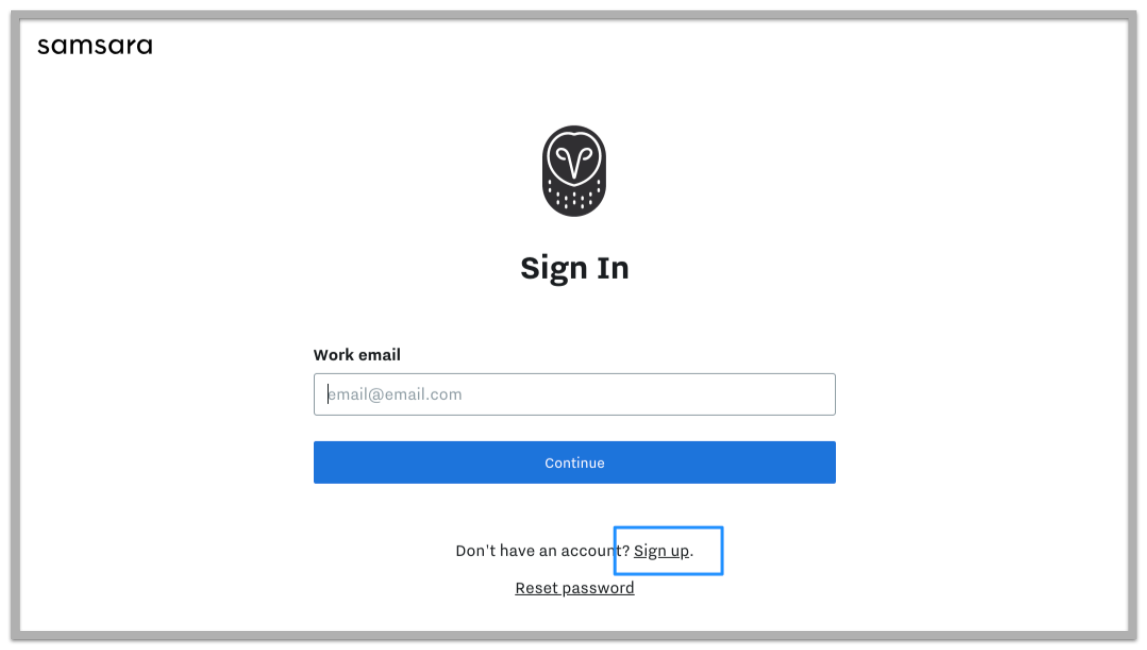
You'll be directed to the Samsara Cloud login page. Click Sign Up at the bottom of the page.
Select your organization's country, and click Continue
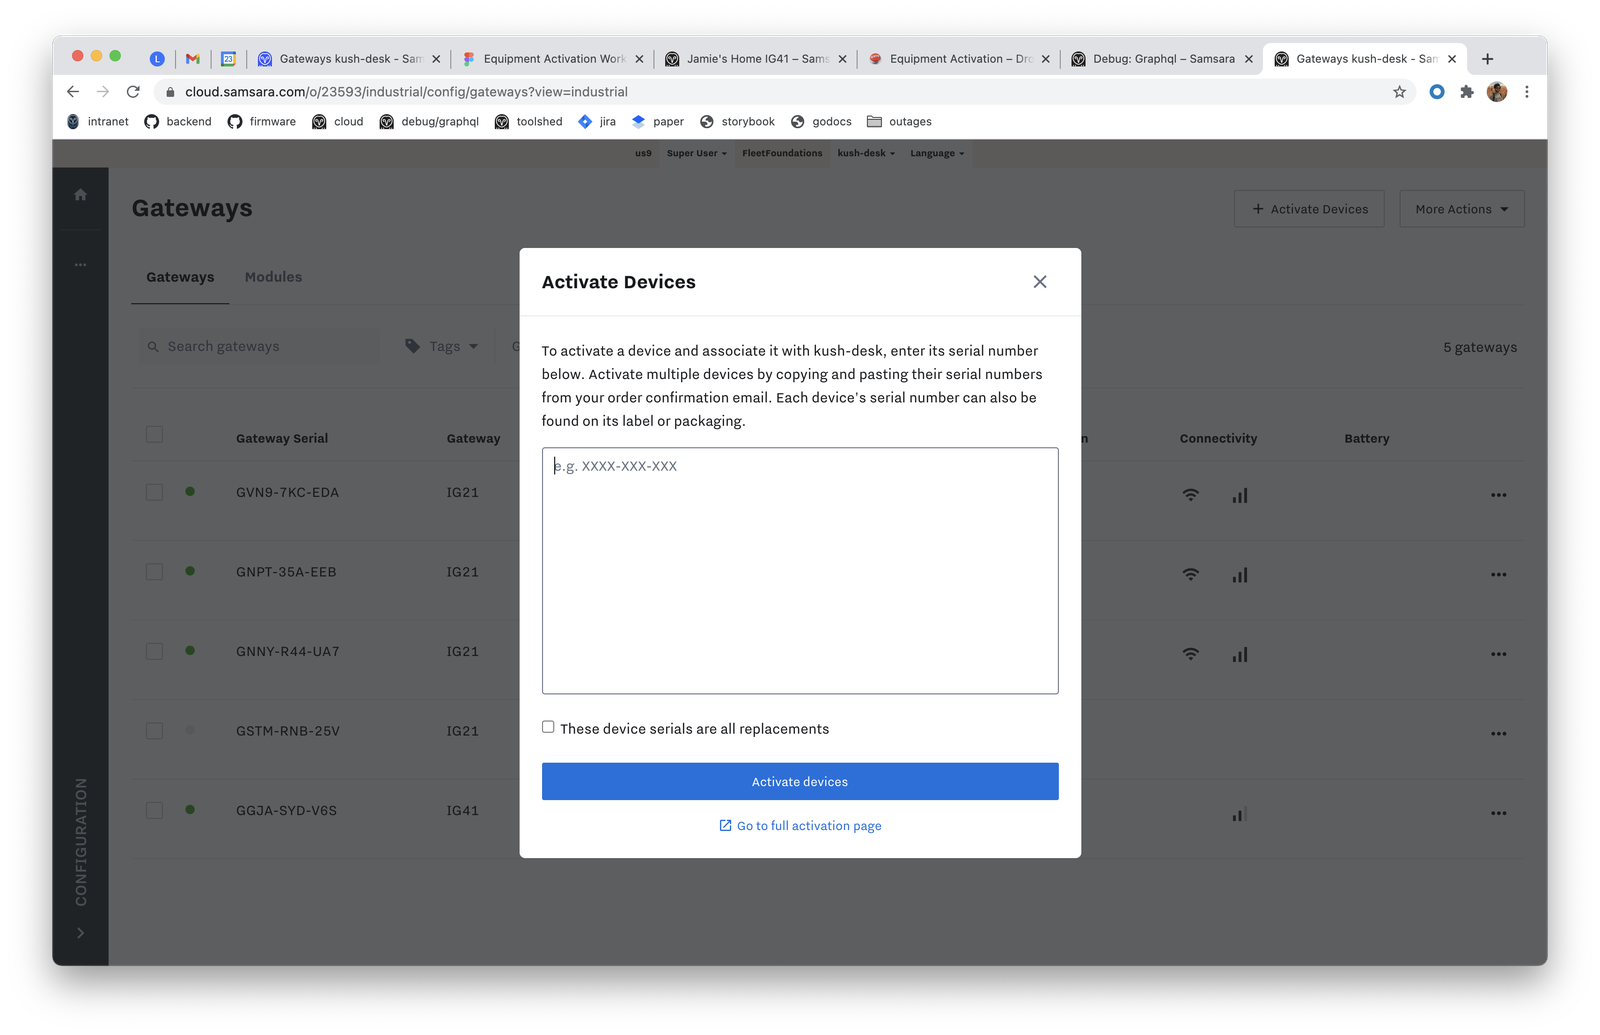
The next page will allow you to activate your devices. Find your device's serial number on your "Order Shipped" email or on the physical device. Enter your gateway serial number in the open text box.

Please note: If you have more than one gateway, press Enter in between the serial numbers (new row = new serial number).
If you receive an error message, please check the spelling of the serial number. If you have confirmed that the serial number is the exact one you were sent, please contact us by selecting the "Submit a Request" or "Help" button.
Click Continue to Dashboard and you will be redirected to your Samsara Cloud account
Activating Devices for Existing Users
From your Cloud Dashboard, navigate to Settings > Devices > Activate Devices.
Enter the serial number(s) located on the back or side of the device.
Note: If you have many devices to activated, reach out to your Samsara representative to give you a list of all your serial numbers in a CSV file. When received, copy/paste into the Activate Devices box (one serial = one new row) to activate devices in bulk.
Once activated, navigate back to your Samsara Cloud organization and search for the devices under “Gateways” and/or “Sensors”
After Activating Device(s)
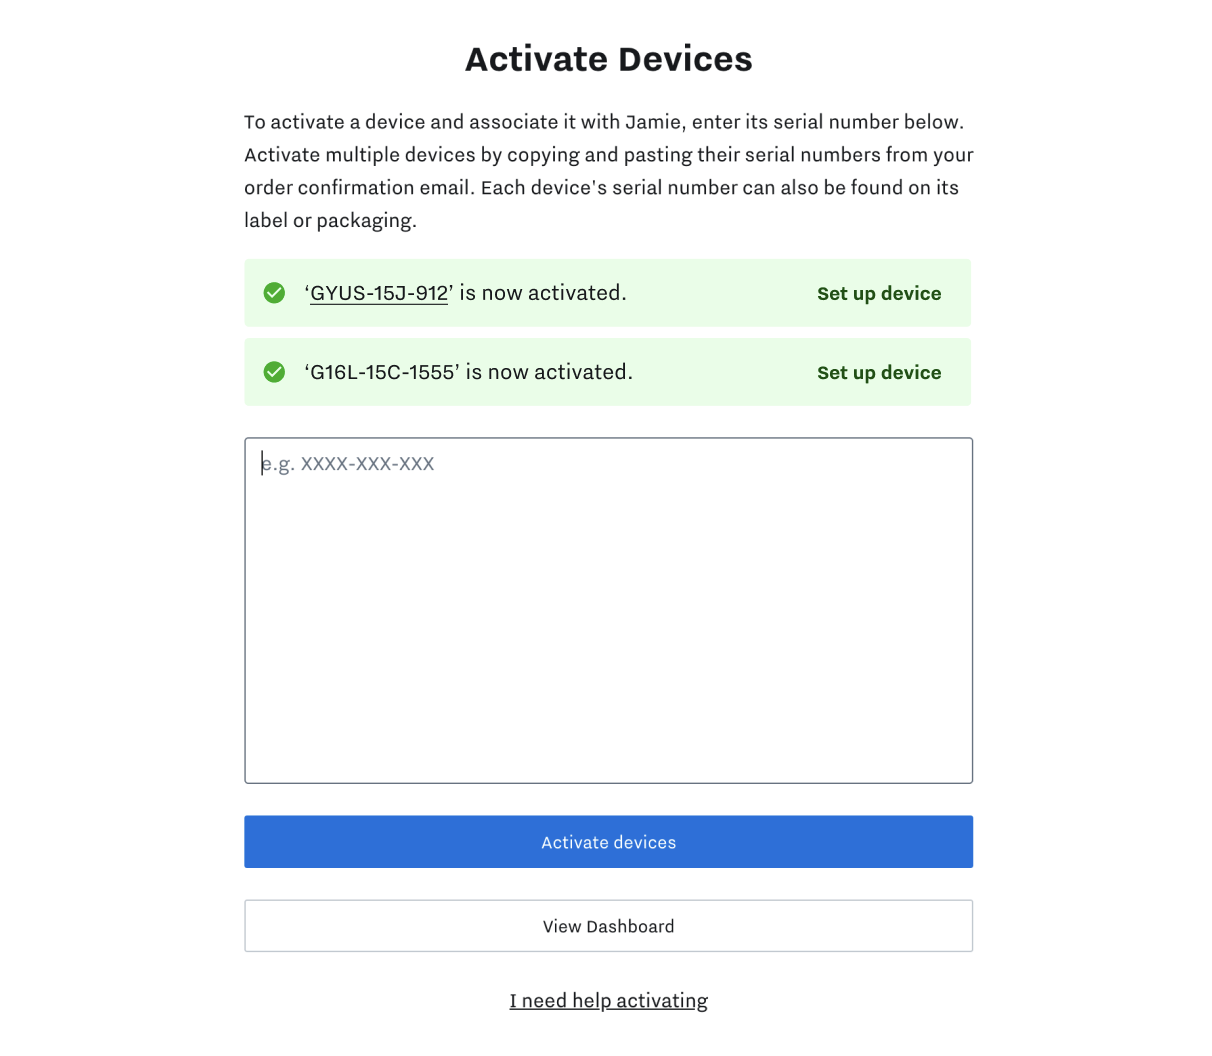
Once you activate the devices by populating the Serial numbers and hitting Activate Devices, a green success banner will appear and allow you to navigate directly to that device’s Details Page by clicking on “Set up device.” If multiple gateways were activated at once, multiple corresponding banners will appear.
Example:
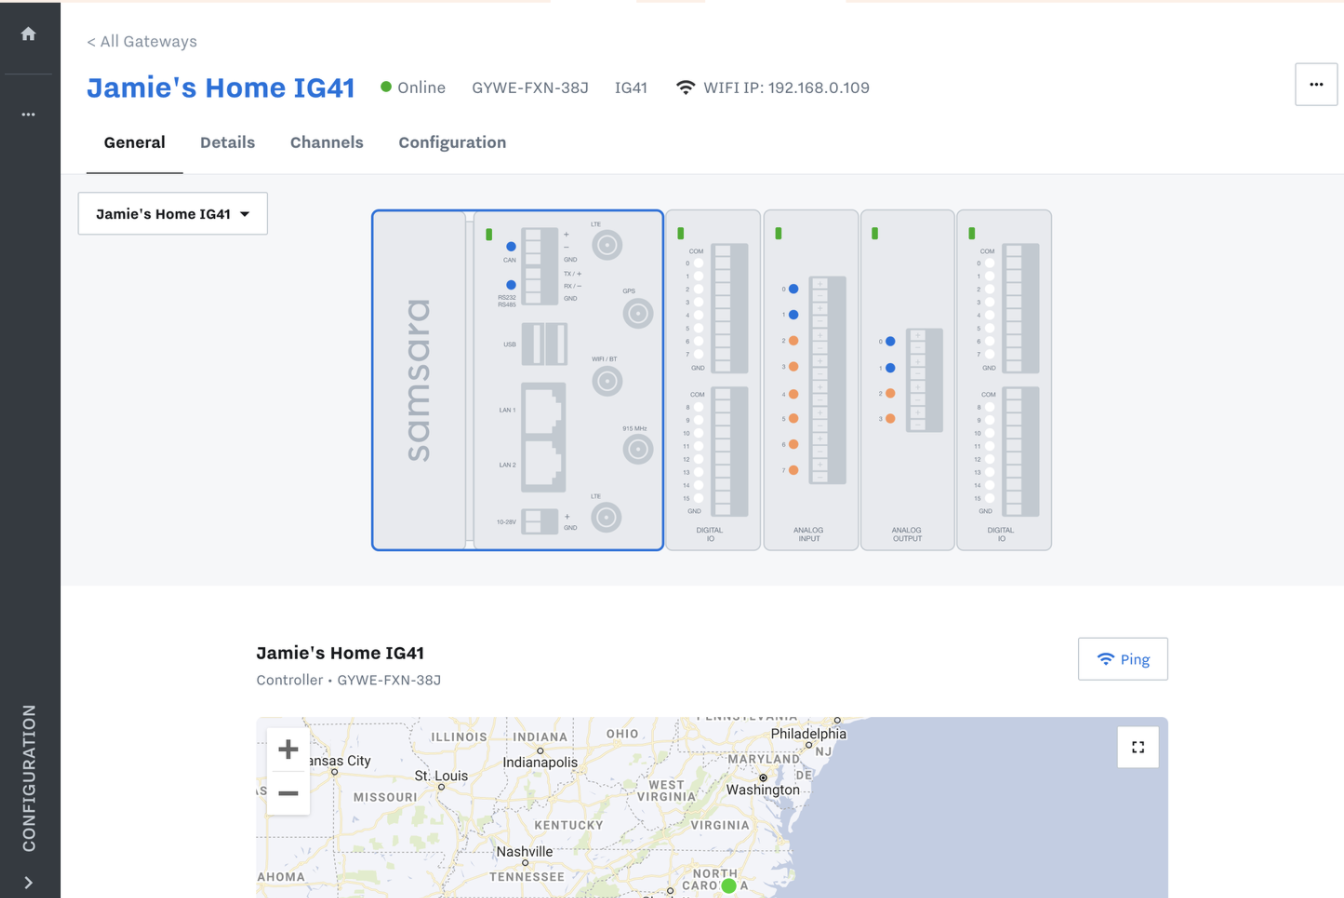
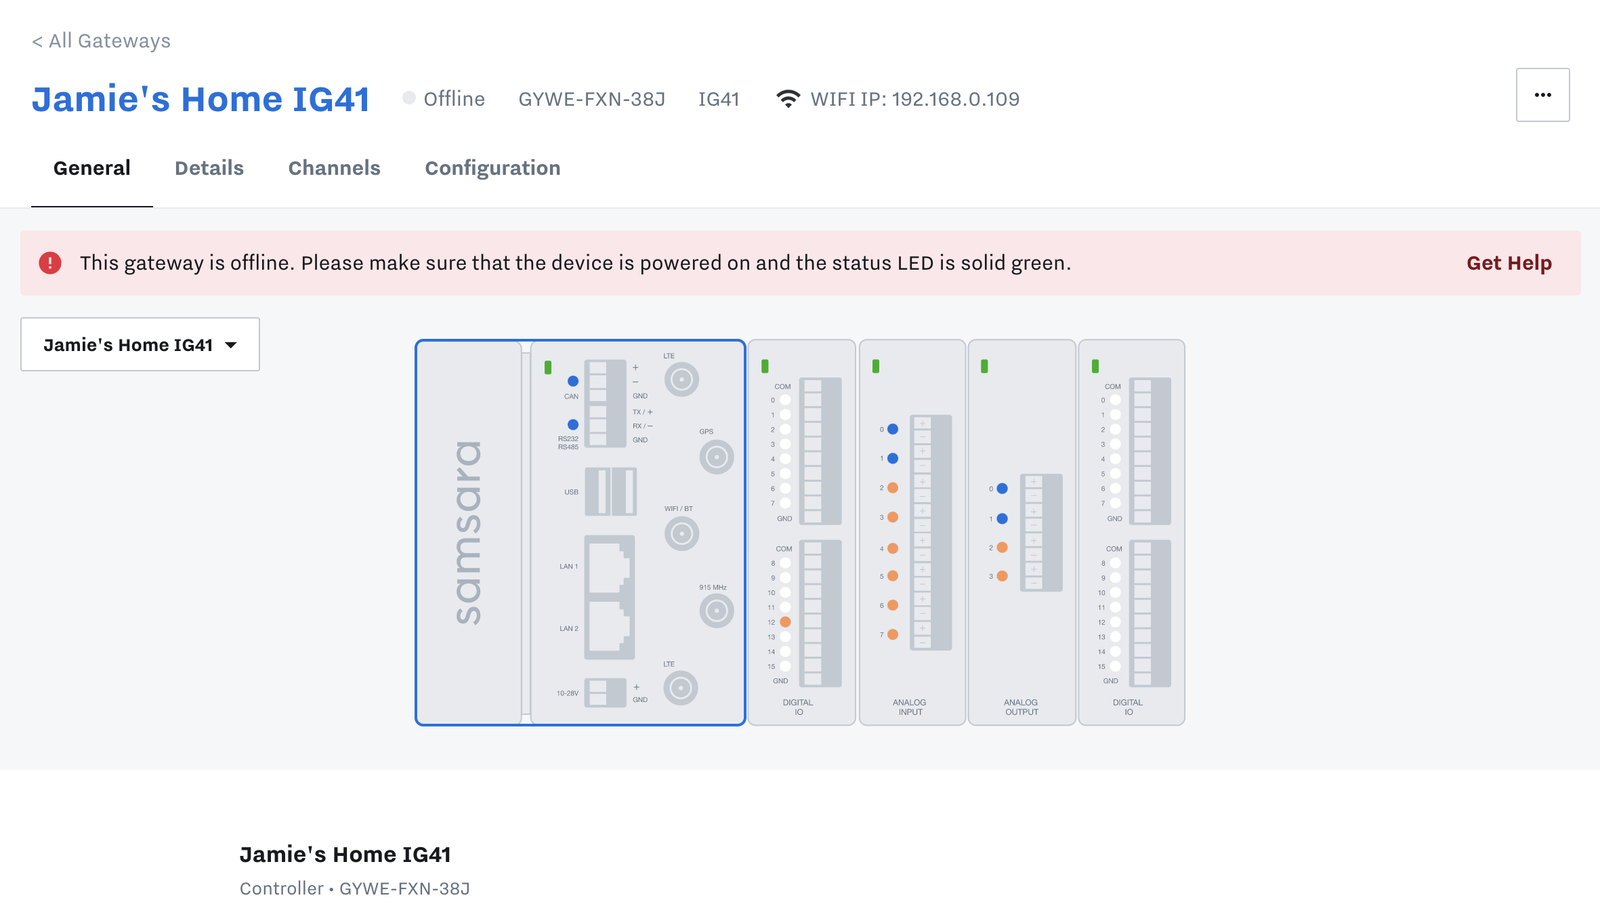
Navigate to IG41 Device Details Page
For the IG41, after navigating to the Details Page, you will see a few tabs at the top.
Go to General tab to see an overview of the device’s health and latest telemetry data
All of the status lights on the IG41 should be reflected accurately in the graphic based on the latest reported data
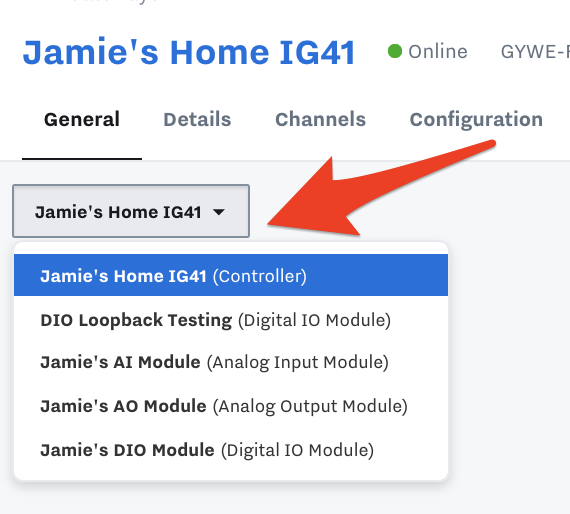
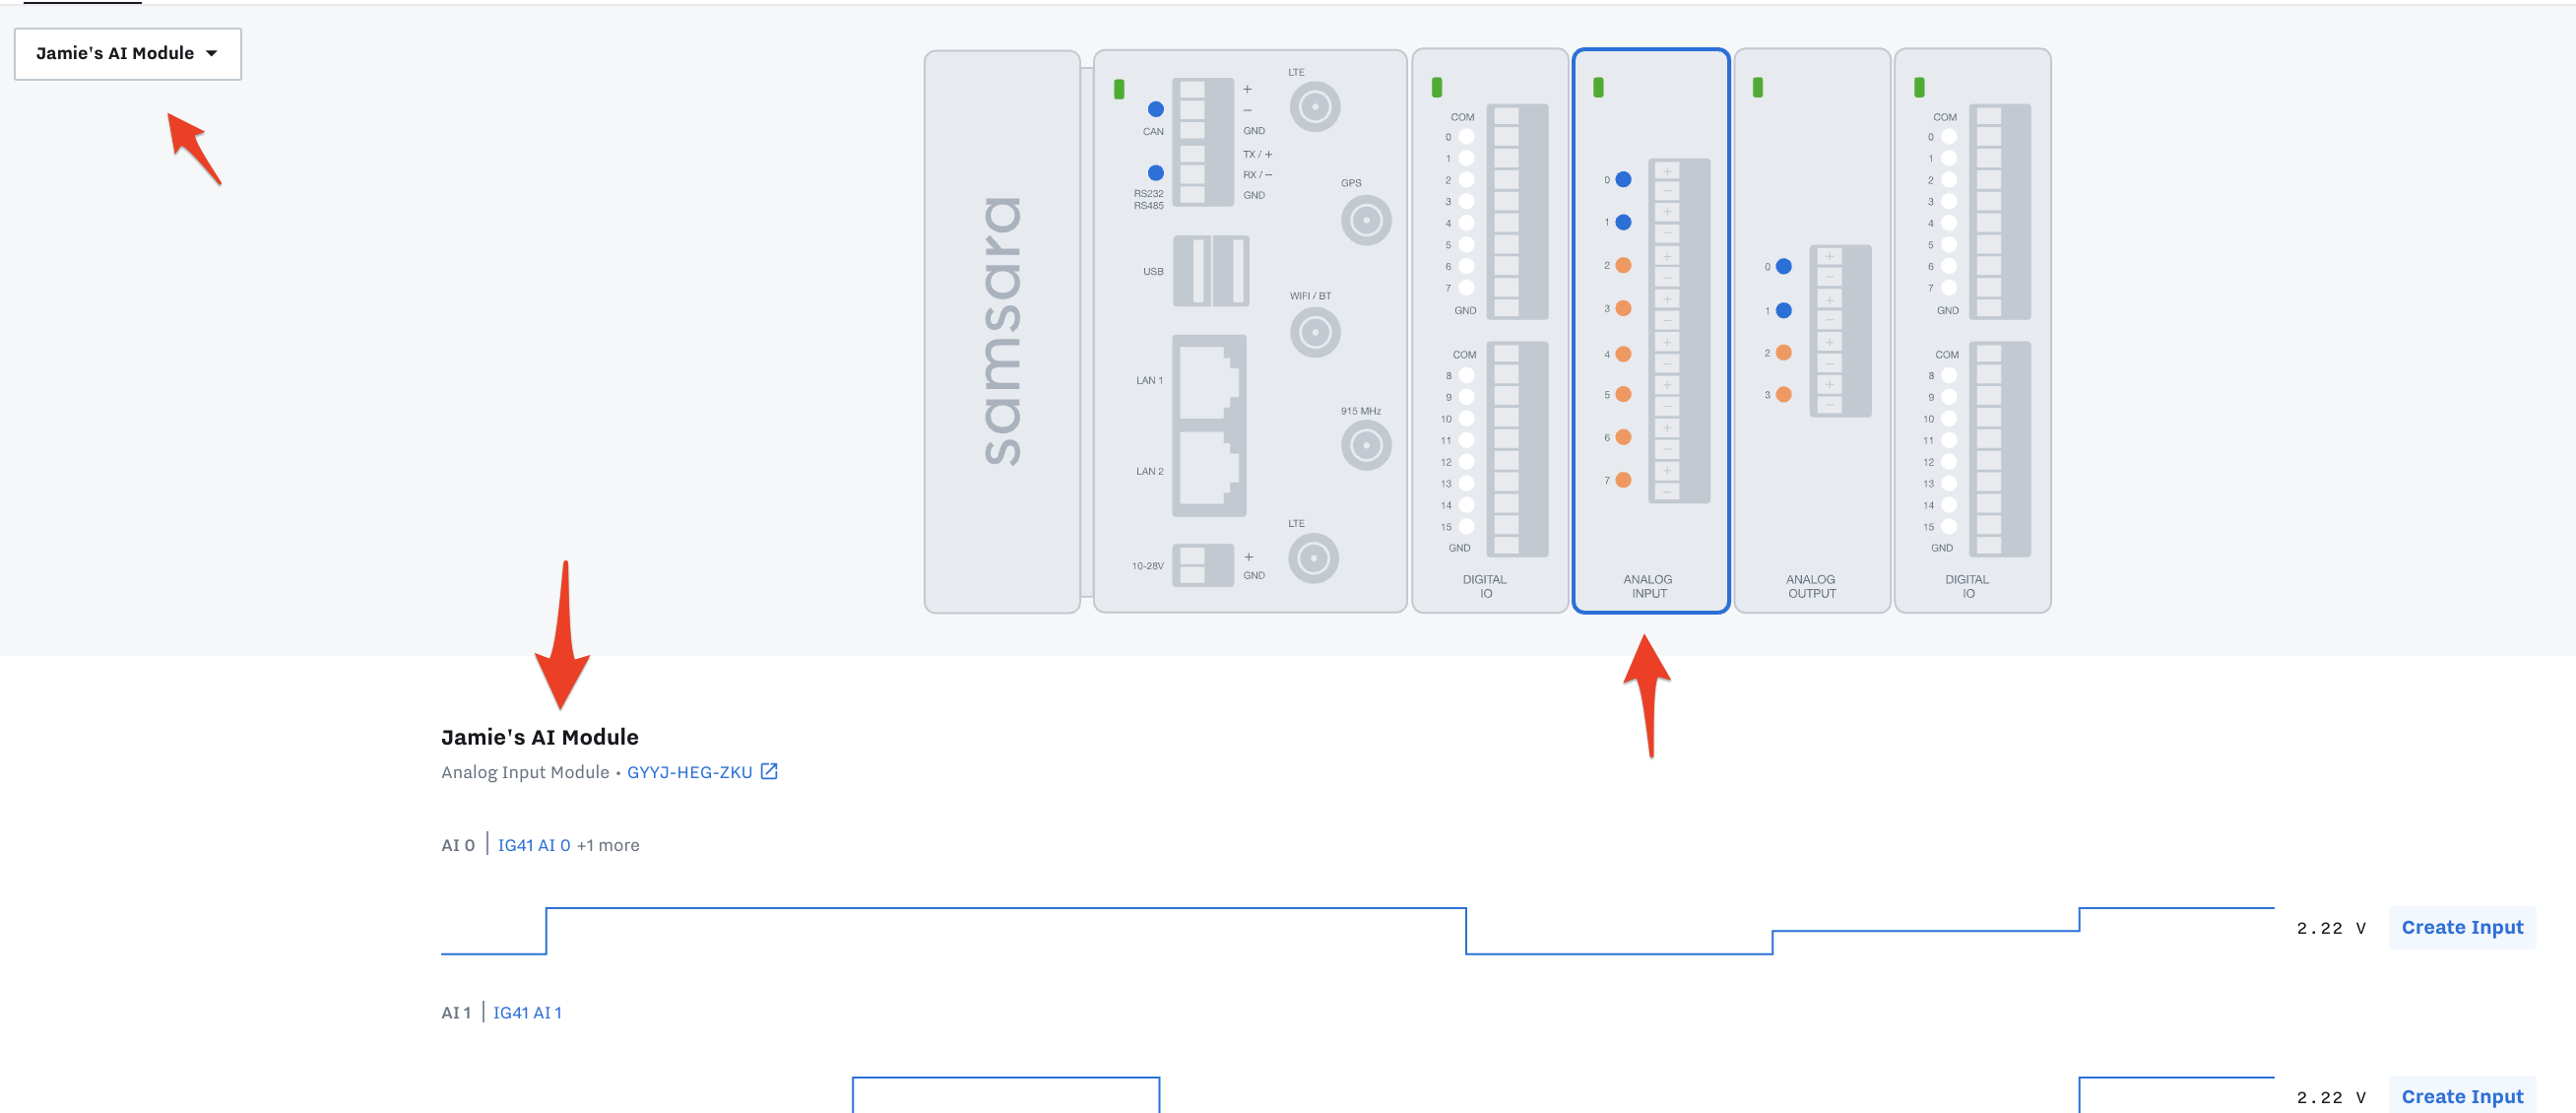
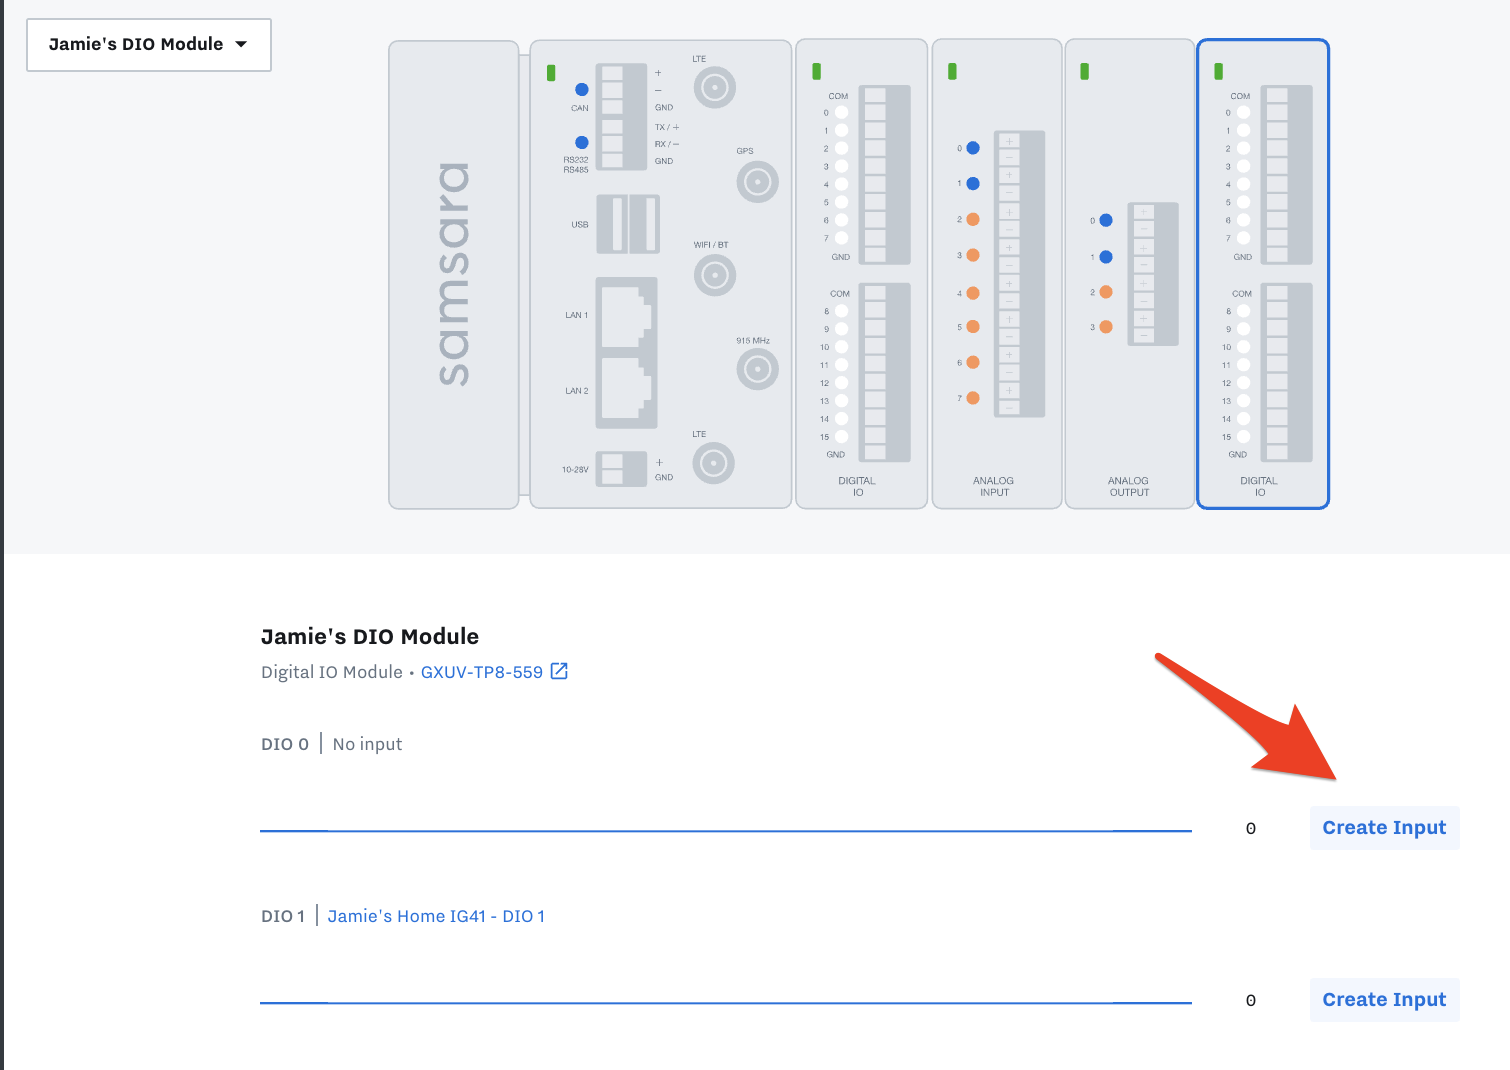
Using the module selector in the top left, or by clicking directly on the modules in the picture, you can sift through the data reported by each module as well.
If Device is Offline
If the device is offline, either because it has never been plugged in or has simply lost connection, a warning banner will appear indicating that we do not know the device’s current status, as well as a link to the support article for setting up a new IG41.
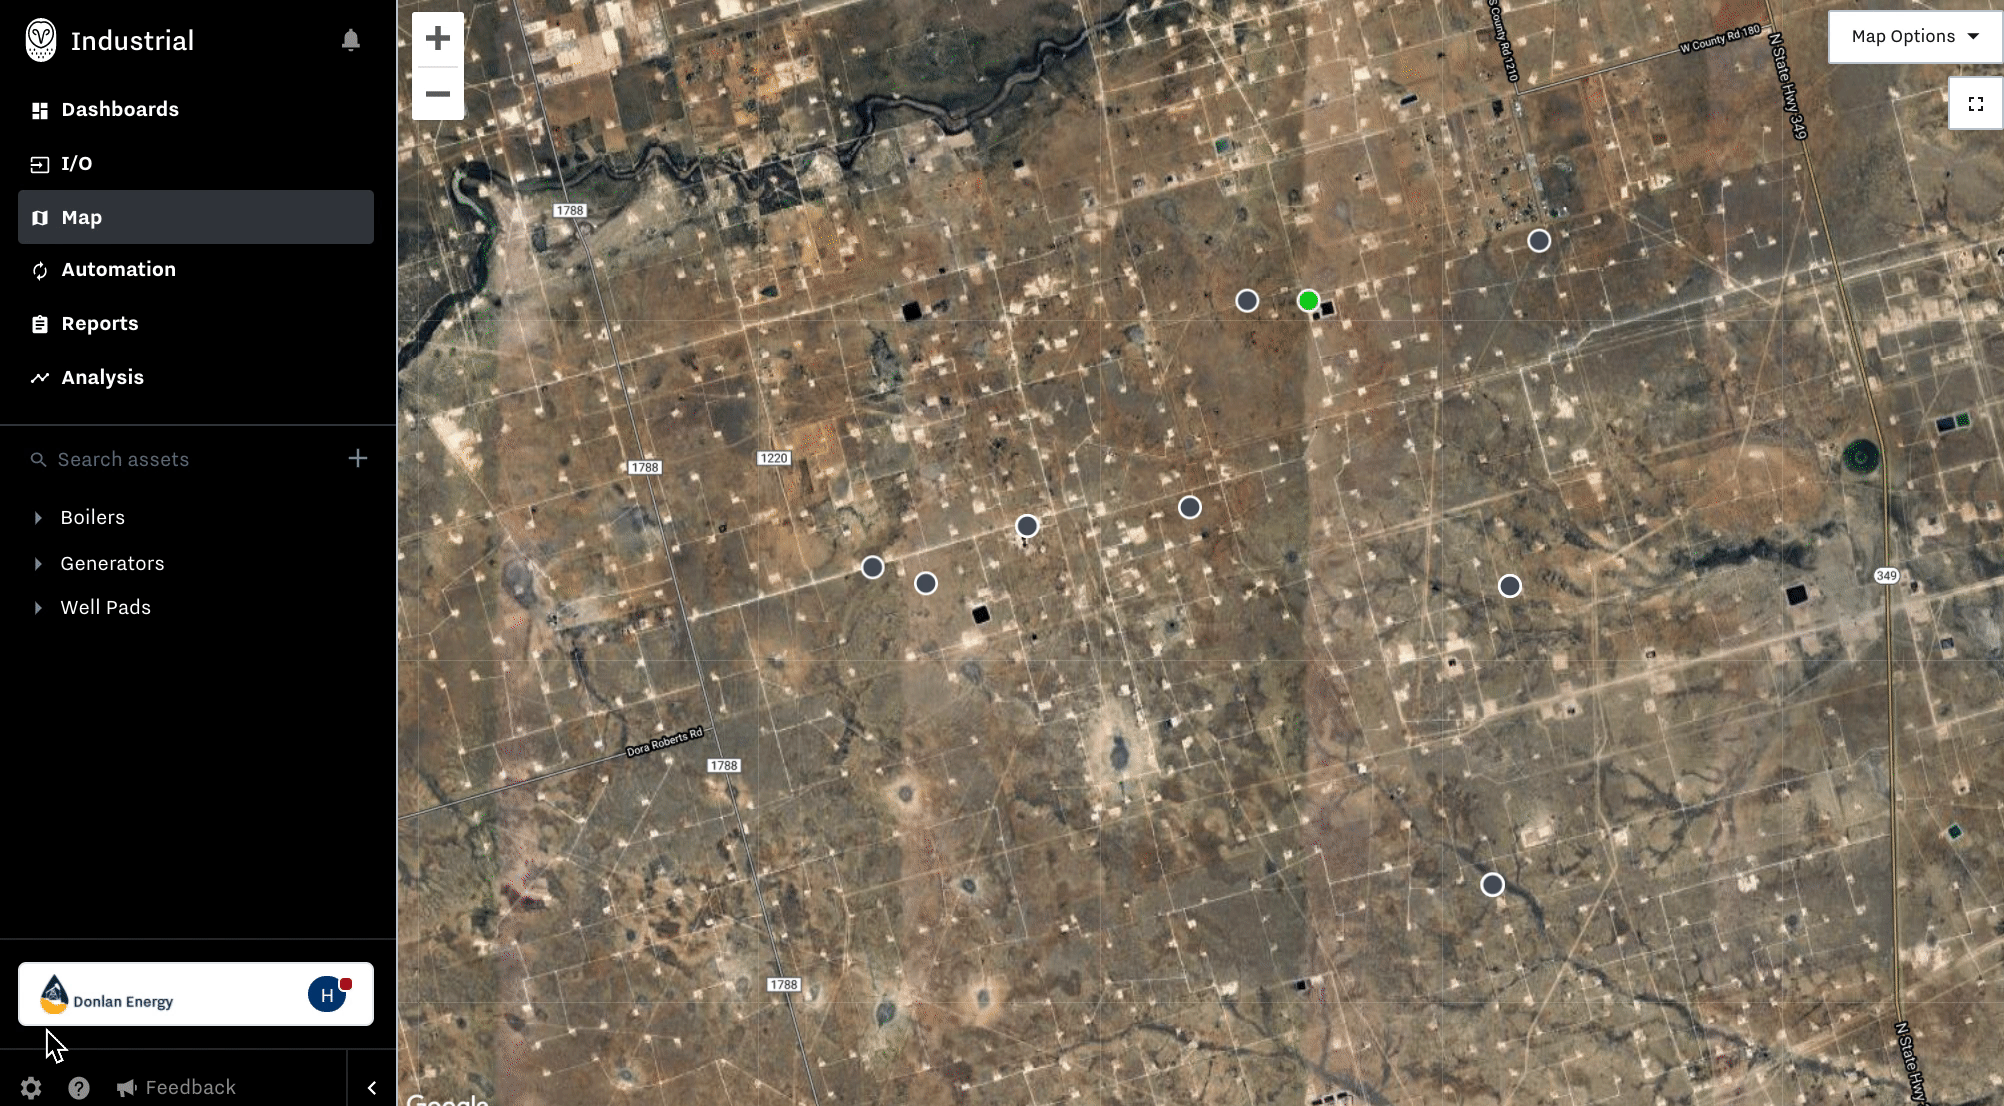
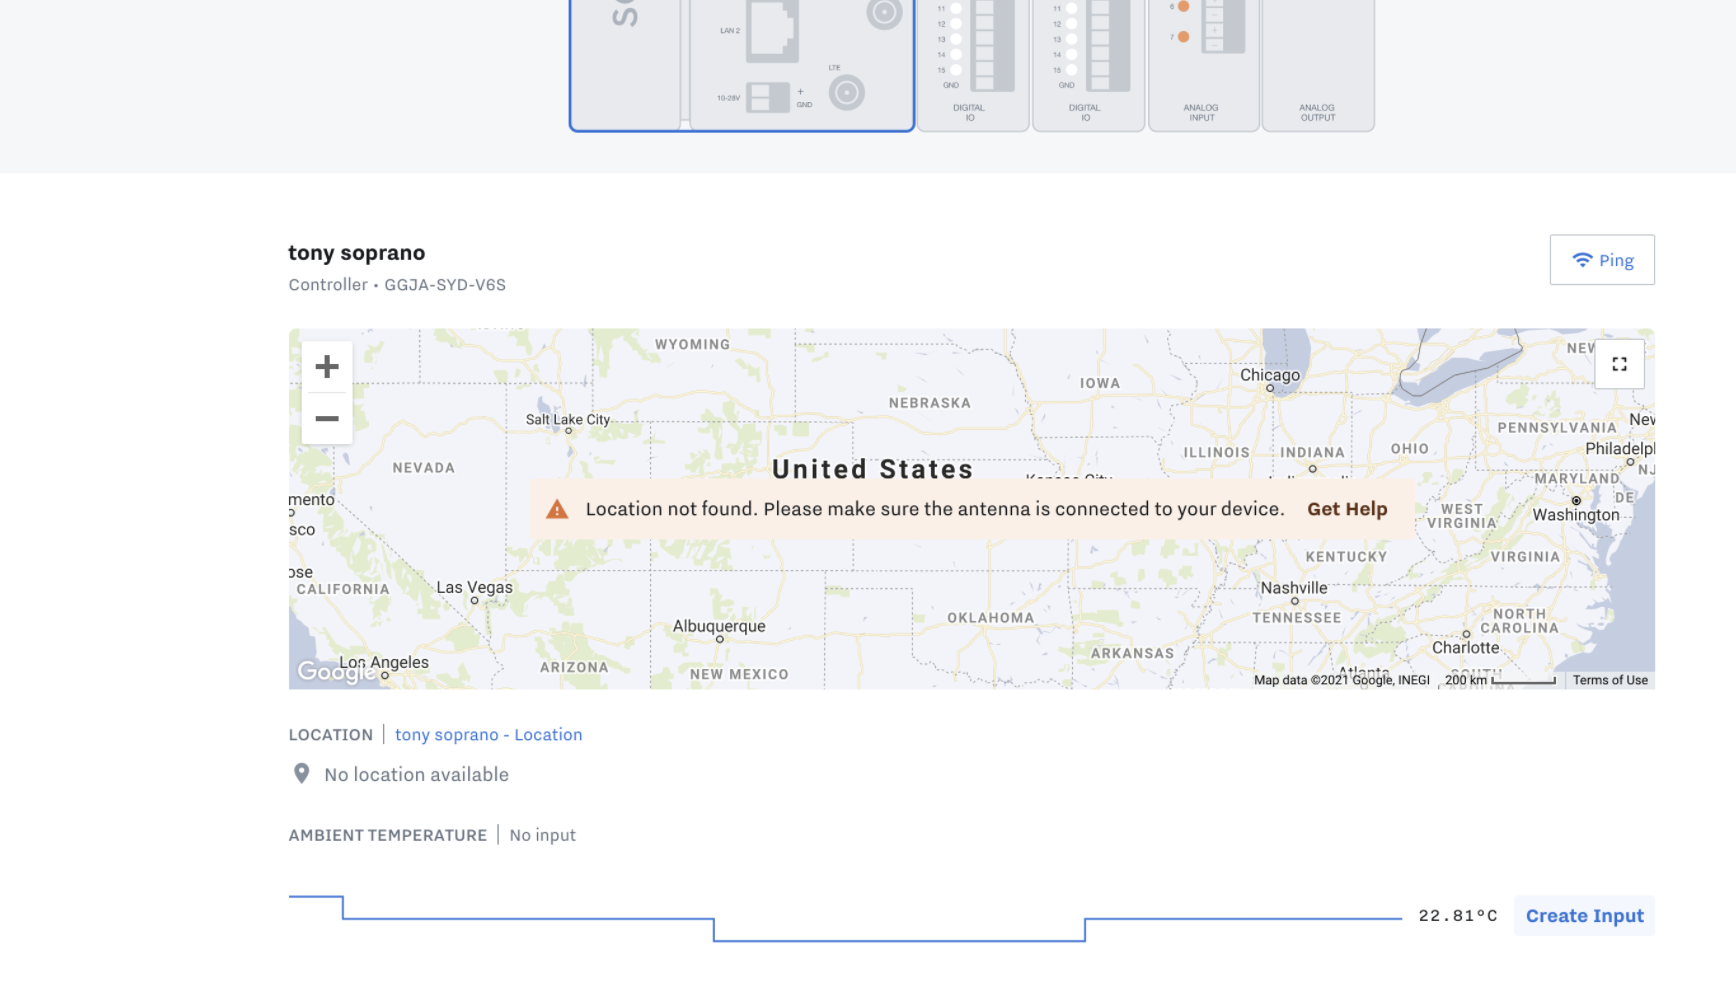
Device Location Can’t be Determined
A similar banner will appear on the map if a device’s location cannot be determined, indicating that the user should check their physical antenna configuration.
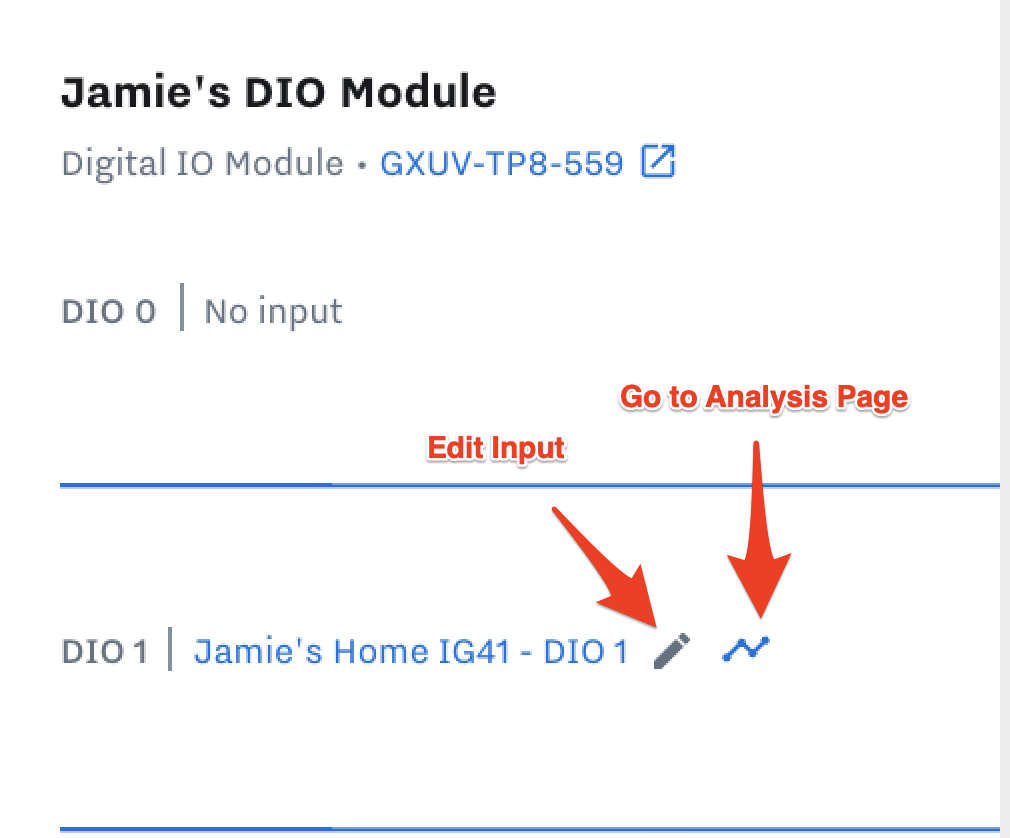
Create and View Data Inputs
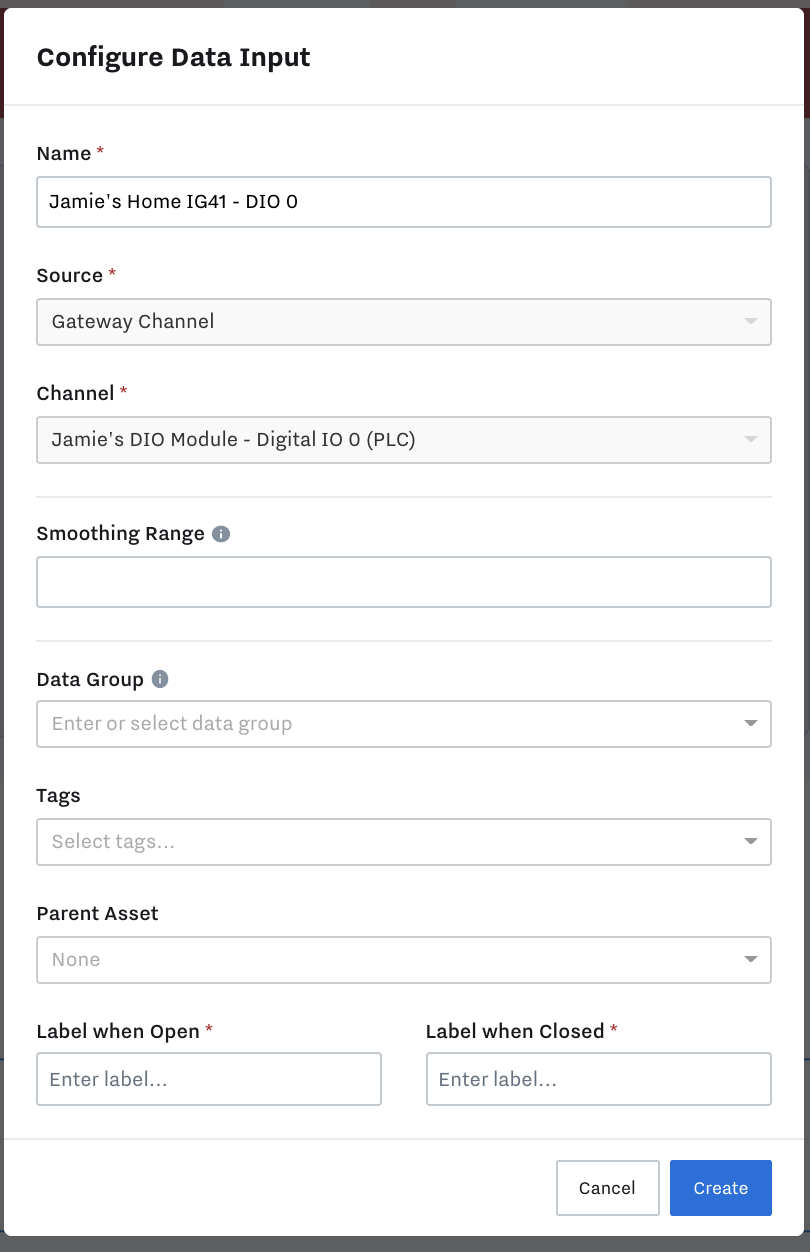
For each of the data sources shown on this tab, you can create new data inputs by clicking on the `Create Input` button, which will open a pre-filled data input modal.
Once the Data Input is created, Click on the `Edit` or `Analyze` icons to modify or open the analysis page for that input.